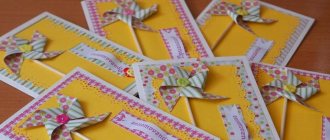
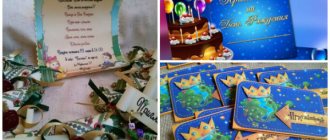
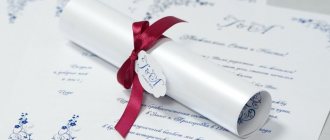
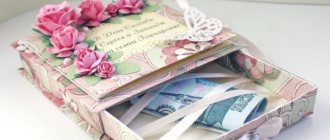
Let's figure out what types of wedding invitations there are and choose the ones you like. Do you like handmade wedding accessories? Let's try our hand at creativity and make original wedding invitations with our own hands? With the help of our step-by-step master classes, even a novice master will make invitations that will be individual, kind, and will keep the warmth of your hands.
The invitations indicate all the necessary information: where, when, what time the wedding ceremony and banquet will take place, what the theme of the wedding will be and whether the newlyweds will have wishes for the style and color of the guests’ outfits.
Making a list of guests for the wedding
Make a list of guests correctly, then it will be easier to determine how many and what kind of invitations you will need. With a guest list, it is easy to control the sending of invitations, as well as the gathering of guests. In the guest list you should note those invitees who will not be able to attend your wedding for some reason.
- Thoughtfully and calmly discuss what kind of wedding you want: a small one, with friends and close relatives, or a large-scale one, with a large number of guests.
- Estimate what budget will be allocated for the festive event.
Tip: Don't expect gifts to recoup your money. As a rule, this does not happen.
- Check how many people your chosen banquet hall can accommodate.
What the guest list looks like (option):
| Guest name | Note | Invitation sent | Participation confirmed | Address or telephone number |
| From the bride's side | ||||
| Papa Vladimir Petrovich | + | + | ||
| Mom Anna Nikolaevna | + | + | ||
| Sister Katya | + | + | ||
| Girlfriends | ||||
| Masha | With baby | + | + | |
| Olga | vegetarian | + | + | |
| Relatives | ||||
| Aunt | ||||
| Nephew | With a guitar | |||
| From the groom's side | ||||
| Papa Ivan Petrovich | ||||
| Mom Tamara Nikolaevna | ||||
| Brother Kostya | poet | |||
| Friends | ||||
| Vic | sings | |||
| Oleg | + | Will arrive on the second day | ||
| Mutual friends | ||||
| Tomashovs | ||||
| Additionally | ||||
| Igor Petrovich Ivanov | Will be late |
First of all, decide in what style you see the wedding, in what color scheme , because... The wedding invitation is the prologue of the wedding, and it must match the chosen style.
Once you understand these details, prepare your materials and let’s get creative.
Following this master class, we will create beautiful wedding invitation cards with our own hands that will reflect individuality and also reduce the cost of the wedding budget!
Recommendations
There are a large number of unusual invitation templates posted online, but to make them truly unique, take the idea and adapt it to your celebration:
- Before starting work, think through all the details - fonts, design, colors, number of guests. In this case, you will not have to correct what has been done;
- You can start by making a sketch and showing it to a friend or relative whose taste you trust;
- Heartfelt invitations in verse will delight elderly relatives, humor will be appreciated by friends, formality and severity will be appreciated by colleagues;
- If possible, it is better to give invitations personally - this way you will demonstrate the importance of each guest;
- Involve creative friends and your fiancé in the process - joint creativity brings you closer together;
- Small details in the invitations, duplicated in the wedding decor, are a great opportunity to demonstrate excellent taste!
Wedding invitation in rustic style Master class No. 1
Difficulty – suitable for beginners
Operating time – 10 minutes
Material for one invitation:
- Openwork paper napkin for cake
- Invitation text printed by you or postcard
- Double sided tape
- Label
- Decor (beads, bow, rhinestones, etc.)
- Twine or ribbon
Tools:
- Glue gun
- Scissors
- Ruler
- Paper knife
This is what our finished wedding invitation will look like:
DIY wedding invitations - step by step
- Let's get to work. Attach a card or printed invitation to a lacy cake napkin. Fold the top and bottom of the napkin, as well as along the sides, so that the perimeter remains marked without using a pencil along the 4 lines.
2. Now remove the invitation itself to cut out the excess along the lines marked on the napkin. To complete this step, help yourself with a ruler. Remember to only cut out the top and bottom and leave both sides on the right and left.
3. Attach four small pieces of double-sided tape to the back of the card.
4. Place the invitation in the center of the cut out napkin and press with your fingers to adhere securely to the tape.
It is important that the invitation is placed between the lines marked in the first step.
5. Decorate your text message. Choose the one you like best and make it original by decorating it with a nice message or phrases about love. Using hot glue, attach a small decoration of your choice (bead, bow, rhinestones, etc.)
6. Tie the invitation with a satin ribbon, a piece of twine, attaching a label and tying it in a bow.
The wedding invitation is ready!
We are publishing another master class for those who have little time to make invitations:
Compatibility with the style of the celebration
An electronic card for guests can be created to suit any wedding style; only the general design, font and images in the photographs of the newlyweds will change. For a wedding invitation in the classic version, a light background is chosen, with an image of two wedding rings, doves or hearts placed in the corner.
The desired text is created in the empty area; if desired, you can play with the font - add or remove shadows, apply a gradient, etc. If there is free space around the edges, choose a neutral pattern several tones darker than the background.
For a wedding in the style of the famous film, there are two options for creating an electronic card. You can place a romantic still frame from this picture or an image from its poster on it, correcting the date, time and place of the premiere to the details of your own celebration. If this seems too simple a solution, there is another option - dress in the style of the characters from the film, take a photo and make the photo the basis of the invitations, with text on top.
For all other styles, invitation cards are drawn up in the same way. A background of a suitable shade is taken as a basis, and images of elements characteristic of the theme are arranged in a space free from text. For example, for a wedding in vintage style, these are antiques; for retro, vinyl records, a typewriter or a car of the last century.
Wedding invitations in classic style Master class No. 2
Difficulty – suitable for beginners
Operating time – 20 minutes
Material for one invitation:
- Thick designer cardboard (from 200 g/m²)
- paper for printing text (milky or white)
- tracing paper for printing the inscription “Wedding Invitation” (you can use the paper indicated above)
- satin ribbon 12mm wide
- satin ribbons 25mm wide
- openwork lace
- double-sided tape 5 or 10mm wide
- double-sided tape 2 mm wide
- PVA glue
Tools:
- glue gun
- scoring board (if you don’t have a board, use a ruler to make the fold)
- ruler
- pencil
- scissors with straight edges
- scissors with curly edges (optional without them)
- hole punch with figured flowers
Creating an invitation card step by step
- Cut out a rectangle measuring 30x15 cm from designer cardboard.
- On the scoring board we make a straight groove exactly in the middle for subsequent folding of the cardboard. Fold the card in half and get an even fold.
3.Make a bow from a 2.5 cm wide satin ribbon. Attach the bow to the card with a glue gun.
4.Next we print the text for the inside of the card. We trim the edges with curly scissors. If you don’t have such scissors, then scissors with straight edges will do.
5. Attach the text to double-sided tape 2 mm wide.
6.On paper or tracing paper, print the inscription “Wedding Invitation” and cut it out. Using scissors, wrap the ends into a tube. Using double-sided tape 5mm or 10mm wide, we glue the inscription on the title page of the wedding invitation.
Ready!
Fast, easy and original. Is not it? These handmade wedding invitation cards carry positive energy, even if they are all the same.
You can make them personal if you pay attention to the composition of the text.
Tip: Add small details to some of the invitations - “hints” so that relatives and friends understand that this was done especially for them.
Envelope with a secret
A regular landscape sheet needs to be cut in half. We fold one half three times (we wrap the edges towards the center). Using embossed scissors, you can make patterns and cut off the top corners.
We cut out a rectangle from paper of a different color, approximately 7x10 cm in size, and write an invitation on it. Insert it into the envelope.
Using a hole punch, make two holes along the edges of the envelope and invitation, thread a ribbon through it and tie it. You can decorate the envelope with decorative stamps and drawings.
Also make lacing on the envelope itself, so it will look prettier.
You can make invitations in the form of scrolls; they are artificially aged in a solution of strong tea or coffee, and lightly scorched along the edges with a candle to give the paper a special texture. If you wish, you can put hieroglyphs and strange symbols on the scroll - this will make it look more interesting. However, you can limit yourself to typical wedding symbols - doves, hearts, rings. The edges can be processed with embossed scissors; the scroll can be decorated with compositions of artificial flowers, lace, ribbons, and beads. Then we rewind the invitation with ribbon or twine and send it to the recipients.
How to write a wedding invitation text
The text must be composed in such a way as to convey all the information, and at the same time it looks artistic.
You can choose a universal text and sign everyone’s postcards the same way. You can buy an invitation card with the text already written.
But a heartfelt message composed specifically for each guest is much better perceived. It can be assumed that the response will be warmer.
First, let's talk about the rules (etiquette) that you need to know in order to write the text correctly.
Rules (etiquette) of invitations
Please indicate in your invitations:
- Newlyweds' names NB! In our country it is customary to put the groom's name first (head of the family), but in European countries it is the other way around - the bride's name is written first. It is allowed to highlight the names of the newlyweds in a font style or size different from the main text.
- Guest names NB! The woman's name is indicated first, the man's second. If you do not personally know your guest’s companion, then write the man’s name first. It is permissible in an official invitation (to your boss, colleagues, higher status, relatives) when addressing guests to use “Dear”, “Dear”, “Venerable” and call them by name and patronymic. Abbreviations to initials are not advisable. Friends, colleagues, equal in status, close relatives can be addressed using full names or diminutives. The addresses “Grandma”, “Mommy”, “Sister” look sincere and touching.
- Time and date of the wedding ceremony and banquet.
- Name and address of the Wedding Palace or registry office.
- Address of the place where the celebration will take place. Name of the restaurant or banquet hall.
- Think through your opening words . They should be sincere, warm and addressed specifically to this guest.
- Discuss the dress code if the wedding is themed.
- It would be appropriate to ask for confirmation of attendance at the wedding. It can be written on a separate piece of paper, which can be included in the invitation or written directly in the text.
- Feel free to express your wishes for gifts . It would be appropriate to say that you will gladly accept gifts in envelopes.
- Be sure to specify which traditions you do not want or, conversely, want to maintain at your wedding (for example, bride kidnapping, frequent cries of “bitter,” etc.)
- It would not be amiss to stipulate that you ask guests to arrive 20-30 minutes before the start of the celebration.
Text options:
If you want, use standard texts without changes, and perhaps these texts will awaken your imagination, and you will write better, more sincerely...
Parents of the bride and groom:
Thank your parents, write about your love and the significance of their presence at the celebration.
Older generation:
It would be appropriate to say that you want to gather your closest and dearest people to share your happiness. And the presence of a grandmother (uncle, aunt...) will add warmth to the holiday atmosphere.
Friends
Friends will understand and appreciate your humor and jokes. Mention in the postcard that all the brightest moments in life for us are created by people, our loved ones.
It is allowed to write in separate text on a separate piece of paper:
Please confirm your desire and ability to attend our celebration. Do this in person or over the phone (phone number).
With respect and hope for a meeting, (names of the newlyweds).
Scrolls
In this case, paper with text printed on it must be artificially “aged” by soaking it in a solution of coffee or strong tea, then lightly scorching the edges with a candle or a simple lighter, which will give the paper the appropriate texture. And with hieroglyphs or other strange symbols it will look even more interesting.
On separate small pieces of paper, processed in the same way as the main scroll, write the names of the guests for whom the invitation is intended, and punch a hole from the edge with a hole punch.
Now the scroll remains to be rolled up, tied with twine, ribbon or regular rope, threaded through the hole near the label and secured with melted paraffin with a stylized seal, which can be bought at any stationery store.
The result will be an unusual and very interesting product that will be a pleasure to give to any guest.
Invitation color
If the wedding is themed, then guests should be warned in advance.
Choose a wedding color scheme. You don't have to limit yourself to one color. It will be even better if you offer a color palette of harmonizing colors.
Please mention this point in your invitations. Let's say adding an entry:
Dress code
For us, the most important thing is your presence, but we will be glad if you support the color scheme of our wedding:
Primary colors:
It is advisable to use these colors in clothing and accessories.
If your guests support you and choose outfits in the recommended colors, your wedding photos will turn out stylish and especially beautiful.
Tip: It is better to keep the invitations in the wedding colors.
What paper is best to make wedding invitations from?
An important factor when creating a wedding invitation is: the quality, design and color of the invitation paper.
hand mad style ideas, plain writing paper is suitable.
creative sketchbook sketches on special drawing or watercolor paper.
The fashionable effect of aged parchment is very easily achieved with brewed coffee. It is enough to tint a sheet of writing paper with the prepared solution, and the ancient parchment is ready.
for making simple cards .
Invitations that cannot be folded can be made from decorative thick cardboard. Designer cardboard is often used, mostly Italian. Matte designer cardboard is used to make envelopes.
quilling techniques, paper density should be no more than 60 g/sq.m.
of scrapbooking ideas offers a wide range of paper material densities from 70 g/m2. m. up to 400 g/sq.m.
Various coatings and original textures of designer paper are an excellent option for realizing any creative fantasies.
How to give invitations and when
Invitations are supposed to be given 1.5-2 months before the wedding. This is the optimal period of time that an invited guest needs to think about the gift, his image at the celebration and adjusting his plans.
No later than two weeks before the celebration, invitees must confirm their arrival, because The newlyweds need to decide in advance on the guest list, order a banquet and alcohol for the wedding based on the number of guests. And make changes to the wedding budget.
It is advisable to place the wedding invitation in an envelope. But the envelope must be signed officially, indicating the names and initials of the invited guests.
It is best to present invitations in person, but you can also send them by mail. If you want the guest to confirm his presence at the celebration, do not forget to include an envelope for his message.
Making your own wedding invitations is fun. Involve your significant other in this activity. Handicrafts bring you closer together and at the same time reveal talents that you never knew you had. Who knows, maybe deep down you are a designer, poet or folk craftsman. And your guests will keep the wedding invitation you made both as a memory and as a unique work.
Here are some more ideas for inspiration! Create and enjoy the creativity, as well as the result!
Our website presents other wedding-themed master classes:
how to decorate wedding glasses
how to decorate wedding champagne
alcohol calculator will help you calculate how much alcoholic drinks you need to buy for your wedding
