Every parent dreams of making the most unforgettable and magical holiday of the year for their child - a birthday. For the sake of one radiant smile and laughter, mom and dad order cakes, balloons and a huge amount of decorations, invite guests, and even rent a restaurant. Of course, it’s easier to invite specialists who will turn any room into a fairyland. But this can hardly be called an interesting pastime with the family.
The fact that the holiday is organized with your own hands, as well as individual decorations for it, makes the child proud of his parents.
If your imagination is not inclined to prepare the hall and decorate it yourself, then direct your gaze to a popular type of decoration - volumetric numbers for a birthday. You can not only buy them, but make them yourself.
Creating a wireframe
Creating a holiday figure begins with the frame. It is made from thick cardboard. Corrugated packaging cardboard from boxes for large household appliances is perfect for this purpose.
The figure consists of two large parts and several small ones. On a large sheet of cardboard you need to draw a silhouette of a number. If you are good at drawing, do it by hand. You can do it even simpler, download a photo of a birthday number template from the Internet, print a large picture on several A4 sheets and cut it out. All you have to do is attach the finished template to the cardboard and trace it.
Having cut out two parts of the number, you need to cut out a long ribbon from cardboard; it will be located between the front and back of the number and form the volume. If there is not enough material for a long strip, you can cut out several pieces of the same width and connect them with tape. All that remains is to glue all the parts together with wide tape.
Making a number with your own hands can be even easier. You can cut the frame of the decoration from foam or foam rubber. Simply attach the printed template to the material, trace and cut out. Foam rubber can be cut with large scissors; foam plastic can be cut with a stationery knife.
The finished frame can be decorated in several ways.
Suitable types of materials
A common component of the craft is small plastic or inflatable balls that need to be attached to a frame.
Unfortunately, balls belong to the classic method of making numbers, and most people have long been bored with them. Let's look at 3 well-known and interesting methods of creating decorations: paper, fabric and edible figures.
You can also watch an interesting lesson on a specialized website on creating crafts or jewelry with your own hands, for example, the handicraft portal https://tytpodelki.ru/ offers a huge selection of original and exclusive works.
Each of them differs in creativity and way of presentation. For example, butterflies, flowers, and bows come out beautifully from fabric, and craftsmen can create any type of origami from paper. A completely new type of holiday numbers is a cake made from cookies, cakes or sponge cake.
An independent and hand-made creation is always valued more than a factory one, so you will not regret the money and time spent. Especially if you find out that the figurine can be sold at an attractive price. The cost depends on the shape, size and material.
Fluffy figure for a boy
You can get original numbers from corrugated paper if you make it according to the following instructions:
- Cut long strips of small width from corrugated paper of the main color and glue them to all the joints of the cardboard frame. This is necessary so that there are no gaps on the number;
- Cut out many squares of corrugated paper, measuring 5 by 5 cm or slightly larger;
- Each square needs to be wrapped around a pencil or pen; corrugated paper will hold its shape well;
- Immediately glue each piece onto the frame.
At the bottom of the figure, you can glue several pieces of cardboard, stacked on top of each other, to make it heavier and more stable.
Number in winter style
For work we will prepare:
- cardboard;
- corrugated paper in several shades;
- stationery knife;
- pencil;
- scissors;
- scotch;
- plain printing paper;
- glue in a gun;
- rhinestone ribbon;
- watercolor paints and brush;
- decorative snowflakes.
Draw a number of the required size on the cardboard and cut it out with a stationery knife. We make two identical blanks.
We cut out strips of cardboard of the required width to make the figure three-dimensional. Carefully glue them with tape to one of the sides.
We place a second blank in the form of a number on top and glue it with tape.
We cut strips of corrugated paper of different shades.
Cut them into small pieces, as shown in the photo.
We cut white printing paper into strips and paste over the number.
Glue pieces of white corrugated paper along the edges.
Fill the middle tightly with two colors. To give a winter style to the figure, we apply a little white and blue watercolor paint. Glue decorative snowflakes on top of the corrugated paper.
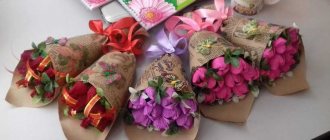
Fabric bows
You can use more than just paper to create numbers. Excellent decorations also come from fabric. For a girl’s birthday, you can cover the number with fabric bows.
For this purpose, it is better to buy several meters of ready-made smooth braid. The ribbon is cut into pieces 10-15 cm long, each one is tied into a bow and glued to the frame. If the fabric frays at the cut site, gently burn it over the fire to seal the edge.
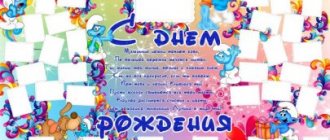
“Numbers from 1 to 10” for printing in pictures.
You can print these bright and colorful picture cards with numbers from 1 to 10 on a color printer (A-4 paper). Cut each form into four parts along the indicated lines - and start teaching your child. Using these cards, you can independently come up with various tasks for kids, for example, similar to those that we have placed on the fourth form of the manual.
Ribbon fringe
If you buy thin multi-colored ribbons, you can use them to make fringe. We offer you instructions on how to correctly make a number with fringe:
- Cut the tape into pieces 10 cm long;
- Fold each piece in half and tie a knot at the fold;
- Glue the knot to the cardboard frame;
- Repeat for each ribbon. The knots need to be glued close to each other; for this it is better to use hot melt glue.
Note!
- Macrame: diagrams, interesting projects and detailed descriptions of making crafts
- Crochet amigurumi - examples of how to make a beautiful toy with your own hands (75 photos)
- Coffee topiary: step-by-step master class on how to make a small decorative tree from coffee beans
Introducing numbers and numbers
Nine is the last digit in a series of single digit numbers. Acquaintance with it should occur when the previous eight have already been studied.
Before moving on to studying nine, you need to repeat and consolidate the material you have covered, solve examples on adding and subtracting single-digit numbers.
The child must know the answer to the question: what is the difference between a number and a digit and how many digits there are.
The lesson is conducted in an interactive form, using the following materials:
- educational games;
- puzzles;
- puzzles;
- Proverbs and sayings;
- simulators for the development of thinking, etc.
To make it comfortable for a child to study and easier to assimilate information, it is necessary to create an environment suitable for learning, eliminating extraneous sounds (TV, phone, tablet, etc.). You should create a working atmosphere in the room. It is not advisable to conduct a lesson in a children's room, where there are many toys and other elements that distract attention.
It is better to sit at a table in a large, bright room. During the lesson, you need to take short breaks and engage in physical activity during this time. This is due to the fact that a preschool child gets tired quickly and it will be difficult for him to sit in one position for a long time.
During the lesson, the child must master writing the number nine, learn how to perform arithmetic operations with it, concentrate attention on an object and complete tasks independently.
As educational material you can use:
- training video;
- books on mathematics for preschoolers;
- interactive maps;
- copybooks, coloring books;
- computer games.
The material should be presented in such a way as to interest the child. This is due to the fact that children cannot concentrate on what is not interesting to them. Perseverance and attentiveness must be developed gradually.
After the lesson, the child should:
- know the composition and formation of the number 9;
- be able to correlate the number of objects and objects with the number;
- be able to break a number into its components.
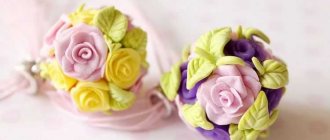
Satin flowers
You can make beautiful and very realistic flowers from a wide satin ribbon. For each flower you need to do the following:
- Cut out three circles, different sizes;
- Fire heat all edges;
- Add the circles together from largest to smallest;
- Pierce the center of the piece with a tailor's pin and pin it to the base.
How to write numbers from 1 to 10 correctly.
This manual will be useful to you after your child has learned and memorized 10 printed numbers well. In order for a child to learn to write capital numbers correctly, it is first necessary to demonstrate to the child the sequence of writing them using arrows using a clear example. Place the form on the table in front of the child, take a pen or pencil, and start circling the first number from the indicated point in the direction of the arrows, then invite the child to do the same. Then the second, third and so on, depending on how quickly the child remembers the writing sequence.
The form must be in sight of the child at all times so that he can check himself at any time. After the child has memorized these rules, you can proceed to the seventh point of this page, where the child needs to circle the numbers by dots, guided by this manual.
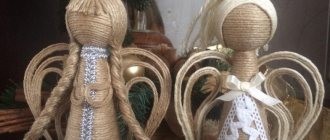
Making numbers with yarn
Another simple way is to wrap the number with thread. Select the yarn of the desired color or colors, firmly glue the end of the thread to the cardboard figure and begin simply wrapping the thread around the frame. The thread must be placed very tightly so that the cardboard is not visible. The direction of the thread can be changed, so the number will look more interesting.
A melange thread or thread with smooth color transitions will look beautiful on a festive number.
Decor of volumetric figures
Volumetric crafts make an even greater impression with their scale. They look incredible and beckon you to take a couple of pictures side by side.
Birthday celebrants will be able to fully enjoy the interior of the festive room, and guests will appreciate the cozy atmosphere.
There are many options for creating three-dimensional figures, so let’s look at them now.
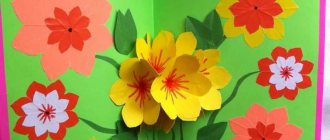
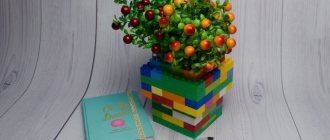
Paper products
For a simple three-dimensional figure with paper elements, we will need: a ready-made base for the figure, colored paper, a glue gun and PVA.
The process is very easy:
- We prepare the frame for the figure (we previously discussed its production);
- Separately, we roll up many roses from colored sheets. Here you will need unlimited patience and nerves. Choose delicate shades for the product;
- Attach the finished roses with glue to the number frame.
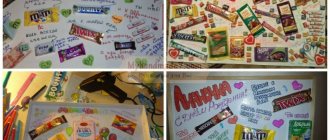
Napkins
Using napkins you can make amazing flowers; this is a budget option. Choose shades of napkins that are pleasing to the eye, shape them like an accordion, tie them with a thread in the center, open the opposite ends, and round them.
Gradually, one by one, we separate the layers of the napkin and make a bud. Once all the flowers are ready, you need to attach them to the frame with PVA glue. Try not to leave gaps or pre-paint the frame in an identical color.
Fresh flowers
Everything is repeated here. Attach flower buds to the frame. The only thing is that such a product can be very heavy and unstable, choose a stand and attach the numbers. Try not to leave gaps or decorate them in advance.
Fabric
The numbers can be covered with beautiful fabric and additional decor can be sewn on. It will be great if you cover it with a canopy of bright shreds, it looks much more interesting. Or, attach flowers sewn from fabric to the finished product. If time permits, you can sew the numbers according to the pattern, filling them with cotton wool.
Ribbons
You can use one or more ribbons of different colors to cover the voluminous figure around the entire perimeter. This method works well with beads, which are then sewn onto the craft.
Ribbons make excellent knitted patterns, but you should choose a larger material. This is one of the most budget options.
Buttons
Buttons are a universal option that goes with everything. Be it cardboard, fabric, ribbons, colored paper or foam. Using this decorative element, you can fill the entire area of the craft or just a part, creating a pattern. It will be more beautiful if you choose buttons of different sizes, but almost the same color.
mi
It looks very aesthetically pleasing if you carefully wrap the voluminous numbers with knitting threads.
The effect of overflow and tenderness is created, and if you choose several similar colors and create a light edge, it will be delightful.
Real needlewomen will appreciate this option for birthday decorations for both adults and children.
Rain
Rain is a capricious material that is not so easy to use in crafts. But if you work hard and pay attention to it, you can create a bright figure.
All you have to do is wrap the frame with rain, sometimes using PVA glue to secure the material. At the end, leave a few lines hanging to create a festive effect.
Sequins
Glitter makes little princesses happy; we need more of it, everywhere.
Apply glue to the entire surface of the product and carefully distribute the glitter evenly.
Let them dry and cover them again with clear glue.
Try to work in a specially designated area. Otherwise, your home will shine for several more days in a variety of places, we promise.
Acrylic paints
This material is not suitable for all frames, but with its help you can realize many fantasies. Draw the number as you please or create unique patterns and drawings on the canvas. For greater effect, go over the paints several times.
We have shared with you the most interesting ideas for bringing unique numbers to life. All you have to do is select materials and use a little imagination. Good luck!
Other ideas
In addition to the listed ways to decorate a holiday number, there are many more ways. Here are just some ideas on what you can use to cover a number:
A large piece of fabric. The fabric is glued to hot glue, forming beautiful folds;
- Colored paper or gift wrapping paper. On top of the frame you can make a thematic applique in the theme of the holiday;
- Small photographs;
- Multi-colored buttons;
- Felt;
- Artificial flowers made of plastic;
- Sparkles. The frame should be generously greased with PVA glue and sprinkled with multi-colored glitter;
- Wrap a decorative rope around the number, periodically gluing the rope;
- Small balloons. They need to be attached to a foam plastic frame, piercing the tail of each inflated ball with a tailor's pin. If the frame of your figure is made of cardboard, glue the balls with tape; hot glue will melt the rubber.
A festive number will decorate your home during your child’s birthday celebration, and can also be an excellent gift for an adult birthday boy. It can serve as a decorative item or combine several functions.
You can put a small gift inside the volumetric figure; for convenience, make a “door” in advance through which the birthday person can get the gift. For kids, you can make a festive piñata from a hollow cardboard figure. To do this, just fill the figure with candies and hang it in the yard.
Paper view
This type of decor requires certain materials: a ready-made frame, PVA glue, colored paper and active imagination.