In this section of my blog you can download free animal masks for children.
They are suitable for both home role-playing games and games in kindergartens and early childhood schools.
Is it easy to make an interesting mask with your child?
Animal masks are often used at children's parties and New Year's carnivals. Children love to dress up as animals: it gives them special pleasure. The most common children's masks are hare, bear, tiger, cat, fox and other pictures of forest-dwelling animals.
If you are going to a holiday for a kindergarten, sometimes buying a mask for children can be expensive, and you won’t always find the right one. You can make paper animal masks at home with your own hands. The templates on our website will help you with this, which can be easily printed and then cut along the contour.
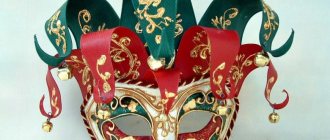
Leather mask
You will need: a piece of leather 4 mm thick, PVA glue, plastic mask, scissors, brush, hair dryer, cling film, elastic band, golden paint in a tube, lace and other decorative elements.
Master Class
- Dilute PVA glue with water in a 1:1 ratio.
- Wet the back of the leather well with the adhesive, using a brush to blot it. This is necessary for it to become elastic.
- Cover the plastic mask with transparent film.
- Place the skin on the base of the mask.
- Carefully press the skin against the mask so that it completely copies its shape.
- Dry with a hairdryer, but do not forget to ensure that the leather does not lose its shape.
- Trim the skin along the outline, then carefully cut out slits for the eyes.
- Make a golden outline of the mask and leave to dry.
- Cut out 2 circles of leather and secure an elastic band in them, then glue the circles to the mask.
- Paint the mask, cover the outline with lace, or decorate the mask to your taste.
The leather mask is ready!
DIY carnival mask: simple manufacturing ideas
If you need a carnival mask for a festive outfit, and you haven’t found one suitable in the store, don’t worry, it’s quite possible to make such an accessory yourself at home from scrap materials.
The mask can be made from paper, cardboard, fabric, plaster, modeling mass; and use rhinestones, sequins, sparkles, beads, etc. as decorations.
We bring to your attention 4 of the simplest ideas for creating a carnival mask with your own hands.
Carnival mask made of paper
This is the simplest and most economical option for creating a carnival mask. The main element for creating a mask is a paper template.
Materials and tools:
- a template with an image of a carnival mask (can be found on the Internet and printed or drawn, see examples of templates at the end of the article),
- thick A4 sheet,
- cardboard,
- PVA glue,
- hole puncher,
- simple pencil,
- scissors,
- scotch,
- rubber,
- acrylic paints (you can use ordinary gouache),
- decorations: rain, glitter, stickers, rhinestones.
How to do:
- Glue the template onto the cardboard so that the mask does not become deformed in the future.
- Color the mask. Paints are only useful if the image was printed in black and white. When buying paints, do not look closely at watercolors - they harm the quality of the paper, no matter how thick it is.
- After painting and drying the mask, cut it out along the contours.
- Using a hole punch, make holes for the elastic bands along the edges of the mask, and to prevent the mask from tearing in these places during wearing, reinforce the surface around the holes with tape.
- Now thread the elastic through the holes and secure each end with a knot.
- Before doing this, try on the mask to adjust the length of the elastic.
- All that remains is to decorate the mask with glitter and so on.
Carnival mask made from modeling clay
The process of making a carnival mask from mass is very long, but not difficult.
Materials and tools:
- white modeling mass,
- paper,
- scissors,
- pattern,
- penknife,
- face mockup,
- multi-colored acrylic paints,
- sparkles, rhinestones, beads.
How to do:
- First, cut out a template from paper.
- Roll out the modeling mass with a rolling pin into a thin cake (the thickness should not exceed four millimeters).
- Place the paper template on top of the rolled out mass and cut along the contour with a sharp knife so that the same shape is obtained from the “dough”. Don't forget to cut holes on the sides for the elastic.
- Now very carefully lift the mask from the table and place it on the mock-up of a human face (read Mannequin Head for Making a Carnival Mask for how to make it). Leave it to harden for twelve hours, or better yet for a day.
- The mask must dry exclusively on its own, without the help of hair dryers or other steam heating, otherwise it will become deformed.
- When the mask has completely hardened and dried, paint it. You can, of course, at your own discretion, but it is better to give preference to the color of the bird whose year is coming.
- Additionally, you can decorate it with convex patterns from the same modeling mass, and with decorations from the list.
Making a carnival mask using papier-mâché technique
The papier-mâché technique is also called maching. This is a very affordable method of making a carnival mask.
Materials and tools:
- round air balloon,
- wide bowl for diluting adhesive liquid,
- petrolatum,
- PVA glue,
- water,
- toilet paper or napkins (paper towels),
- any colored paints,
- stationery knife.
How to do:
- First, inflate the balloon to the size of your face for the mask.
- Tear the paper into small pieces.
- Dilute the glue with water in a ratio of 2:1.
- If you don’t have PVA glue on hand, starch or flour can be an alternative.
- Spread Vaseline on the inflated balloon to prevent the paper from sticking to the rubber of the balloon.
- Dip each piece of paper into the adhesive mixture and place it on the ball so that they intersect and cover each other.
- Cover the ball with paper in four layers.
- Leave the ball with paper until completely dry.
- Check that the paper on the ball is dry - pierce it with a needle.
- After this, pierce the ball that is under the paper.
- Next comes a very important step: you need to carefully cut the paper blank into two identical parts with a stationery knife. Using the same knife, make holes for the eyes and for attaching the elastic on the sides. If you wish, you can make holes for the nostrils and mouth. For adults, these holes are not important, but if you are making a mask for a child, then you definitely need to make these additional holes so that he feels comfortable and can breathe easier in the mask.
- If the mask has any unevenness or defects, sand it with sandpaper. All that remains is to decorate the mask and you can dress up for the holiday.
How to sew a carnival mask from fabric
This is the best option for making a mask in addition to a costume for a children's party. If you are at least a little familiar with cutting and sewing techniques, it will not be difficult for you to sew a mask for your child using a template, of which there are many on the Internet. You can make such a mask either by hand or on a sewing machine.
Materials and tools:
- fleece,
- pattern,
- threads,
- rubber,
- scissors.
How to do:
- From the base material, cut out two identical mask parts.
- Using a zigzag stitch, sew the finishing pieces to one of the parts of the mask.
- Sew and turn the two parts of the mask inside out (just leave holes for the elastic).
- Insert the elastic into the holes and stitch the mask along the outer edge again. All that remains is to decorate the mask with various details.
Examples of templates for making a carnival mask with your own hands:
Source: https://dizaks.ru/karnavalnaya-maska-svoimi-rukami-prostyie-idei/
Swan mask
You will need: white, pink and black cardboard, shiny golden cardboard, scissors, elastic band, glue, 2 rhinestones, 8 half beads.
Master Class
- Print out the swan template.
- Transfer the template to white cardstock, then cut out two swans.
- Make wings from glitter and pink cardstock as shown in the photo, then glue them on.
- Cut out eyes and beaks for swans from black and pink cardstock, then glue them on.
- Glue the swans together to form a mask.
- Make small holes on the sides of the mask and secure the elastic.
- Glue rhinestones as the eyes of the swans.
- Decorate the mask by gluing half beads.
The swan mask is ready!
Masks for children
Every child wants to be the most beautiful, interesting and original at a creative event. A mask is a stunning accessory that complements any look. In this article we will look at how to make masks for children with your own hands.
Butterfly mask
You will need: foam board, scissors, rubber band, tape measure, glue, sheet of paper, pencil.
Master Class
- Measure the distance from the ear to the bridge of the child's nose.
- Fold a sheet of paper in half, measure the resulting distance from the fold and draw a butterfly wing.
- Cut out the template.
- Attach the template to the child's face and mark the locations of the eye holes.
- Cut out the eyes on a paper template with a small margin.
- Trace the template onto the foam board, then cut it out.
- Make a decoration for the mask from foam cardboard (it can be eyebrows, droplets, flowers) then glue them.
- Measure the size of the elastic from one ear to the other, make small holes along the edges of the mask and secure the elastic.
The carnival mask “Butterfly” is ready! I recommend watching this video!
Mask made from hands
You will need: colored cardboard, a simple pencil, scissors.
Master Class
- Choose your hand position.
- Trace their hands on cardboard.
- Cut out the mask.
- Place the mask on your face, mark the holes for the eyes, then cut them out.
- Cut out the nails and ring from cardboard, then glue them onto the mask.
- Fold the cardboard in half and cut a “double” thick stick.
- Glue a stick to the side of the mask as a holder.
The handmade mask is ready! I recommend watching this video!
Bright mask
You will need: colored paper, a simple pencil, scissors, eraser, glue.
Master Class
- Draw an owl mask template on plain paper.
- Mark the locations for the eyes and cut the holes.
- Transfer the template onto blue paper, then cut out the mask.
- Make circles for the eyes and decor for the ears from black paper.
- Cut and attach the beak as shown in the image.
- Cut out small and large feathers from colored paper and glue them to the mask.
- Make 2 holes along the edges of the mask and secure the elastic.
The bright paper mask is ready!
Ninja Turtle Mask
You will need: orange and green felt flowers, a simple pencil, scissors, a glue gun, Velcro.
Master Class
- Print the template.
- Transfer the pattern to felt, then cut out the pieces.
- Cut 2 orange strips for ties.
- Glue the parts together using a glue gun.
- Attach Velcro in the desired places.
The turtle mask - ninja Michelangelo is ready! I recommend watching this video!
Spiderman Mask
You will need: red felt, scissors, black marker, sewing machine, elastic band, sewing pins.
Master Class
- Print the template.
- Make 2 felt blanks.
- Mark the web with a marker on one of the blanks, then sew the lines.
- Fasten the pieces together with pins and place an elastic band.
- Sew the edges of the mask.
The Spider-Man mask is ready! I recommend watching this video!
Paper mask “Owl”
You will need: beige and white paper, scissors, templates, glue, elastic band.
Master Class
- Print and cut out the templates.
- Transfer them to colored paper, then cut them out.
- Cut fringe as feathering on each element along the edges, as shown in the image.
- Glue the parts together.
- Make 2 holes along the edges of the mask and secure the elastic.
The “Owl” paper mask is ready!
creative mask
You will need: cardboard, scissors, a thin rubber band or elastic thread, a stationery knife, felt-tip pens or pencils, a hole punch.
Master Class
- Fold a sheet of cardboard in half.
- Draw a mask template on the half.
- Cut out a hole for the eyes using a utility knife.
- Use a hole punch to make a hole for the elastic.
- Cut out the mask.
- Draw a face on the mask - nose, ears, mustache.
- Secure the elastic band.
The creative mask is ready! I recommend watching this video!
Emotional mask
You will need: colored cardboard, pencil, eraser, scissors, glue.
Master Class
- Draw an oval on a sheet of cardboard of such a size that it covers your entire face.
- Draw the eyes and mouth corresponding to the emotion you want to show.
- Cut out an oval.
- Cut out the eyes and mouth.
- Erase the remaining pencil with an eraser.
- Cut out a stick from cardboard that will serve as a holder.
- Glue the holder to the mask.
The emotional mask is ready!
Paper mask “Cat”
You will need: thick paper or cardboard in white, pink and black, glue or double-sided tape, rubber band, scissors, a simple pencil.
Master Class
- Draw the cat's face on a black piece of paper, then cut it out.
- Draw the center for the ears and the muzzle on a white sheet of paper, then cut and glue.
- Cut out a white mustache and a pink nose, then glue them on.
- Draw and cut out the eyes.
- Attach the elastic band.
The “Cat” paper mask is ready! I recommend watching this video!
Photo master classes
We present to your attention a photo gallery of step-by-step instructions. Choose the best mask in your opinion, carefully read the manufacturing process and start creating a masterpiece. Also check out the article on paper masks by clicking here.
Fox Tiger Monkey Cat Dog Bear Panda Owl and Fox Wolf Dragon
Children's mask templates
Loading…
Source: https://svoimirukamy.com/maski-dlya-detej.html
Masks made from plastic plates
You will need: white plastic plates, colored cardboard, glue, cotton wool, pom-poms, chenille wire, scissors, ruler, 2 ice cream sticks.
Master Class
- Snowman mask. Take 2 plastic plates of different circumferences.
- Cut the inside of the plate to a smaller size, leaving only the outer circle.
- Glue the plates together to form a snowman silhouette.
- Cut out 2 strips of red cardstock and glue them on as a scarf.
- Glue 3 black “buttons” in the center of a large plate.
- Make a hat out of black cardboard and glue a chenille wire decoration to the side.
- Glue the popsicle stick to the back.
- Santa mask. Cut half of the inside of the plastic plate as shown in the photo.
- Cut a triangle out of red cardstock and glue it on as a hat.
- Make a beard out of cotton wool.
- Roll cotton balls and glue them onto the hat.
- Glue on a red pom pom for the nose.
- Glue the popsicle stick to the back.
New Year's masks made from plastic plates are ready!
Downloads
Playing with animal masks develops a child’s speech, broadens his or her horizons, forms the beginnings of theatrical abilities, and brings a lot of joy and positive emotions to children. Try playing with your child using animal masks.
Black and white
Colored
Boy mask
You will need: a sheet of A4 cardboard, colored pencils, glitter, hole punch, scissors, eraser.
Master Class
- Print the template.
- Color with pencils as shown in the photo.
- Decorate with glitter.
- Cut out the mask.
- Cut holes for eyes and lips.
- Make holes on the sides and secure the elastic.
The boy's mask is ready! I recommend watching this video!
DIY New Year's felt mask Tiger symbol of 2022. Carnival mask for kindergarten and school
Head masks for children: printable templates
Download and print templates for making children's three-dimensional paper head masks with your own hands.
Magic transformations are one of a child’s favorite activities. From early childhood, girls try on their mother’s outfits and jewelry, imagining themselves as princesses or fairy tale characters. The boys are also not far behind, imagining themselves in the image of their favorite Superheroes or a brave pirate. Imitating your favorite heroes is not only entertainment, it helps a child to realize himself.
You can buy ready-made carnival masks of animals, birds, superheroes for children in an online store (in Ozone, in My-Shop, in Labyrinth) or make your own from paper using the templates presented below.
Animal masks for the game "Cat and Mouse"
Source: mermagblog.com
Printable template for the “Cat” mask, pdf file.
Head mask “Owl” made of colored paper
Source: paperchase.co.uk
- Printable Owl mask template:
- PART 1
- PART 2
Print the “PART 1” template on colored cardstock or thick paper, set the print settings to “photo” and “grayscale”. Cut out the mask along the contour and eye holes. Punch holes on both sides to thread the ribbon through. Make folds on the beak along the dotted lines and glue in place.
Print the feathers on sheets of different colored paper. Set the print options to "photo" and "grayscale". Cut out large feathers, fold them in half and glue them onto the mask. Cut out small feathers and start gluing to the base from the bottom row.
Superhero masks for boys and girls
Source: mini.reyve.fr
Paper bunny mask
Source: playfullearning.net
Printable children's mask "Bunny" template, pdf file.
In order to make a mask you will need: a printing template, scissors, a marker or felt-tip pen, cardboard and two pieces of rope or tape.
Print the mask template onto thick paper and fold it in half vertically. Cut along the contour, make holes for the eyes. Open the mask, color your nose with paints or a pencil. Children can decorate the mask as they wish. Make two longitudinal folds in the nose area at the same distance from the middle. Make holes in the side wings and thread the strings.
Coloring mask “Cat” for children
We offer you to download a color and black and white “Cat” coloring template for printing. The child can independently paint the mask with any colors, glue it together and transform into his favorite animal.
Source: happythought.co.uk
- “Cat” coloring mask template for printing, pdf file.
- WE RECOMMEND:
- Set of animal masks for children, 10 pieces for 180 rub. on AliExpress
DIY masks for children's creativity:
(Click on the image for details)
Source: https://www.iqchild.ru/shabloniy-karnavalniyh-masok-iz-bumagi-dlya-detej/
Carnival mask with feathers
You will need: a plastic mask in the shape of a face, modeling compound, a rolling pin, a sheet of paper, a pencil, acrylic paints, a crystal, a craft knife, an elastic band, black feathers.
Master Class
- Draw a mask template on paper, then cut it out.
- Roll out the modeling mass to a thickness of 3-4mm.
- Transfer the template to the modeling compound and cut out with a template sheath.
- Make holes for the elastic.
- Place the mask on the plastic face mold and leave to dry for 12-24 hours.
- Paint the mask with acrylic paints and wait until dry.
- Decorate the mask by making a pattern using modeling clay.
- Glue the crystal in the center of the mask and decorate with black feathers.
- Secure the elastic band.
The carnival mask is ready!
DIY New Year's masks for children: templates, patterns, master classes
Children's MASKS - 122 New Year's, carnival templates.
Hello everyone, we have finally gotten to the topic of New Year's masks for children - made of paper, cardboard, felt. Carnival masks in the form of wild animals (masks of a bear, wolf, fox, hare, squirrel, hedgehog) and domestic (masks of a cow, pig, bull, sheep, hen and chicks). Pet masks (dog, cat, hamster). You can make all these masks with your own hands from paper and cardboard or soft material (such as felt, formiam). In this article you will find ready-made samples of masks and patterns.
All carnival masks can be divided into categories based on their location on the face and the degree of closure of the front part.
Carnival masks for adults
Before we start making a mask, let's first figure out what materials we'll need. The simplest version of a carnival mask is a ready-made template that you just need to print. This mask is suitable for those who have absolutely no time for creativity. Among them you will find many beautiful carnival masks. You will need to work hard on other options, but the result will exceed your wildest expectations.
To please, surprise and delight your friends, family and loved ones, you can make
New Year's cards for the New Year with your own hands. After all, such a postcard can convey much more bright feelings to the recipient and bring special joy and pride to the author.
Mosaic mask made from broken toys
Every time, before decorating the New Year tree, you have to sort through the Christmas tree decorations and separate the broken ones from the whole ones. Of course, every broken ball is a great pity, because many of the decorations are dear to us as memories of holidays spent with our family. But broken toys can be given a second chance by decorating a carnival mask with a mirror mosaic. You will need:
- a plastic mask from the store or a mask made from papier-mâché;
- several broken glass balls in matching colors;
- thick fabric or towel;
- rhinestones, feathers;
- hammer, pliers;
- braid;
- glue gun
- Remove the fasteners from the broken balls and break the balls with a hammer into small fragments, having first wrapped the toys in thick cloth.
- Use pliers to unscrew the fasteners, place them on a hard surface and lightly tap them with a hammer until the parts become flat. The result should be something like snowflakes or flowers.
- Glue these elements to the top of the mask and along the sides. Place sequins or a sparkling crystal in the middle of each element.
- Apply a little glue from a glue gun to the mask and glue the pieces of Christmas decorations, leaving small gaps. This way the pattern will look more like a mosaic pattern.
- Decorate one of the side parts of the mask with a lush feather.
- Measure the circumference of your head, cut two pieces of braid or ribbon, 6-8 centimeters longer than your head circumference. Attach the tape to the mask and let the product dry.
Face mask template made from gauze and cotton wool
If you urgently need a mask, then take note of this manufacturing method. It has been tested for years; it doesn’t even require a thread and a needle.
This bandage is considered disposable, but it has an advantage over the factory version made of spunbond. Pharmaceutical products need to be changed every 2 hours, and you can stay in gauze and cotton for 3-4 hours.
You will need:
- gauze measuring 100 x 50 cm.
- cotton wool
- scissors
How to make a mask for an adult:
- Make a liner from cotton wool measuring 20 x 30 cm, 1-2 cm thick.
- Spread the gauze and place a cotton pad in the center. Fold the edges of the gauze on both sides and cover the cotton pad with them.
- Cut the loose ends in half lengthwise. You will get 2 pairs of ties. The bandage is ready and can be used for its intended purpose.
The template is for a standard adult mask. It should cover your face from ear to ear, covering your nose, mouth, and chin.
But the template can be changed. The size directly depends on the age and individual build of a person. Even in adults, the distance from the bridge of the nose to the chin and from ear to ear can vary.
Paper face mask
When you don’t have a ready-made mask at hand, but you need one very urgently, then the paper version will come in handy. You can use paper towels, multi-layer napkins and even toilet paper.
It is important to choose a paper through which you can breathe without suffocating.
Take one section of paper towel. The more dense it is, the better. We fold it like an accordion and fasten rubber bands on each side, which then need to be put on the ears.
If you don’t have a rubber band, you can tie or glue a linen band or make ties from a bandage.
You need to understand that such a mask will last only a few minutes. But it’s enough to go out to the store and buy something quickly. And it doesn't cost much.
Papier-mâché masks
Made from newspaper with the addition of PVA. Thanks to this technology, it is possible to make a craft on the face of the person who will subsequently wear it. You can add parts to the workpiece. Foil attributes are also made using a similar principle.
creative mask
You will need: colored cardboard, scissors, a stationery knife, glue, black marker, eraser.
Master Class
- Cut out the base of the mask.
- Prepare 13 small, 7 medium and 7 large feathers in three different colors.
- Cut and shape a triangular voluminous nose as shown in the photo.
- Glue 6 small feathers to the bottom of the mask.
- Glue 7 small feathers to the top of the mask.
- Glue 7 medium feathers at the top of the mask, arranging them in a checkerboard pattern, and add large feathers in the same way.
- Cut out the eyebrows, then glue them on.
- Glue the voluminous nose.
- Outline the eyes and tip of the nose with a black marker.
- Secure the elastic band.
A creative cardboard mask is ready! I recommend watching this video!
Christmas Mask Reindeer Rudolph | Paper Crafts Quick and Easy with Your Hands
Sheep mask
You will need: cotton wool, paper plate, scissors, glue, cardboard.
Master Class
- Cut out the middle of the paper plate.
- Roll cotton balls.
- Cover the plate with balls.
- Cut out the ears from cardboard, then glue them on.
- Try on the mask.
The cotton wool sheep mask is ready! I recommend watching this video!
New Year's mask / DIY TSVORIC
Plastic plate mask
You will need: plastic plate, scissors, double-sided colored paper, glue, pencil, cocktail tube, hole punch, tape.
Master Class
- Cut the plastic plate in half.
- Use a hole punch to make holes for the eyes.
- Cut out feathers from colored paper and glue them on, decorating the mask as shown in the photo.
- Cut out a double triangle from colored paper and glue it as a nose.
- Cut out circles from yellow paper and glue the mask onto the eye circumference.
- Decorate the mask by gluing small bright circles and triangles.
- Attach the tube to the side of the mask using tape.
The plastic plate mask is ready!
A little bit of history
Masks for children have become entertainment only recently. But the history of this attribute is very long. In primitive times, people used masks to frighten evil spirits and used them for ritual purposes. It will be interesting for children to know that previously people made masks not for fun, but solely for practical purposes.
Today, children's masks are made for carnivals in kindergartens and aesthetic centers. They are produced in industrial conditions, in toy factories. However, you can make a mask for children yourself, and you will spend minimal time and effort, but you will get great pleasure communicating with your child. Coloring pages can be chosen as the basis for the mask.
Felt mask with sequins
You will need: black felt, scissors, cardboard, glue gun, pencil, black elastic band, braid, rhinestones and sequins.
Master Class
- Draw the mask on cardboard, then cut out the template.
- Transfer the template to felt and cut out the base of the mask.
- Fold the mask in half and make a hole for the elastic.
- Secure the elastic band.
- Glue the tape along the contour of the mask.
- Decorate the mask to your taste by gluing rhinestones and sequins as shown in the image.
The felt mask with sequins is ready! I recommend watching this video!
How to make a New Year's mask from papier mache with your own hands.
Paper masks (print only)
Paper masks (print and color)
If time permits, then let the children participate in the process of creating the mask. Print out the finished template and let your child paint his own mask. And it’s even better if you do this together.
The child will wear such a mask with pride, because he made it himself or together with his parents, and in addition to everything, you and your whole family will receive a lot of positive emotions and pleasant memories in your family collection!
DIY paper masks: master classes
If time allows, and most importantly, you want to make a beautiful mask, then take advantage of our master classes, which describe in detail and step by step how to make a paper mask for children.
#1 Owl Mask
Download template
#2 Handprint mask
An unusual carnival mask will be made from handprints. Choose any position of your hands on your face, then transfer them to paper, cut them out, color them and the mask is ready! Fast, unusual, and most importantly - with your own hands!
#3 Volumetric paper mask Tiger
You can make a wonderful three-dimensional paper tiger mask with your own hands using the following master class. You need to draw a template, make cuts in three places, and then glue the mask along these cuts. As a result, the mask will be voluminous and will fit well to the head.
#4 Volumetric Monkey Mask
Using the same scheme, you can make absolutely any variations on the theme of masks. The only differences are in the details. For example, in the case of a monkey, ear-circles are cut out and glued separately.
You'll also like:
Time runs inexorably forward and now white flies are flying outside the window, slowly falling to the ground and covering everything around with a snow-white fluffy blanket. However, despite the cold, my soul is warm and joyful. And all because suddenly appearing snowflakes herald the coming of the New Year. The most important holiday of the year is already very close, which means it’s time to think […]
no comments yet
#5 Volume mask Cat
But the cat’s mask is very similar to a tiger. Pay attention to the shape of the ears (triangles) and the shape of the eyes (the so-called cat's eye).
#6 Volume mask Dog
The owner of the outgoing year was the Dog, so the costume of a four-legged friend this New Year will be very relevant. One difference from previous masks is the long ears, which are cut out and glued separately.
#7 Volume mask Bear
On New Year's Eve, even the clubfoot leaves his den to see Santa Claus. Making a bear mask is not difficult. The ears are glued separately.
#8 How to make an Owl mask with your own hands
And here is a step-by-step master class on making an Owl mask from paper. A voluminous beak and feathers will add realism to the mask.
#9 Volume panda mask
#10 Volume mask Fox
Download template
#11 Cat mask
Download template
#12 Mouse Mask
Download template
Cardboard masks
Paper masks are easy to make, but at the same time they are not very durable. If your baby is not very careful when handling things, then it is more logical to make him a mask out of cardboard. We have a master class and templates for owl and fox masks. But you can dream up and make any other animal: a wolf, an eagle, a bear, a dog, etc.
- Owl template (for adults) Owl template (for children)
- Fox template (for adults) Fox template (for children)
DIY felt masks for children
In addition to paper, felt can be used as a material for making carnival masks. The results are very cool crafts, but you will have to tinker with them a little longer. We have collected for you not only ideas for New Year's felt masks, but also ready-made templates and master classes.
#1 Felt mask Pink Owl
#2 Felt mask Wolf
#3 Step-by-step tutorial on how to make a Butterfly mask from felt
#4 Felt mask Dragon
- You will be interested in:
The New Year holidays are approaching, which means that very soon a forest guest will appear in almost every home in our country.
Some people prefer to put up an artificial Christmas tree, some prefer to put up a real forest spruce from a Christmas market, and some even confine themselves to pine branches.
However, this is not so important, because the most important feature of the New Year tree is the toys. Since ancient times, people in [...]
no comments yet
#5 DIY Lion mask + diagram
Download template
#6 Owl mask made of felt + pattern
Download template
#7 MK: Panda mask + template
Download template
#8 How to make a squirrel mask from felt with your own hands + diagram
Download template
#9 Kitten Mask + pattern
Download template
#10 Piggy and Stepashka: master class + diagram
Download template
#11 Felt Owl Mask
Download template
#12 Mask for children Raccoon
Download template
#13 Children's masks of forest animals: deer, fox, owl
Template Deer part 1 Template Deer part 2
Template Fox part 1 Template Fox part 2
Owl template part 1 Owl template part 2
Patterns
Paper plate masks
Another cool material that makes great kids masks is paper plates. Turn on your imagination and making New Year's masks will give you a lot of pleasant emotions!
Help us improve: if you notice an error, select a fragment and press Ctrl+Enter.
Source: https://hny.by/prazdnik/100-karnavalnyx-masok-dlya-detej-shablony-i-vykrojki/
Felt fox mask
You will need: a muzzle template, thick beige, orange and black felt, golden foamiran, white, orange and black threads, scissors, a needle, black floss threads, a glue gun, a satin ribbon.
Master Class
- Prepare a template for the muzzle, ears, eyelashes and nose.
- Transfer the muzzle template onto beige felt and make 2 blanks.
- Make a blank for the face from orange felt, as shown in the photo.
- Cut out eyelashes from golden foamiran.
- Cut out a nose from black felt and inner ears from beige felt.
- Sew orange felt onto one beige face base.
- Sew on the inner ears.
- Sew on the nose and make antennae with black floss threads.
- Take the second base of the muzzle, make 2 small holes on the sides from the wrong side.
- Secure the tape by making several knots, then secure it additionally with a glue gun.
- Sew the 2 halves of the mask using a buttonhole stitch, do not forget to sew the slits for the eyes.
- Glue the golden eyelashes.
The felt fox mask is ready! In this way you can make a mask of a deer or another animal.
