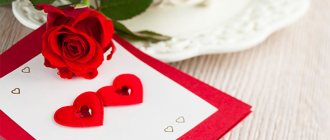
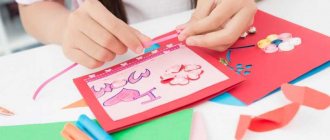
DIY Card: UGC Beautiful birthday cards are a special gift for the birthday person. Making a present yourself allows you to show your imagination and creativity and create a unique thing. Such gifts are especially appreciated because a piece of the giver’s soul is embedded in them. Let's look at simple options for birthday cards.
What kind of birthday cards can you make yourself?
Homemade cards, which evoke not only tenderness, but also genuine joy, can be made using a variety of decorative little things that come to hand - paper, thread, textile scraps, paints. If they are available, postcard “semi-finished products” – blanks – can be used.
Handmade birthday cards can be divided into several large types:
- musical;
- volumetric (“3D”);
- with a surprise;
- complex design (“engineering”).
DIY Happy Birthday Card
It is considered good form to combine several types of production in one postcard - naturally, without fanaticism.
Based on the manufacturing technique and materials, greeting cards are divided into:
- paper - based on applications of varying degrees of complexity and texture of the material;
- fabric - also appliqués, but made of special fabric;
- embroidery – use any available embroidery technique (cross stitch, satin stitch, using ribbons and/or beads);
Greeting card with embroidery
- Rampling and quilling are relatively new techniques in which postcards are created by gluing various small balls, bows, and oval shapes onto a finished background;
- molded - a special plastic mass is applied to the finished drawing, on the surface of which the necessary elements are manually drawn.
Birthday card using quilling technique
These technologies for making birthday cards with your own hands are the most popular due to their simplicity and accessibility, as well as the minimum time and financial costs during production . At the same time, despite its simplicity, with the right skill, you can make beautiful happy birthday cards with your own hands with little effort.
Advanced techniques
There are also rarer techniques for creating birthday cards with your own hands. They require a relatively large amount of consumables and painstaking work.
Ganutel
This technique is a distant relative of scan technology. With ganuteli, the elements of the composition are made from pieces of wire or thread and glued to the postcard base.
Flower made using the ganutel technique
Quilling
The elements of the craft are made from paper blanks, which are subsequently glued to the base of the postcard.
Postcard with quilling elements
Bead pattern
In order to make a beautiful birthday card with a beaded pattern with your own hands, beads, as well as beads and buttons are glued onto a base with a pre-applied schematic design of the finished composition.
Postcard decor with beads
Thread cards
The composition of the postcard in this case is created from threads glued to a template, folded in the right places and cut into pompoms or “fluff”. Thread elements can be either the main part of the craft or just an addition to the pictorial drawing.
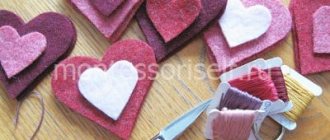
Birthday card decor with pompoms
This technique also includes the use of knitted elements when creating a composition.
Combined
All of these techniques are good enough on their own, but an incomparably better result is obtained when they are combined. The only condition is that the density and strength of the base of the postcard must correspond to the chosen manufacturing methods.
When making cards, combine several techniques
This is especially true for modeling, beaded mosaics and wire and wire compositions.
Relevance of the gift
Especially for children, many lessons have been created to develop fine motor skills. During labor at school, students are offered to perform various exercises related to the creation of paper products. A postcard will be a great solution for this. In addition to this fact, it is also worth considering that the child is trying to make such products and the process itself brings him pleasure.
One of the original examples of a paper postcard with the addition of other elements made by a student
The article will look at different ways to create postcards in different styles from paper and related materials. Manufacturing methods will be presented to readers:
- three-dimensional pictures;
- with added fabric;
- collected from figures;
- with added confetti;
- and an envelope for money and coins;
- with three-dimensional figures on the main part;
- with the addition of cut-out images of animals.
It is also worth noting that all the postcards described below can be made easily at school or at home. For this purpose, improvised materials can also be used. The main thing is to use your imagination and be smart.
Rules for making your own birthday cards
“When making beautiful birthday cards with your own hands, a lot depends on the selection of colors”
There are quite a lot of techniques to give a homemade postcard an original and memorable appearance. The easiest way is to use an unusual, non-traditional base for manufacturing. A non-standard move, for example, would be to use watercolor paper as a background; A drawing stamped on tracing paper with a backing made of bright, “acid” colored decorative paper will look original.
When making beautiful birthday cards with your own hands, a lot depends on the selection of colors. With the right approach, the simplest composition can very well become a highly artistic product!
For greeting cards, it is important to choose the right color scheme
The main rule in this case is not to overdo it: it is quite enough to use three colors in one card, two bright, contrasting to each other, and one neutral. An unusual, asymmetrical way of folding it will add originality to the craft.
It is preferable to make the inscriptions on the postcard in a beautiful calligraphic font, but always easy to read. When using computer fonts, do not forget that the letters “l” and “p” in many of them are extremely similar and that this can lead to unexpected incidents. The best, festive-looking color for letters is silver or gold.
The gold font looks festive
To make your own birthday card, you can use the scrapbooking technique. In this technique, several background layers are glued layer by layer onto a base made of colored cardboard, each of which contains the necessary decorative elements. Well, very great opportunities, despite its apparent simplicity, are provided by the paper decoupage technique, in which the top layer of ordinary, for example, napkins is used as an image (drawing). This layer is carefully removed from the “source” and carefully glued onto the postcard base with PVA glue diluted with water.
Happy birthday card using scrapbooking technique
Cardmaking styles
This direction of needlework (handmade) has its own styles and techniques.
Classic style
It is recognizable by the harmony and integrity of the created plot. All decorative elements of the style must be correctly combined in color and structure of materials. It is also called American.
European style
Like Old Europe - strict, reserved conservative. Let's compare it with minimalism - there are no more than three colors on a postcard, moderation in the number and size of decorative elements. His face is simplicity and clarity of lines: materials, decor, text for congratulations must be kept in the same tone.
Vintage style
It is also called the “antique” style. You can recognize the style by its aged decorative elements. To make a vintage postcard, vintage and old postcards, magazines, and newspapers are used.
Grunge Style
Ambiguous style and ambiguous attitude towards it. The main message of the grunge style is deliberate sloppiness, shockingness, melancholy and apathy. Definitions that characterize the style: shabby, rough, dirty, torn.
The colors of the style are gray, black, brown, red, orange, blue, which either contrast with each other or shimmer into each other, forming an incomprehensible dirty palette.
Mixed style
This is a combination of the other two styles. One style is taken as a basis, and elements can be from another. Or individual inclusions of a different style. The main rule is not to overdo it.
Handicraft techniques used in cardmaking.
Embroidery
They are used as a whole embroidered canvas, designed in the form of a postcard, as an insert on a postcard, or as embroidery of individual elements. Embroidery with glass beads, beads and sequins is especially popular for this type of needlework.
Scrapbooking
This is a technique invented to create beautiful photo albums. Rich in many patterns that are used for work - silhouettes of people and houses, hearts, rings, flowers, ribbons.
In making postcards, this technique is used in all styles - from classic to grunge. It uses various embossing, abrasions, craquelure, and torn edges.
Decoupage
The technique uses paper napkins, rice paper, and decoupage cards. The design is torn out of the napkin and glued to the chosen location using PVA glue to create a postcard.
Today there are napkins with ornaments, flowers, houses, and New Year's scenes that can be used to create cards in European and classic styles.
Quilling
Creating patterns using thin paper strips, from which flowers, leaves, and patterns are created using the rolling method. Today stores sell special sets of such serpentine stripes. You must have patience and perseverance when preparing decorative elements from narrow strips.
Iris Folding
The technique of cutting out pictures and layering flat parts on top of each other to create volume and texture.
Pop-up
This is a technique that includes all the rules for creating a folding card when opened, which reveals three-dimensional pictures. The most complex and time-consuming technique.
Stylish DIY birthday card for your aunt
A handmade greeting card for your aunt’s birthday, given from the heart, will not only be remembered for a long time, but may well become the highlight of the holiday day . It is quite simple to do, and it does not require large material investments or great physical effort. The result will be interesting, original in its own way and, of course, memorable.
Simple paper card
To make a paper card for your aunt’s birthday with your own hands, you will need the following tools and materials:
- colored paper with a beautiful, “festive” texture;
- scissors and a stationery knife, as well as a simple school compass;
- PVA glue and a little simple double-sided tape;
- small beads;
- an artistically attractive ribbon;
- small wooden stick.
First of all, several circles of different diameters are marked and cut out on colored paper with a compass. Then, using scissors, moving them from the edge of the paper circle to its center, a spiral is cut out - the basis of future flowers. For greater beauty, you can use scissors with curly blades.
Using a wooden stick, which can be an ordinary pencil, the spirals made are twisted from the edge to the central part - you get a kind of flower. To prevent it from unwinding, the center of the twisted spiral is fixed with a small drop of glue. It should be taken into account that the splendor of the finished “bud” depends on the density of the twist.
Paper flowers for greeting cards
The basis of the postcard will be a rectangle of cardboard (not packaging, of course!). It needs to be folded in half, and after that you can begin the first “trying on” of the craft. Then a “pot” for the finished flowers is cut out of dark-colored paper, and a small piece of double-sided tape is attached to its underside.
Greeting card in the shape of a pot of flowers
The color background of such a homemade postcard will be a rectangle made of green colored paper - its dimensions are made slightly (1-2 cm) smaller than the dimensions of the cardboard base. The background is glued to the base, then a composition of paper flowers and a pot-vase for them is finally assembled on it. The finishing touches are to glue a bow tied from a decorative ribbon to the pot, after which another piece of ribbon with a congratulatory inscription printed on it is attached to the hand-made card for aunt’s birthday.
Postcard with ribbon
The next version of the postcard will take a little more time to make, but the result will be impressive. The main thing is the correct selection of colors; bright acid colors are unacceptable for this craft. The colors should be delicate shades that go well with each other.
To make these beautiful birthday cards with your own hands, you will need the following accessories:
- a piece of cardboard of a suitable color;
- a small amount of decorative paper, always light in color;
- beautiful beads, if possible you should also use rhinestones;
- a piece of not very wide festive-looking satin ribbon;
- artificial small flowers;
- a few centimeters of double-sided tape.
Necessary materials for a postcard
The basis of the craft will be a square sheet of cardboard, folded in half. Another square is made from decorative paper, the side of which is the same size as the width of the cardboard base of the future postcard. A piece of tape is attached to it on the reverse side.
Fold a square sheet of cardboard in half
The prepared paper is fixed with the second side of the tape at the bottom of the postcard. The border between the color of paper and cardboard is masked with a piece of satin ribbon, for which a small slot is first made in the cardboard base as close as possible to the fold of the postcard halves. The end of the ribbon is carefully tucked into it.
The border between the color of paper and cardboard is masked with tape
Using another piece of tape, several artificial flowers are attached under the satin ribbon in place. The ribbon is tied in a beautiful bow and secured with a couple of drops of glue. For a congratulatory inscription, a rectangle of a suitable size made of light paper is glued inside a homemade holiday card. A homemade birthday card for your aunt is decorated with several beads mixed with rhinestones.
Decorate the finished card with several beads
From the shape of a heart
For the next type of card you will need an even heart shape. It's better to print it on a printer on colored paper or find a good, large template to trace around it. You need to be careful, if the edges of the heart are not even, the postcard envelope will not work out.
Envelope in the shape of a heart
It is also recommended to use gift wrapping instead of colored paper. All actions are designed in 5 steps:
- A template is prepared and the heart is cut out.
- Turns over with its back side facing the user.
- The sides of the heart fold evenly.
- The heart turns over and the part that is at the bottom is folded to half the product.
- The top part becomes the lid of the envelope. The sides are glued for fixation.
You can put a small bow or ribbon on the front of such an envelope.
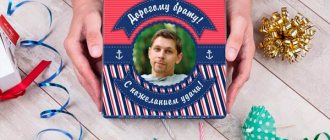
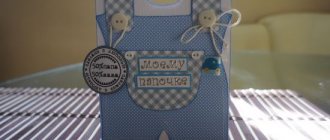
DIY birthday card for godfather
Very simple and beautiful card
This simple option for making a birthday card for your godfather with your own hands will not take much time - with certain skills it can be completed in a quarter of an hour. The only materials you need are beautiful wrapping paper and some cardboard, and the tools are scissors and a pen. Well, and a little glue.
Several strips are cut from wrapping paper, which are twisted into cylinders using a pencil or pen - these will be “candles”; They turn out very beautiful from striped paper. To prevent the finished candles from unwinding, the edges of the strips are fixed with a small amount of glue. Then small “lights” for candles are cut out from similar paper of a suitable “flame” color.
Card with candles made from wrapping paper
All prepared elements are collected together and attached with glue to the postcard. A piece of beautiful cardboard folded in half can be used as a base. The congratulatory inscription is applied in any available way.
Postcard – “medal”
“Handmade medal cards are great for presenting to your godfather on his birthday, and they only take a couple of tens of minutes to make.”
To make another craft, in addition to the standard set of materials, you will need threads. Hand-made medal cards are great for presenting to your godfather on his birthday, and they only take a couple of tens of minutes to make.
The work begins with the preparation of materials. The background of the finished postcard is selected in accordance with the intended composition and your tastes. It’s not bad, for example, to combine two multi-colored base blanks, one of which is slightly smaller in size than the other. Another option is to attach paper with a pattern to a plain background sheet. A large blank is glued directly to the cardboard base, a small one - to it.
DIY paper medals
The three-dimensional medal is made from a paper strip folded like an accordion. The technology is widely known - the accordion is tied in the middle, then folded into a ribbed circle, the opposite edges of the paper are glued to each other. The ends of the medal ribbon are also made from scraps of suitable colored paper.
The last stage of making a DIY birthday card for your godfather is assembling all the finished elements into a single whole. As in the previous case, small rhinestones or beads matching the color can be used as additional decorating elements for such a card.
Materials
To be able to let your imagination fly free and create a real work of art, you need to know where to find all the necessary materials to create it. You can use improvised materials as decorative elements: old beads, lace or a beautiful napkin can be found in the attic or closet, but unusual decorations or quilling sheets must be purchased in advance.
A variety of cardboard, gouache, brushes, glue and other stationery supplies can be purchased at an art store. They also sell all sorts of quilling equipment, including special loops and sticks. In craft stores you can find interesting details for decoration: half beads, stamps, ribbons, glitter and napkins for decoupage.
Unusual cards
You can make an original and beautiful birthday card with your own hands from patterned paper. To do this, several squares of equal size are cut out of it, which are glued to the base of the postcard. A ribbon or a piece of a beautiful lace is attached to each such square; small bright bows will also look cute.
The creation of such a craft is completed by applying a congratulatory inscription.
A “chicken” postcard made from a couple of pieces of cardboard or high-density paper will be no less original. The first piece with dimensions of 120x120 mm is bent 3 cm from its edge, the second has dimensions of 150x180 mm and is folded in half - it will be the base.
Original postcard with “chicken”
Six slits are made on the fold of the first sheet, and the side ones should be placed symmetrically to the fold. As a result, you should end up with several centimeter-wide strips - they are folded in such a way that “steps” come out of them. In the future, these steps will play the role of stands for figurines made of paper - a newborn chicken and eggs. The chick is cut out of yellow paper, the eggs from brown, the shell, of course, from white.
The background of such an original card can be decorated not only with applique, but also with real chicken feathers.
Features of choice
For brothers and sisters, the guideline for choosing a gift for a beloved sister should be to determine what the gift is for. There are gifts for business - such a present is both useful and practical. For example, a mobile phone, a new camera, cosmetics, a wallet, an umbrella or gloves. Your sister will probably like something new from this list, especially if you first discreetly find out what exactly she would like to buy.
There is also a category of gifts - for the soul. You can make a new large album with family photos (especially if the older sister lives far away), make an inscription and her photo on a T-shirt, mug or poster, as well as a poster with a collage of photographs that depict different moments of her life.
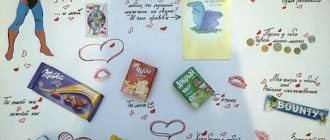
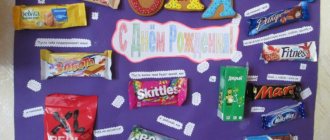
Idea! Any girl will love a sweet gift - a bouquet of chocolates and plush toys, and a cake baked for her beloved sister will be the most unforgettable gift.
For younger sisters and brothers who do not have the means to purchase a gift, there is also an option: surprise your sister with your own hands. In this case, you can make an original gift yourself.
If you think carefully and use your imagination, you can prepare many original crafts.