Posters "My first year"
One of the most important holidays in the family, the child’s 1st birthday is the most exciting and memorable.
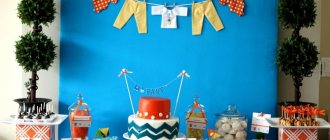
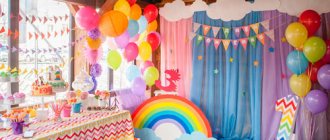
Every mother and every father tries to celebrate this event in an original, fun, bright and colorful way. Everything is used: balloons, soft toys, wall decorations, tinsel, garlands and greeting posters. The “My First Year” poster is needed to create a festive mood, become a large colorful postcard, and attract the attention of guests. Each guest can leave a note with their wishes on this poster, as well as take a photo against the background of the poster. In addition, such a poster can be kept for many years to remember pleasant family moments.
Choose a poster template for the first year on our website and add the brightest photos of your child - the layout of the one-year anniversary poster is ready! Believe me, 1 year old birthday posters are probably the best thing you can give to the baby himself.
Poster “I’m 1 year old” No. 12
A bright colorful poster for the first birthday “I’m 1 year old” for photographs of your baby from birth to one year old with a garland of a funny train with carriages, as well as clouds for wishes from guests. Photos of your baby will be posted on the photo.
Poster “My first year” No. 13
Delicate pink “My First Year” poster with photos of your baby from birth to one year. Photos of your baby will be framed on a pink background with lovely flowers and festive treats and balloons.
Children grow up quickly, but that's how it is.
Poster “My first year” No. 14
A bright colorful poster “I’m 1 year old” with photographs of your baby from birth to one year. Photos of your baby will be placed in round frames on a wonderful summer background with butterflies, bees and other inhabitants of the summer meadow.
Poster “My first year” No. 15
A cute “I’m 1 year old” poster with photos of your baby from birth to one year. Photos of your baby will be placed on a green background with the little heroes of the cartoon “Mickey Mouse”.
Children grow up quickly, but I really want to preserve a piece of them.
Poster “My wonderful first year” No. 16
Colorful poster with beautiful princesses “My Wonderful First Year” for baby girl photos. Photos of your baby will be placed in frames against a fairy-tale background with Disney princesses - Ariel the Little Mermaid, Snow White, Princess Aurora and the Queen.
Poster “My first year” No. 17
Poster “I’m 1 year old” with photographs of your baby from birth to one year. Photos of your baby will be placed on a blue background with Diddle mice.
Glitter banner
For letters made of durable material, such as wood, it is no longer necessary to use a background. Making something like this is a little more difficult, the work will take longer, you will need more special materials:
- letters made of wood or chipboard (you can buy them in art stores, handicraft stores, or order them online);
- transparent glue for creativity;
- glue brush;
- several packages of glitter;
- dishes and spoon for glitter;
- rope like hemp twine or tape;
- glue gun
When all the necessary materials have been collected, you can proceed directly to work:
- Carefully coat the front side of the letter with a thick layer of glue.
- Pour glitter into a small container. Sprinkle the glitter evenly over the glue layer using a spoon. Act quickly so that the glue does not have time to dry.
- Wait a few minutes, then carefully turn the letter over. Excess sparkles will fall off, and you will see in which places there are gaps and the glitters are not stuck.
- Carefully coat the gaps with glue and sprinkle with glitter again. Repeat until all gaps are filled.
- Cover each symbol with glitter and let it dry well.
- Lay out the entire congratulation, and then turn it over with the front side, that is, the side with glitter, down. Watch the distance between characters, it should be the same, and do not forget about spaces, they should be large enough so that the words do not merge.
- Use a glue gun to attach string or tape.
Remember that the material on which you are attaching the inscription must be able to easily support its weight, and also about the need to leave sufficiently long free ends for fastening. If you were unable to find wooden letters, letters cut from very thick cardboard may well be an alternative.
Such volumetric letters can also be used as attributes for a photo shoot.
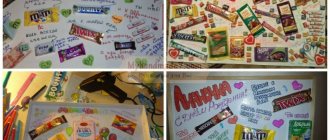
A one year old child's achievement board: how to make it yourself? Sample?
It is also called an achievement poster or an achievement poster. Where can I get a chalkboard template for a poster like this? What facts about the child should be mentioned in this poster?
An example of a achievement board.
How to make a similar poster, but in Russian and with your own data?
The fashion of drawing a child’s achievement board came to us from America. Most often they draw it on the baby’s first birthday.
Thanks to such a board, parents and relatives will be able to admire their child once again, and guests will be able to find out all the most interesting information about the little birthday boy.
The achievement board can be drawn on a slate board, or on whatman paper, or made electronically and then printed.
Traditionally, such a board indicates:
- child's name;
- height and weight at birth;
- number of teeth;
- “skills” of the child;
- baby's favorite foods;
- baby's vocabulary;
- favorite song or cartoon;
- other information important for parents.
Fabric banner
Beautiful congratulatory banners are made from fabric. Unlike paper and cardboard counterparts, they can be placed not only indoors, but also outdoors without any problems. You will need the following materials:
- background fabric;
- contrasting fabric for lettering;
- pattern of each letter;
- scissors;
- glue web;
- iron;
- ribbon or string;
- thread and needle or sewing machine.
The order of work will be as follows:
- Decide on the size and font, print and cut out each letter. Don't forget the exclamation mark.
- Place the templates on the fabric for the letters, trace and cut out each one.
- Decide on the size of the background, as well as the shape of the flags, for example, will they be rectangular or triangular. To place the inscription “Happy Birthday!” you will need 16 flags, of which two empty ones are needed for the space between words and one for placing an exclamation mark.
- Using pieces of web, attach each symbol to a separate flag. Remember that the web is ironed in the “no steam” mode.
- Now the garland needs to be assembled. Place all the letters in the correct order, don't forget about spaces. If you are using fabric tape, simply topstitch or sew each flag to it. If you want to secure the inscription on a string, then fold and sew the top of each flag, and then use a pin to string them onto a string or lace.
It is very important to choose the right length of rope or tape. Firstly, the lettering should not be pulled too tight or sagging too much, and secondly, you will need loose ends to secure it. Therefore, try to measure the room in advance and determine the mounting locations.
Posters for 1 year old baby's birthday
- Wedding invitations
- Planning seating arrangements for guests
- Complementary Products
- Made to order
- Jewelry for the bride
- Everything for the bride's hairstyle
- Complementing the image
- Everything for the groom
- Wedding traditions
- Everything for a photo shoot
- Showering the newlyweds
- Wedding walk, buffet, picnic
- At the registry office
- Wedding accessories
- Souvenirs and prizes
- Fun and competitions
- Sweet table
- Gifts for newlyweds
- Car decorations
- Indoor decorations
- Fairy lights
- Banquet hall decorations
- Bride ransom
- Wedding in your style
- Bachelorette and bachelor parties
- Wedding anniversaries
- Romantic evening
- Birth of a baby
- 1st birthday
vote
Article rating
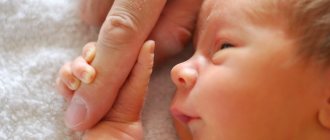
What is a metric for a newborn
As a rule, metrics are presented in the form of a poster. When decorating, parents use all their imagination. Moreover, pregnancy tests are sometimes used in metric design. But basically, the poster displays the main information about the child. Namely: the baby’s gender, his name, height and weight, time and date of birth, as well as head circumference.
All information on the metric should be easy to read. In addition, casts of the child’s arms and legs can be added to the poster. The metric is also decorated with small texts or poems written by the parents themselves.
Often, the poster is made in a cute frame that matches the design of the baby's room.
Currently, you can find a huge variety of metrics on the Internet:
- Metric-cast;
- Poster made of wood or plywood;
- Poster decorated with photographs of the child;
- Cross-stitch.
It is not necessary to pay a lot of money to designers to create this image, since absolutely anyone can create a metric. In addition, thanks to modern technologies, it has become possible to create metrics for a child on a mobile device.
How to take a metric for a newborn using a mobile device
The easiest way to make a poster with basic information about the newborn is using a mobile device. Using one of the programs presented above, you can create a collage with photographs of your child. You can decorate it by entering basic data and choosing the most suitable font.
The finished image must be printed, and then it will need to be placed in a beautiful frame.
Step-by-step instructions for creating a metric for a child:
- First you need to collect photographs of the child. In addition to this, you can also find any other images that will look harmonious. You should choose the simplest images possible. For example, bears, butterflies and so on; When creating a project, you need to select the size of the image that you plan to print as a result;
- Next, you need to paste all the selected images onto the background. You also need to insert inscriptions and decorations;
- You can make the picture more unusual by adding effects;
- The finished image must be printed.
Follow the link to watch a video on how to make a metric for a child on a phone:
Making a metric for a child is as simple as possible, and the process itself does not take more than 5 minutes. You can print the finished image on a printer, and if it is not available, this can be done in a special center. Moreover, the image can be shared with all friends and relatives by sending it via instant messengers or social networks.
4.5/5 — (24 votes)
Comparison of program functionality
| Editor's name. | Available templates. | Additional functions. |
| All templates are available and free. | In this editor you can create flyers, advertising posters, advertisements and simply edit images. |
| The editor features more than 60,000 layouts. | With this program you can create designs for any purpose. |
| The program has customizable templates in three categories. Namely: classic, stylish and minimal. | Using this editor, the finished layout can be sent to social networks. In addition, you can also create layouts for any purpose. |
| You can use both empty and ready-made templates. | With this tool, anyone can create a poster, banner, and so on. The finished image can be sent to friends on social networks. |
| The tool has over a hundred different layouts for creating metrics. | Using this application you can make posts for social networks, as well as various projects. |