A beautifully wrapped gift is already half the success. Of course, today there is no shortage of packaging boxes - money can buy a product of any size. But the price for such packaging is often high, especially during the holidays, when the demand for them increases several times. Therefore, it is much easier to make it yourself, just have the necessary materials and show a little imagination.
The easiest way is to use a regular empty box, but at the same time decorate it beautifully by covering it with wrapping paper. And knowing how you can make an original gift box with your own hands, you can easily surprise your loved ones and friends. Moreover, there are a lot of blanks that can be used to quickly and effortlessly make packaging of any size and shape. Such a gift will certainly be the center of attention.
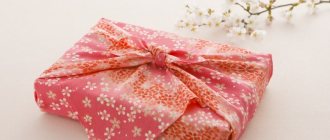
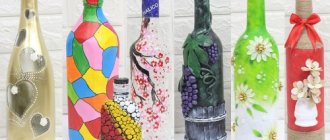
Various packaging options
Have you ever thought about how the packaging for New Year's gifts should be different? How can you make packaging wedding gifts interesting and atypical? How can you make beautiful cardboard bonbonnieres or miniature boxes? If you have kraft paper and twine, then don’t worry - look at the selection of photos.
Are you preparing a wedding gift or a birthday gift? Ideas for wrapping gifts for different holidays - for the New Year you can do something multi-colored, and for original wedding gift design it would be useful to stock up on silver or gold dust; it will make a light box with a gift truly magical.
Do you want to pack a gift for the New Year in an unusual way? Pack it in craft paper and use original stamps (they can be cut from a regular eraser). Simply stamp craft paper or a box of craft paper with the stamp you created - white ink looks amazingly stylish on craft paper.
Wrap the gift box in white paper and make a wax seal. By the way, you don’t necessarily need wrapping paper; you can simply pack your present in regular newspaper (it’s better to take a stronger one).
Do you think what else you can wrap New Year's gifts in? Here are some ideas.
How to make funny packaging? How to pack a gift for a man? Use some masculine image - for example, wrap the items you donate in a “suit and tie” or make decor in the shape of a heart. Any guy will love this DIY gift box.
Should I show you a few more master classes on how to make gift wrapping? I have a lot of ideas for you, you can practice day or night - cool packaging materials are welcome!
Now you can wrap gifts yourself and make various cute boxes for gifts, or maybe they will make you think about handmade gifts or you will start doing handmade things? You should always try something new, even if that new thing is just wrapping handmade gifts.
Folding diagram:
And a video bonus. If you have nothing at hand except A4 sheet, then you can make a beautiful bag out of it for your gift, watch the video:
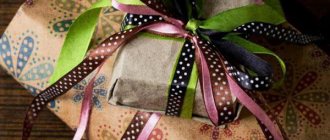
Decorations can be different: choose yours!
To choose how to decorate the box for your gift, you need to focus on the fact for which holiday it is intended and to whom.
So, all kinds of flowers, feathers, lace and satin ribbons, beads and rhinestones are suitable for women's gifts. If you know how to knit, then knit one or more lovely flowers, which you will stick using the same double-sided tape to any place on your box. A delicate flower made of chiffon will also look great, which is very simple to make: cut thin fabric into circles of different diameters, singe their edges over a candle to add texture, and then use glue to assemble them from the largest circle to the smaller so that you get a lush flower. The middle of this airy “creation” can be decorated with one or several beads.
You can also use the decoupage technique for decoration. This design is suitable for decorating boxes made of white cardboard. This technique involves pre-painting the product inside and out with acrylic paints. Then you need to give it time to dry. The next step is to paste the image printed on very thin tissue paper. An alternative to such special designs can be a regular colored napkin, split into two layers.
The design from the top layer is cut out, coated with PVA glue, and then glued to the product
It is very important to carefully straighten your “stickers”; a wide, but not stiff brush is suitable for this. After the glue has dried, it makes sense to varnish such a box, then after removing the gift from it, it will serve as a wonderful box for all sorts of little things
As for a gift for men, the decoration here should be more strict, but no less solemn. Therefore, a classic ribbon and a chic bow will come in handy.
However, they are not a panacea, so decorate gifts as your imagination dictates!
How to make a gift box
A worthy and convenient option for gift packaging would be an original handmade box. Depending on the volume and shape of the gift and the wishes of the master, gift packaging can be of almost any shape and size.
Small gift box
For a small souvenir, it’s easy to glue together a classic-shaped box from thick white cardboard.
Step-by-step master class.
- The first step is to cut two squares from a piece of cardboard. For the bottom part, you can take a size of 17 x 17 cm, in this case, for the pattern of the lid, the sides of the square will be 1 cm larger each.
- On the finished square parts it is necessary to draw intersecting diagonal lines. You can mark them with a simple pencil with a hard lead or a needle. In this case, the lines will not be noticeable later.
- Each corner must be bent so that its top coincides with the intersection of the diagonals.
- Then this part must be folded so that the fold line coincides with the diagonal. The fold must be aligned. To make the fold on the cardboard look neat, you can draw a fold line on the inside with a needle along a ruler.
- Manipulations are done with each corner, resulting in 3 folds on each side.
- The sides opposite the folds need to be trimmed a little. It is more convenient to use a sharp knife.
- Corners without cuts should be folded toward the middle along the folds and folded inward.
- Fold the ends and secure.
The box is ready. The second part of it is made in exactly the same way. Then the product can be signed or decorated depending on your desire and imagination.
For decoration, you can take ribbons, wrapping or colored paper, beads, rhinestones, stickers and any other suitable items.
Round box
Depending on the shape of the gift, sometimes a round box may be more appropriate and convenient for packaging. It is also easy to glue from cardboard.
Step-by-step master class.
- The first step is to cut out 4 circles. In this case, the diameter of the two blanks for the bottom of the lid must be measured approximately half a centimeter larger.
- Then mark and cut out the rectangular parts of the sides with a seam allowance. The width of the strips depends on the height of the box itself and its lid.
- The circles are wrapped in strips and glued.
After the glue has dried, the resulting packaging is decorated as planned.
When marking packaging parts, it is important that the size of the future product matches the dimensions of the contents. A round box can be made of any height from flat to quite high
Rectangular gift box
A rectangular box for gift wrapping or storing small items can be made quickly.
- To make it you will need an A4 cardboard sheet or half of it. The part from which the bottom will be formed should be half a centimeter narrower in size on each side.
- Measure 15 centimeters from each edge and draw stripes. You can use a needle instead of a pencil. In this case, the fold line will be more accurate. The main thing with a needle is not to break through the material.
- Make cuts at each corner along the line of the long side of the part until the drawn lines intersect. There will be 4 notches on each of the blanks.
- The sections are folded and fixed with glue.
Popular articles Congratulations on Spring and Labor Day
Convenient and easy-to-make packaging is ready.
Original boxes
If you want to make the packaging unusual, you can show your imagination and make a stylized container for a gift.
Cake box
A good idea would be to design the packaging for a gift in the form of its contents. For example, you can make a box in the shape of a cake.
For work you need to stock up on satin ribbons, velvet paper, fabric braid, and various decorative elements.
- In this case, the dimensions and shape of the blanks are copied from the finished cake container.
- To attach parts of blanks and decorative elements, it is more convenient to use double-sided tape.
Particular attention must be paid to the design of the lid. You can copy the design of a real cake or a suitable picture from the Internet.
It is important to make the packaging durable so that the contents are not damaged.
You can decorate packaging for other gifts in a similar way.
Decor of ready-made boxes
If you want to make an unusual box with your own hands for gifts or storing items, you can use the finished product as a basis. Shoe boxes are a good basis for decoration; they are durable and comfortable in shape.
For decoration, you can use gift paper, lace or thick fabric, such as linen or denim.
In addition, you need to stock up on PVA glue, scissors, measuring tape, a ruler and finishing elements.
The parts for gluing are cut out based on the shape and size of the base. They are glued using PVA glue. In this case, it is important to apply the glue in an even layer and carefully smooth the glued fabric onto the surface of the base, otherwise bubbles may form.
After the product has dried, you can start decorating. Depending on the idea or theme of the gift, you can decorate the box in a New Year's or folk style.
Penoplex box
Unusual materials can also be used to make original packaging boxes. For example, a building material for thermal insulation called penoplex. It does not absorb moisture, is durable, but easy to process and glues well.
Heart-shaped box
To work, first of all you need to make paper patterns. You will need a heart-shaped bottom and two pieces for the sides. After cutting out the parts from paper, it’s a good idea to “try on” to ensure that the sizes of the bottom and sides match.
- After this, parts are cut out of the foam sheet using a sharp knife.
- The edges of the parts are treated with sandpaper.
- It is better to glue the parts together with hot glue.
Making boxes for gifts and storing items is a simple but fun creative process. Original design will make any gift more enjoyable, and homemade boxes for storing small items will not only decorate the interior, but will also help save the family budget.
How to make a gift with your own hands
You will need:
- wrapping paper
- decorative ribbons
- scissors
- tape measure
- double sided tape
First you need to determine the amount of wrapping paper you need. To do this you need to cut out a rectangle.
* To find out the required width of the rectangle, measure the box around the perimeter using a measuring tape. After this you need to add 2-3 cm to the hem.
* To find out the length you just need to know that it is twice the height of the box.
Helpful advice:
If this is your first time wrapping a gift, test it on regular newspaper. This way you can determine the correct sizes.
1. You have cut out a rectangle of the required size from wrapping paper. Place the gift box in the center of the paper.
2. Now you need to bend the left or right vertical edge by about 0.5-1 cm and stick double-sided tape to the fold.
3. The gift box must be wrapped tightly. Remove the film from the tape and glue the folded edge of the wrapping paper.
4. The top part of the wrapping paper needs to be folded as shown in the picture. It must be pressed tightly against the end of the box.
5. The side parts must also be bent and pressed tightly.
6. To secure the lower part neatly, you need to bend it and press it against the end of the box. After this, you need to bend this part and bend it again, but now in the middle.
7. Glue tape to this part and attach it to the end of the box.
8. Repeat the same process on the other side.
How to decorate a gift. Option 1.
First you need to cut out a paper strip of a different shade. Wrap this strip around the box and seal the ends with tape. You can add decorative cord.
How to decorate a gift with your own hands. Option 2.
This option can be used if you have double-sided wrapping paper. Leave more paper around the width and use this part for decoration.
How to beautifully decorate a gift. Option 4.
A lace ribbon can also help decorate a gift. Wrap it around the gift wrap and secure the ends with double-sided tape.
How to wrap a gift beautifully
You will need:
- roll of wrapping paper
- double sided tape
- scissors
- bright ribbon
1. Prepare a roll of gift paper, unroll it on a flat surface (table) with the pattern down (wrong side up).
2. Take the gift box and turn it upside down. Next, place the box on gift paper.
3. Trim the paper, leaving a margin of approximately 2-3 cm.
4. Stand on the side where you have the roll. Stretch the paper on the opposite side and secure it with double-sided tape.
5. Unroll the wrapping paper and cover the entire box with paper. You also need to cover that part of the box that is slightly covered on the opposite side. The paper should extend beyond the edge of the box by about 2-3 cm.
6. Bend a margin of 2-3 cm inward and secure it to the box along the fold using double-sided tape.
7. The ends of the paper sticking out from the side need to be folded inward. You need to make four sashes that bend at an angle of 45 degrees. Next, bend the paper along the flaps.
8. The top flap must be carefully bent to obtain even corners. To achieve this, you need to bend along the top edge of the gift. Next, the sashes need to be bent again to get a line along which you can cut off the excess with scissors. Once you have cut off the excess paper, glue it to the box.
9. Do the same with the bottom sash.
10. Repeat steps 7, 8 and 9 for the other side of the box.
11. Prepare a bright ribbon that should be about five times longer than the box. Place the wrapped gift upside down on the ribbon, pull it tight and wrap the gift as shown in the picture.
12. Turn the box over. The ribbon needs to be tied in a double knot and made into a bow.
13. You can cut a triangle at the ends of the ribbon.
How to make a box for a women's gift on March 8?
Template No. 1 Template No. 2 Template No. 3
It just so happened, but for some reason most women associate March 8 with delicate branches of mimosa and scarlet tulips. That is why when making a box for this holiday, you must remember that there must be flowers on its outside. Whether they are drawn or made using appliqué is up to you to decide. The main thing is that your packaging shows with all its appearance that spring is coming very soon.
If you don't want to spend extra time decorating the box, then invest in scrapbooking paper. If you are ready to work a little, then you can download some interesting template on the Internet, make flowers using it and cover the finished box with floral applique. Also, if you wish, you can simply paint it beautifully.
Decor features
Decorating a homemade gift box is another important step in making packaging. There are a great many ways to beautifully and elegantly decorate a made gift box.
Let's look at several options for how to effectively decorate a gift box.
- You can decorate a gift box with beautiful bows of different sizes. Bows can be either small or lush.
- Multi-colored ribbons are a win-win option for decorating gift wrapping.
- You can put together a very beautiful and bright decorative composition from shining rhinestones or multi-colored beads.
- Drawn patterns or drawings look good on cardboard boxes. To do this, you can use different tools, but the most effective sketches are obtained using gel pens.
- You can wrap the box with cloth. It can be either light and airy material or thicker jeans or denim.
- A universal solution is special gift paper, which is sold in many stores. It can be used to decorate any box.
- It is also possible to add various stripes to the gift box. For example, these could be multi-colored buttons of different sizes.
- If we are talking about a box for a New Year's gift, then it can be decorated with a small Christmas tree branch or small Christmas balls.
- Decorative flowers made of fabric or paper look great on holiday boxes. Such details can be both small and large. Buds made from shiny fabrics that shimmer in the light look especially impressive.
- You can decorate the box with sparkles. They can be applied in different ways. Shiny inclusions will stick more reliably and firmly if you put them on glue. To do this, you should use a brush previously soaked in the adhesive solution.
- If we are talking about a present that is presented in winter, then you should turn to paper decorations. From snow-white paper you should make beautiful snowflakes of a cunning shape. Such elements can decorate any gift wrapping.
Popular articles Lemon-honey drink
Varieties
Depending on the type of material, gift filling can be made from different raw materials. For example it could be:
- paper (parchment, corrugated, craft, office);
- decorative tape;
- thin spiral rain of short length;
- foil rain for decorating the Christmas tree;
- a scattering of pink petals;
- sisal, mesh or regular sugar bag;
- translucent organza or decorative napkins;
- film for packaging flower bouquets;
- foil, silence, packing tape.
Each type of filler has its own characteristics. For example, thick paper holds the gift well, and therefore the item inside the box will not move spontaneously. Thin – good for lighter and smaller items. Craft wine is unique in that, with all its simplicity, it allows even the simplest gift to be made expensive at a moment’s notice.
Popular articles How to congratulate on Palm Sunday
Organza is a sheer fabric with glitter that holds its shape well. It doesn't take much to fill the empty space of the box. The colors of this filler are varied; it also differs in the degree of softness.
As for the most common packaging option, paper is in great demand when decorating gifts. It can become a backing and decoration for a gift; it can be used to fill empty spaces to secure the position of the gift. To do this, you can combine colors, choosing shades of a related or contrasting range.
Material selection
Making an attractive gift box with your own hands is not difficult. Such work rarely takes a lot of time, and the result is pleasantly surprising if everything was done correctly. Such gift wrapping will be in no way inferior to the store version. This is why homemade beautiful boxes are so popular today.
If you decide to make a gift box yourself, it is important to consider that you need to select suitable materials for this. They must be of high quality and reliable
The material from which such packaging is made should not fall apart or come unglued. After all, it will be very disappointing if such an incident occurs at the time of presentation of the gift.
It is recommended to use a special type of cardboard with high density when making gift packaging. Further, such a box can be supplemented with various decorative details made from paper intended for needlework. Cardboard boxes decorated with elements made using the origami technique look interesting.
In special art stores you can find everything you need to prepare a beautiful and high-quality box of any size and design.
However, not only thick cardboard can be used to create a beautiful gift box. Wooden boxes of different sizes look very interesting in this role. They can be decorated however you like. Wooden boxes complemented with carved elements look especially bright and creative.
A wooden box can be made in the form of a small chest, a cute box, a carved casket or a small cabinet with opening doors. Such gift wrapping will serve as a complement to the main gift, because later it can be used separately from the present. For example, it is good to place jewelry and accessories in such a container for storage.
Assembled origami boxes
Prefabricated packaging with original shapes looks interesting and attractive.
Pyramid
A small gift can be placed inside a fun pyramid box. It's not difficult to make.
The pattern can be downloaded from the Internet or drawn yourself.
- The basis is a square bottom, from which triangular shaped walls are drawn.
- The outer sides of the triangles are shaped like an arc.
- The tops of the triangles are complemented with holes for the ribbon.
- The finished pattern is folded along the fold lines.
Place a gift inside and tie it with a beautiful ribbon.
Packaging in the form of a flower bud
To make it you will need a template. The workpiece is cut out and folded along the fold lines. The box is painted or supplemented with decorative details.
Having placed the gift inside, the petals are folded and their teeth are fastened together.
Ready-made templates, assembly diagrams and images of similar boxes using the origami technique can be found on the Internet.
What do-it-yourself money boxes can be like?
Idea 1. Magic boxing
We have already looked at Magic Box many times on the blog pages from different angles, and even made them with our own hands. Why not consider them as a money box? An inconspicuous box that, after removing the lid, reveals its inner, fairy-tale world. And at the bottom, in the very heart of this box, lies a treasured bundle of money. An example of such an application (and at the same time a master class on how to create it) can be found here: Autumn magic box.
Idea 2. Box with a gift and a compartment for money
Do you know that if you glue some kind of envelope to the top-opening lid, you can turn any box into a box for money. Making it is also quite simple. Moreover, with this option, when in addition to money there is also a small but pleasant gift inside, the impressions are enhanced. This has been verified.
I suggest you take a look at my favorite master class: a universal do-it-yourself money box. It perfectly demonstrates what I wrote above. Inside that same package, I placed handmade coffee soap on one side, and on the other, the same envelope with money. But who said that you should limit yourself to only these gifts)))
Below you can see a sweet version of the gift (the photo is not mine, I specifically leave the name of the master’s account).
Idea 3. Chest of drawers
A cardboard chest of drawers is a thing that can not only serve as an unusual handmade box for money. After all, if you look closely, this is a 3-in-1 gift! This lovely little thing can serve as an independent gift in itself. Plus money...
In addition, you can add something small, some pleasant trifle, to a monetary gift: candy, a mini-album for photos, handmade magnets, a postcard, gingerbread, etc.
Of course, this method is not the fastest. If you make such gift wrapping yourself, you will have to spend time creating it. But the effect of such a gift will be very, very noticeable! And it's been verified!
In turn, to make your task easier, I offer a choice of two master classes: a box using the cardboard technique and a mini chest of drawers made of cardboard.
Idea 4. Treasure chest
A very logical way to give a cash gift. You can play up the presentation of a gift using a quest, when the recipient, together with a team of like-minded people, will look for the treasure))) It's fun! And verified
There are a great many chest assembly schemes on the Internet. I suggest this (click to enlarge):
Idea 5. Quick DIY box
While I was writing the previous paragraph, I remembered a recent article about the creation of mega-fast bonbonnieres using proven schemes. Why not options for unusual DIY money boxes? By the way, there was also a chest there, only of a different shape.
All these boxes, or rather most of them, can be safely used as containers for the most universal gift))) Still, this is more interesting than a simple, familiar envelope.
Idea 6. A box like for sweets, but instead of sweets there is money
What if you create a beautiful box with transparent windows, the kind I usually use for sweets or... like for mini soap, for example (I talked about such a box here). But instead of candy or soap, put money inside. Neatly, in small packages.
You give such a gift and observe the surprise of the recipient. It's unexpected! He expects anything in such a box, but not banknotes. And here's a surprise!
Idea 7. A small box for money similar to a matchbox or sweet box
On the Internet you can find many similar examples of simple do-it-yourself money boxes based on the matchbox principle. I made a men's suite box in a similar way. Only if you are making this box for a cash gift, then you should take care of how to secure the bills. Usually this is a small arc under which twisted money is pushed.
Popular articles Satin ribbon headband
I'll attach a few of the options I've seen to the gallery. The trick is in the details!
Idea 8. Ordinary box. Ha ha!
Okay, don’t be scared))) Brownie-Art wouldn’t be art if everything was completely ordinary. A box for money can be even the most ordinary one, that’s true. But if, in addition to money, you add unusual or pleasant details inside...
For example, a model car, or a tag postcard, or a keychain, a bag of goodies, etc. And then lay it all beautifully on a bed of raffia or sisal, or even just an unusual napkin. Even a simple banal box will look super advantageous!
Box with a surprise
Small trinkets, packed in beautiful boxes, made and decorated with your own hands, are sometimes valued much higher than regular bouquets and sweets
To show attention and respect, it is better to spend more time than money
This is one of the most wonderful gift ideas. The box opens on its own, you just have to lift the lid. There is some small surprise attached to the bottom: a cake, a folded banknote, an ornament or a decorative composition.
Several parts for the box are cut out (the internal ones are slightly smaller). The ribs are not connected by anything, only the lid is glued. Since the product will be quite fragile, the lid should be easy to remove. You should take this into account when decorating the box.
A bow or picture is glued to the top. Three-dimensional decorative elements, photographs, and cards with wishes can be attached to multi-layer walls. Even tea bags will come in handy if there is a sweet present inside. You can place small decorations in the center on springs or strips of hard plastic. Flowers, butterflies or confetti will fly up and out when the lid is lifted.
Popular articles Children's ottoman
This box is called a magic box, it is a bright representative of products using the scrapbooking technique. The magic box can be themed for any holiday
The main thing in this work is attention to detail and maintaining the overall style. And, of course, a sense of proportion
Regular cardboard box
If you don’t have free space to put buttons, elastic bands, threads, hair clips and other small items, you can use the simplest method of making a cardboard box. It can be built even just from paper, but at the same time it will be very original and beautiful. Of course, it is better to use cardboard, since this material is the most durable and will last quite a long time.
In addition to the main material, you will need regular glue, tape or a stapler, a ruler, scissors, and a glue stick. For production, you can use not only ordinary white, but also colored cardboard. To make the assembled box with your own hands neat and beautiful, you should prepare all the materials in advance.
Pillow box
Having warmed up with origami, we decided to make a “pillow box” in which it is very convenient to put candies.
Notes and tips:
1. Before folding the box, crease along the fold lines - push them with a non-writing pen or other thin, but not sharp, object. Without this, it will be almost impossible to bend a sheet of paper along a curve. (In general, we advise you to press through all the places where future folds are made.) And another piece of advice - it’s easier not to print it out, but to draw a diagram of the box yourself. Yes, to draw a line of valves, you will have to use a handy round object, but then it can be used instead of a ruler when creasing, because this cannot be done accurately by hand.
2. The valves on one side can be pierced with a hole punch to insert the ribbon. But we don’t recommend trying to glue them together: it’s almost impossible to press the valves together for the glue to set, and besides, they already stay closed very reliably.
3. For this box we took pastel paper (16 rubles per sheet). The density of 160 g/m2 was perfect for a small box, and the velvety surface recalled the starry sky and inspired decor.
4. To decorate the box the way we did, choose the constellation you like and draw it with a white gel pen (it’s better to do this on an unfolded box). To glue the stars (again favorite “Leonardo”, RUR 72), dip a cone of toothpicks into the glue, make a dot on the paper and attach the star. We used PVA glue, but keep in mind that it does not hold synthetic materials very tightly. Secondary stars can be made from simple small sparkles (they will cost about half as much as curly ones) - also apply glue to the paper and sprinkle some fairy dust on this place.
Bonbonniere
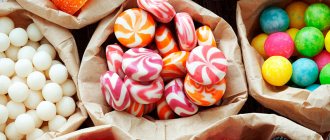
Perhaps this is the most common type of gift boxes. Translated from French, its name means candy bowl. In tall, voluminous ones they give loose sweets, like glazed nuts. The flat ones contain fragile candies with filling.
Traditionally, such bonbonnieres are given to guests at a wedding. Although, as a sign of gratitude, this gift is always appropriate. You can put any pleasant surprise in such a cute box. The following diagram will show you how to make a gift box in the form of a bonbonniere.
If you bend the workpiece along the fold lines and insert the rounded parts of the heart with the slits into each other, you will not need glue. To make the ribbon look neater, it is glued not along its entire length, but in two or three places.
Another themed bonbonniere, decorated with a snowflake, consists of two parts - the bottom and the main part.
Parts of the snowflake can be immediately painted with silver paint on both sides. The workpiece is rolled along vertical ribs. One side is glued. For such a small area, it is better to use a glue stick rather than a liquid one. The hexagon bottom is glued on all sides. The top gathers into an openwork snowflake.
How to pack gifts in gift paper in a box?
It's even easier to wrap a gift that's in a box. In this case, you can make the box yourself or use factory packaging or a cardboard container that you find at home.
A homemade box is cut out of thick paper or cardboard, then assembled and decorated to your taste. Using this template, you can cut out mini boxes in the shape of a cake and give each guest a “piece” of the surprise. A square box can be wrapped in soft corrugated paper without having to worry about trimming the edges. Let the cute “ears” remain, which can be decorated with a bow. Even the most ordinary box can be turned into a real masterpiece. For example, a gift that is small in size but valuable in its content can easily be hidden in an unsightly box, and decorated in some unusual way. Wrapping a large gift in paper is just as easy and simple as wrapping a small one. It will only take a little more paper and time to design the finished composition.
However, if you make do with one ribbon, a few layers of wool threads and a tiny knitted item, you will have a great minimalist decor.
Look at a few more gift decor options and adopt a few ways to wrap gifts in gift paper in an original way.
Where to hide a huge secret
A very large gift box can be a problem. If the gift is given in factory packaging, it is easier to cover it with wrapping paper and pin a bow of paper ribbons. But if you want to use your imagination, you can, for example, paint such a box with spray paints and attach a plush toy to the top.
The gift can be large and heavy. If it is installed in advance in a room for a party, you can make a box without a bottom. At the moment of presenting the gift, the box solemnly rises and... there!
Oddly enough, large boxes are also made for small gifts. This is for lovers of intrigue. One box opens, and then another, and another, and another... Or maybe multi-colored balloons filled with helium fly out from under the lid? Or live tropical butterflies? There is no limit to modern possibilities.