A simple and interesting idea will help diversify a home holiday or street party for children and adults. A bright and original piñata is not only a voluminous type of decoration, but also a fun and entertaining entertainment for guests invited to the celebration.
It’s easy to make such exclusive decor yourself without spending money on buying a ready-made presentation. Manufacturing will take time and inspiration, so prepare for the creative process in advance and select thematic sketches and necessary materials.
How to make a piñata with your own hands? DIY piñata: master class
In Mexico, piñatas are made for children for any occasion. These are quite large toys, inside of which they put sweets, confetti, glitter, in general, holiday attributes. Such fun could be of different shapes, but were mainly created in the form of animals or geometric shapes. Initially they were made from papier-mâché or colored paper. Now we will talk about how to make a piñata with your own hands.
These toys came from Mexico, then children in Latin America began to play with them, and this was several centuries ago. However, even now a wonderful game is played for children mainly on the occasion of a birthday or New Year.
The piñata is hung at the level of the child’s head and given to him with a stick or bat, he hits the toy, and when it breaks, candies, glitter, in general, all the contents fly out of it. This brings children to indescribable delight. This was the original scenario, but you can easily come up with your own. The main thing is that the children find it interesting. It is not necessary to break the piñata; you can make it simply open, then the child will be able to play with it after the holiday.
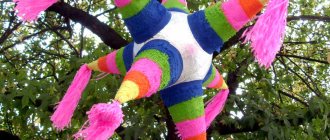
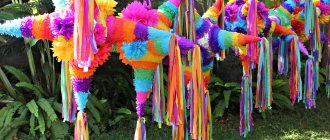
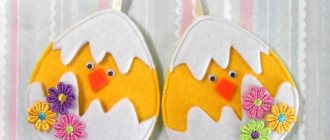
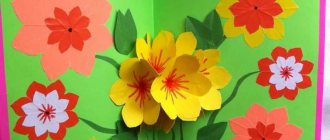
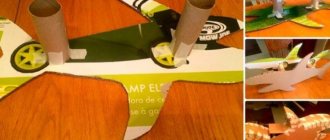
Pinata shape, photo
As already mentioned, the piñata can have different shapes. We have selected for you several photos with options so that you can clearly see what beautiful toys you can make with your own hands for your child’s birthday.
How to make a piñata
Inflate the balloon to the required size and tie it. Now you need to cover it with newspaper scraps. The first layer of paper will be attached to the ball with water, so that after the entire process is completed, it can be easily pulled out from the inside. To do this, we lower the newspaper scraps into the water and cover them with them. The ring of the balloon for inflation should not be sealed, because when everything is ready, we will remove it from the toy. When the entire surface is covered with the first layer, apply the next one, but using PVA glue or one made from flour. Now, instead of water, scraps of newspaper are dipped in glue, and the whole procedure is repeated exactly. You need to make 3-4 layers - this way the toy will be strong, but at the same time, upon impact, it can break in order to give away all its contents. After each applied layer, the piñata must dry completely, and only after that the next sheet of paper is applied.
What can you use to fill a piñata?
If you are preparing a piñata for a children's party, its production will definitely include an interesting choice of filling that will appeal to the birthday boy and guests:
- confetti and streamers. These decorative decorations will help make the process of breaking the piñata more spectacular and turn it into a real spectacle;
- small toys. The best option would be to choose small and soft souvenirs; they should not harm any of the guests or the hero of the occasion;
- gifts for guests. For boys, you can put cars or soldiers; for girls, it is better to choose elastic bands, hairpins, and bracelets.
- delicious sweets. It is better to choose small and light sweets (wafers and lollipops), because in the process of breaking they will fly over the heads of the guests;
- nuts in shell. Anything that spills from the piñata will fall to the ground or floor, so treats should be properly protected with packaging and wrapping;
The paper piñata should not tear under the weight of treats and toys; it is important to correctly calculate the weight of the finished decoration.
Hanging mount
Let's move on to the next stage of how to make a piñata with your own hands. When the mold is completely dry, you can remove the ball by untying it and releasing the air from it. Now you need to think about how the entire structure will be suspended. To do this, you should prepare a beautiful ribbon on which everything will hang, and tie a stick at the end. It needs to be inserted into this hole and placed across it. This is a fairly reliable fastening method. However, to be more sure that when struck, the piñata will not fall off prematurely, you need to cut a circle out of cardboard with a small hole into which to insert a ribbon and glue it to the body of the piñata. The additional seal will hold everything more securely.
The second option for hanging a piñata can be a wire hook. It is also inserted into the hole that remains from the ball, only the spacer is made of wire, and the ring comes out. And also everything needs to be carefully sealed so that the toy does not fall prematurely from impacts.
Pinata - content, ideas
Any child is interested in finding out what is hidden inside the piñata. And its content may be different. Most often it is filled with bright glitter and sweets.
We would like to present you with a list of what can be placed inside:
- Chocolates.
- Lollipops on a stick or in packages.
- Real coins.
- Small toys so that each guest leaves the party with some gifts.
- Nuts.
- Confetti.
- Glitter.
- Cookie.
- Key rings.
- Wishes in the form of notes.
All these things can be placed in one piñata at once, so you don’t have to choose one option. The main thing to remember is that they should not harm the child if they fall! Therefore, do not place anything heavy or large inside the toy. Edible surprises must be well packaged.
If you don’t want to worry about what to put inside the toys, then buy ready-made sweet sets for children at any supermarket or eco-friendly store.
Complex piñata shapes
Now let's look at how to make a piñata with your own hands, but in a more complex shape. There are quite realistic objects in the form of people, for example. The more complex the shape, the smaller the paper needs to be torn for papier-mâché. This will allow you to make a more realistic object, showing all the protrusions, even the smallest ones, without folds. In complex layouts, toilet paper is used because it is very thin and does not wrinkle when dry.
For complex piñatas, you first need to make a mold; the most convenient and common material for this is plasticine. Firstly, it is greasy, making the paper form easy to come off after everything dries, and secondly, it is easy to work with.
How to remove a complex shape from papier-mâché
When creating complex images, the technique is slightly different. When everything is covered with paper and dry, you need to somehow pull out the plasticine blank from inside. To do this, the paper model is cut into two parts so that everything from the inside can be removed. After removing the plasticine object, the paper mold is glued back together and at least one layer of papier-mâché is applied on top. This way everything will hold up much better. Once the model is dry, you can begin painting. Here's how to make a piñata with your own hands in a rather complex shape.
Technologies and methods for making piñatas at home
If the piñata sketch resembles a ball, oval or drop, you can use a balloon and papier-mâché technique. The ball is covered with 5-10 layers of newsprint and carefully glued with PVA glue, which can be diluted with a small amount of water. You can replace PVA glue with dough; to make it you will need to prepare a small amount of flour in hot water (3 tablespoons of flour per 1 liter of liquid) and cool the composition.
To create complex shapes in design and shape, cardboard is used, and blanks are cut out from the template. The parts are held together with paper tape or strips of paper and vinyl glue, and it is important to avoid fixing them too securely. If you glue the figurine well, the child may not have the strength to break it; you can use various materials and decorations for decoration.
Creating a perfectly flat surface on the piñata
However, if a smooth surface is needed, then papier-mâché is sanded. Sandpaper is used for this. When everything is smoothed well, coat the surface with glue - it will give the paper form a finished look and remove any roughness left during sanding. When the glue has dried, the toy is completely inspected, and if there are any flaws anywhere, they are spot-fixed.
Only when the master is completely satisfied with the form is it painted. Any paint will do for this. If you take gouache or watercolor, then to make the surface shine, they are mixed with glue, which, firstly, will protect the surface from moisture, and secondly, the paint will shimmer in the sun. Sometimes glitter is added to it, in general, the main thing is to improvise and try to do it.
Some professionals varnish their products after painting, but such piñatas are not broken; they are stored as an original element of the interior.
The article described how to make a piñata with your own hands. The master class described the entire process in detail - from beginning to end. We started with a shape that was simple enough to make a piñata for kids to enjoy, and then moved on to how to make a real piece of art in any shape without relying on a ball.
Despite the fact that the tradition of putting gifts in piñatas is very old, in our time it has gained a new breath.
This handmade “expectation is reality” is a very strong piñata.
A couple of years ago, my husband and I decided to organize a party on the theme “Birthday at Hogwarts” for our son’s sixth birthday. Animators are for weaklings, we thought))) No one organizes a holiday for our child better than ourselves, we thought))))
We rushed into preparation with enthusiasm - we wrote a script, selected actors among friends, sewed costumes, made props.
One of the elements of the holiday quest was the “Rainbow Dragon Egg”, in which a certain wizard hid treasures. According to my idea, the children had to find this egg and break it with wooden sticks.
I started making the first (I think the last) piñata in my life. I made a paste, took printer paper (newspaper? No, I didn’t hear that), inflated a huge balloon - and for several days in the evenings in the bedroom, secretly from my son, I glued this multilayer egg layer by layer: