DIY piñata at home in 1 day from cardboard
What to do if there is a party tomorrow and you urgently need a piñata, or even worse, guests will arrive in three hours, and you have nothing to surprise them with? It turns out that a piñata can be made in such a short time and you don’t need to bother with papier mache!
All you need is any cardboard (equipment boxes or even cereal boxes), tape, scissors and crepe paper, which you can buy at your nearest stationery store.
If you have a solid piece of cardboard - great, if not, then glue several pieces together with tape to get a sheet of the desired size.
- Draw the desired shape, for example a shark.
- We need two such parts. Between them, for strength, we attach supports, for example, paper tubes or cups or rolled cardboard. Secure with tape. All that remains is to cover the side parts with strips of cardboard. It's not difficult, we cut out strips of the required width and fix them with tape. Cardboard bends great!
Don't forget to add filling.
- Decorate with paper.
- You can take colored paper, newspapers (for a vintage piñata), magazines, crepe paper (ideally).
- We cut off the strip, make cuts on it, twist it a little and glue the strips overlapping until we fill the entire cardboard.
- You can cut small rectangles, but gluing them into strips will be faster.
- Some of it can be simply covered with paper.
- If you made it from white paper, then use a spray can or regular paints to tint it to the desired color.
For example, a dinosaur was made using the same method, but covered with corrugated paper.
Filling, stick, paste for piñata
How to play. In addition to the piñata, you need a stick. She will strike. The goal is to break the hanging bright figure in order to get the surprise hidden in it.
Who can participate? Children, from very little ones to adults. Most often, such fun is prepared for the boy. But girls can also have fun, and even adults can have fun like this.
What shape? This is where you can let your imagination run wild. It could be:
And many many others.
Halloween pinata
It's hard to imagine planning a fun Halloween without some fun. You can make a piñata in the shape of a pumpkin or a bat, and a small figurine of a ghost will add a special atmosphere.
- To make a bat you will need two balls, glue, tape, and black paper.
- The first step is to inflate the balloons, one should be small, it will serve as the head.
- Then secure them with tape.
- Then glue layers of paper on them, letting each one dry well.
- Once you have achieved the strength of the mouse's body, you can pierce the ball and pull it out.
- Next, fill the piñata with the necessary elements.
- To create the wings, use black cardboard.
- After cutting them out, secure them.
- Eyes, teeth and ears need to be glued to the head.
- The finished version can be hung in the room.
History of appearance
There is an opinion that the breaking of piñatas was carried out by the Chinese during the New Year holidays, in anticipation of spring. The figurines were made in the shape of domestic animals, cows, bulls, buffaloes, they were decorated and placed inside 5 types of seeds. They were broken with multi-colored sticks.
Interesting! All wrapping paper was burned after the process and stored for a long time, this promised good luck.
It is believed that the great traveler Marco Polo saw and told about the piñata. His compatriots liked the fun and adopted the tradition, replacing the seeds with souvenirs and candies. The name comes from the Italian word “piniatta”, which means “fragile pot”.
In Spain, the piñata was given a religious connotation; the missionaries so wanted to convert the local population to Christianity that they presented this process as a fight against the devil. And breaking the ball with a bandage on the face symbolized unconditional faith in God.
Interesting! In Mexico, where the game came to us, it was perceived as innocent entertainment, without which not a single holiday could be completed.
For Christmas and New Year
For such holidays, it is worth making a piñata that displays the New Year's attribute. It can be in the form of Christmas tree balls with bright confetti inside, snowflakes, in the shape of a snowman, or a unicorn. The filling is made with predictions; small gifts for the whole family and guests, holiday cards are also suitable. Try to convey the festive mood in every detail.
For a New Year's piñata, you will need materials identical to the usual one, the only condition is that the decoration must be made in accordance with the theme. It is better to take an oblong ball. When all the papier-mâché layers are dry, remove the ball.
Cover the top part with colored foil and tie ribbon bows on top. Then use corrugated paper to make decor - snowflakes.
The most popular shape of piñata
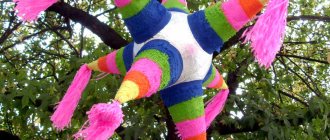
The most common shape of a piñata in Mexico is a kind of sun or star. This piñata has a round base made of a balloon.
To this base, in a chaotic manner, a kind of rays are attached, folded into cone-shaped sheets of cardboard. A piñata of this shape is not so easy to break, but it only adds interest to the competition.
Pinata "Unicorn"
Children especially loved the animal-shaped piñatas. Most girls just dream of seeing a “unicorn” on their birthday. And we can give this to them by creating a piñata.
We will need:
- cardboard;
- corrugated paper (white, blue, pink and purple);
- white sheets of paper;
- pencil;
- ruler;
- PVA glue;
- finger glue;
- glitter;
- glue gun;
- glue brush;
- scotch;
- rope;
- scissors;
- black marker.
- On a large sheet of cardboard we draw a silhouette of a unicorn measuring 60 by 70 cm.
- Cut along the contour.
- We attach the cut out figure to another piece of cardboard and trace it along the silhouette.
- We cut out the second part, we get two identical halves.
- Now we need to take sheets of cardboard, which will become the connection of these two parts. A width of 13 cm would be suitable. Lightly crumple each strip so that it more easily follows the shape of the curves of the unicorn’s body.
- We take a glue gun and apply glue to the area to which the connector between the two halves will be attached.
- We glue the whole animal in this way.
- We apply the second half of the silhouette, gluing only the legs. We will fix the rest with tape. It is necessary for the legs to be the weakest point.
- Take two pieces of cardboard and bend them in half, as shown in the photo below.
- We make a hole in each of the parts.
- We insert a rope inside and tie it so that it is fixed to the cardboard.
- We wrap it with tape for better fixation.
- We make a hole in the back.
- We do the same at the base of the head.
- Insert the blank with a rope.
- Secure with tape.
- Wrap the unicorn with tape to secure all parts.
- Take a piece of paper and cut strips.
- We paste over the body of the animal.
- Take another sheet of paper and roll it into a cone shape.
- Using finger glue, glue the edge so that the cone is fixed.
- In a container, mix PVA glue with glitter.
- We paint the base of the unicorn’s legs—the hooves—with the resulting mixture. We do this over a newspaper, as the glitter will crumble.
- We do the same with the future horn.
- We take white corrugated paper, cut it into strips 4 cm wide, make cuts on one side.
We get the following:
- We glue it to the animal’s legs and to its entire body.
- We take the future horn, make small cuts on it at the base, bend them, and apply glue to these areas.
- We fix it in the right place. We also go through the top with a glue gun.
- Take the remaining sheets of corrugated paper and cut them into thin strips. This will be the future mane and tail of the unicorn.
- Apply glue to the area for attaching the mane.
- We sequentially glue strips of different colors.
- You can make shorter stripes at the front.
- We do the same with the tail.
- We take cardboard, draw eyelashes, and decorate them with a black marker.
- Cut it out and glue it to the place where the eyes should be.
- We make a hole under the tail. It is through this that we will place all kinds of sweets into the unicorn. After which you can simply lower the tail or cover the hole with tape.
So we can create a beautiful piñata with our own hands.
Easy option
First, we'll look at how you can make a piñata quite quickly and easily.
We will need the following materials:
- five types of corrugated paper (different colors);
- balloon
- lace;
- needle;
- scissors;
- glue;
- glue brush;
- newsprint;
- thread;
- sweets.
Inflate the balloon and tie it with thread.
We take newsprint, or just newspaper, and tear it into pieces. We apply glue to each and paste it over our balloon like papier-mâché, not forgetting to leave space for the tail of the balloon. Apply three layers of newsprint to the ball and leave it for the glue to dry.
When everything is dry, take a needle and pierce the ball with it in the place where there is a hole in the paper.
When the balloon deflates, you need to carefully remove it. Now through the hole we can place all kinds of sweets inside.
We cut out a circle from paper, make two holes in it, through which we insert a string.
We apply it to the place where there is a hole in our future piñata. Glue it to the ball as shown in the photo.
We take corrugated paper, cut it into strips, on each of which we make small cuts on one side.
It should look like the photo below.
We paste the cut strips over the ball in such a way that if we take hold of the string glued to its base, turning the ball upside down, then all the cut places will “look” down.
This way you will get the following result quite quickly:
How to make a piñata with your own hands from a balloon and papier mache
We will need:
- Balloon,
- Flour – 50g;
- Newspapers;
- Water – boiling water (500ml) and cold (200ml);
- Starch – 2 tsp;
- Tape – 20-30cm
For decoration:
- Corrugated paper, sequins, ribbons, foil.
How to do:
- Cook the paste. Mix flour with starch and add cold water. Add boiling water. Stir until smooth. The mixture must cool before use. There is an option without paste; PVA glue is used instead.
- We cut newspapers into strips. But you can tear off small pieces. This is not important.
- Inflate the ball.
- We glue pieces of paper soaked in pastes onto it. If you want to use PVA instead of paste, then the first layer of leaves does not need to be coated with glue, but simply moistened in water. This is necessary to make it easier to deflate the balloon later.
- We paste the entire ball in one layer and let it harden for an hour and a half. We leave only a small hole at the “tail” of the ball.
- After a while we make another layer. Again, let it dry completely before moving on to the next layer.
When all the layers have hardened well, you can carefully deflate or pierce the ball, and therefore remove it.
Now let's decorate the blank.
An oval (or round, depending on the shape of the ball and its degree of inflation) shape is suitable for many shapes, for example, you can make Angry Birds or Kinder. Depending on who we want to create, we use multi-colored paper or cut out figures from it, all sorts of glitter.
This is an important part, because the toy should be colorful, emotional and original. Therefore, think in advance who you want to make, you may need a pattern for the ornament. Or you can simply decorate with corrugated paper, as in the picture.
All that remains is to put a surprise inside.
Using a stapler and ribbon, we attach loops to hang the piñata.
Method one - from paper strips
This is the classic way. Strips from old newspapers will do. The size of the strips depends on the size and shape of the product, optimally 1-2 cm wide and about 20 cm long. You will also need a large balloon, which we will cover with stripes. For gluing, you can use flour paste, which must be pre-cooked. For the paste we take flour and water in proportions of approximately 1:4. Since the piñata is made from 4-5 layers of paper, this is how many times you will have to cook the paste, because the finished paste cannot be stored for a long time, and each layer must be thoroughly dried for 24 hours. You can replace the paste with PVA glue, slightly diluted with water.
We carefully dry each layer of paper, which is why the manufacturing process turns out to be so long. We leave the place where the ball is tied unsealed - through this hole we will fill our piñata.
When all the layers have dried well, burst the ball and take it out. We have a blank that needs to be decorated. Usually corrugated paper fringe is used for decoration. Here everything depends on your imagination. If you are having a holiday in the Angry Birds style, then you should make a piñata in the shape of an angry bird.
Now you know how to make a piñata out of paper. In fact, this is not so difficult, and even the little hero of the occasion can handle it.
Round pinata
Using simple steps, you can create a round piñata that looks like a soccer ball:
- First you need to inflate a latex ball with a pump, tying the ends with thread;
- Making a frame from papier-mâché based on paste;
- After waiting for it to dry completely, cut the tail of the ball to easily deflate it and remove it from the base;
- Then you can fill the piñata with various little things. You can put candies, chewing gum, key rings. After which you should hang it by the fasteners;
- At the final stage, it is recommended to decorate the product.
Piñata game
Now we’ll tell you how to play with a piñata:
- The toy is placed in the prepared place.
- The birthday boy is blindfolded.
- He takes a stick or bat in his hands and starts swinging it, trying to hit the piñata. The guests stand in a round dance and clap their hands.
- When he “gropes” for it, he makes a strong blow, and the toy breaks, delighting all the guests with a real fountain of emotions.
DIY piñata in Ladybug style
Games for children will become much more exciting if their favorite characters participate in them. Let's “invite” Lady Bug herself to the competition!
Maybe she will “give” some goodies to our kids if they win?!
But to make the competition fair, let's make our piñata durable:
- Cut out 2 circles and a wide strip, the length of which corresponds to the circumference.
- Glue a strip along the contour of one circle.
- Let's attach a small tube in the middle of our workpiece (length of the tube = width of the strip). This will make the structure stronger.
- And, before we glue the second circle, let’s fill the inside of our “box” with candies/fruits/confetti.
- We will definitely strengthen the structure at the seams.
- Now we will cover the workpiece in 3 layers with newspapers.
- All that remains is to decorate. Let's cut out strips from napkins or corrugated paper, one side is flat and the other is wavy.
- Black stripes are suitable for gluing the side.
- Decorate the outer part of the circle with red.
- We will cover the inside of the workpiece with white stripes.
- We will do this on one and the other side of the workpiece.
All that remains is to find a suitable picture on the Internet to download it.
And one more little touch: we cut out little black circles and place them on the red part of our piñata. Now we can begin our competition. The enemy is ready!!!
How to fill a piñata
There are many options for filling a piñata for children. The main thing is not to use fragile, breakable or sharp objects that can injure the child and others. You don’t need to fill the toy completely, but about halfway, so that there is empty space left. This way the piñata will not be too heavy, but when struck, it will begin to swing and twist.
Sweets and tinsel
The classic filling of the toy is sweets. The candies should be light and small, because they will fall on the baby’s head. It is better to choose toffees and lollipops. Chocolates can be significantly damaged during the beating process. Another filling option is confetti and tinsel. Adding small pieces of foil can make breaking the piñata more spectacular.
Toys and souvenirs
When choosing toys to fill a piñata, you should know that they should be soft and small so as not to weigh down the structure and not to injure the child after breaking the product. Figures of soldiers, small cars are suitable when the hero of the occasion is a boy. Rubber bands, bracelets, bows and hairpins - such “stuffing” will be welcome at a girl’s party.
DIY Lego pinata for a boy for a children's birthday
Not only circles and simple figures can be used to make piñatas, but also more complex ones, with a “pattern” and small details. Now I’ll tell you and show you how.
- First we look for a hero figurine. In our case, this is Lego Joker. Download and print an enlarged template.
- Cut out using this Joker template. We need 2 identical parts.
- We need another long strip. In order for the strip to bend well, we knead it, rolling it into a tube in one direction and then in the other, as in the previous MK.
- Now we glue a strip along the contour of one part. And then we glue the second part to the strip. For strength, we secure the structure with tape in separate places.
- It is very important to apply the pattern to the front part, drawing all the details of the “pattern”: shirt, tie, suit.
- We glue one more detail to the head - the Joker's fluffy hairstyle.
- Now we paste over the sides, back and front with strips of corrugated paper cut into teeth. Let's take the pattern into account! A shirt is one color, a suit is another...
- We decorate the face with lush eyebrows, evil eyes and a scary smile.
Yes, this Joker is just asking to take a bat and hit. But in fact, this figurine is kind. And for a well-aimed blow he will give us candy!
How to decorate a piñata
Most often, the piñata is decorated with corrugated paper in bright colors. It is cut into strips, circles or flowers and glued to the base with PVA glue or double-sided tape. Small parts are used because at the moment when the piñata breaks, nothing should prevent the contents from spilling out easily. Pieces of crumpled paper, thin strips of paper and confetti are also used as decoration.
Teenage Mutant Ninja Turtle Pinata
The blank for this piñata can be made according to the master class of the bird from Angry Birds. The only thing that will differ is the decoration, which will require:
- corrugated paper - green and orange;
- printed eyes and mouth for a turtle.
- After gluing and drying the ball, you can begin decorating it with the specified materials according to the following simple instructions:
- Make a lot of fringe strips from green paper, almost covering the entire piñata, and only 4-5 from orange paper.
- Paste the latter in the middle. Use green to decorate the remaining surface of the ball.
- Fill with filling and cover the hole with adhesive tape.
- Make a turtle bandana bow on the side, as shown in the photo.
Balloon piñata
It is worth noting that a festive product of this type does not have to be knocked down with sticks. In order to give him a fun challenge, you can also use darts. Kids or adults can throw them into a ball filled with sweets from a certain distance. The advantage here is the ease of making such a piñata. After all, it is impossible to do it using the two methods listed above, since it is unlikely that it will be possible to break a box or a piece of papier-mâché using a dart. For such a test, you can make a piñata from an ordinary ball. In order for almost all guests to participate in the competition, several should be made. For this you will need:
- Balloons;
- plastic bottle with a wide neck;
- beautiful packing tape;
- multi-colored markers;
- colored paper;
- PVA glue.
To fill a regular balloon with little surprises, use a wide-necked plastic bottle. Cut off the bottom and pull the ball over the neck. You will end up with a fairly wide hole that will serve to fill the ball. Once the piñata is filled, tie the ball with a beautiful ribbon and start decorating it. This can be done in several ways, for example, by depicting the faces of funny animals on holiday accessories. Ears, mustaches, eyes and tails for them can be cut out of paper and glued to PVA. If the option with animals is not suitable, since you will be making a piñata for an adult party, put various interesting inscriptions on it. These can be humorous phrases, congratulations or wishes.
You need to give your wife a wedding anniversary gift in such a way that she will remember it for a long time. One bouquet of flowers is not enough here! Any bachelorette party requires accessories. Find out which ones from our article! At the following address https://banquettes.ru/stsenarii/vecherinka/kak-organizovat-v-stile-mafiya.html you will read about how to organize a mafia-style party and look at interesting thematic photos from such an event.
You can organize a party using a piñata for absolutely any occasion - be it a birthday, New Year or even a wedding. Save a competition like this for when the event gets a little boring. And if this, fortunately, did not happen, offer to break it for the heroes of the occasion at the very end of the evening. Well, in conclusion, the easiest way to make a piñata awaits you - let's watch the video and learn how to make such an important accessory for any birthday yourself: https://www.youtube.com/watch?v=wGDMToYktt8
Pirate pinata
Another type of piñata, where the blank is a ball using the papier-mâché technique. You can make it according to the instructions in the first master class. For decoration you will need:
- black corrugated paper – 10-12 sheets;
- orange corrugated paper - 1 sheet;
- printed image of a skull – 1 pc.;
- stick – 1 pc.;
- black cardboard – 1 sheet.
The design here is very simple, even a child can handle it. Having made the blank, you can start decorating according to the following instructions:
- Cut fringe into strips from black corrugated paper and cover the entire ball with them.
- Paste an image of a skull on top.
- Attach a short cylinder made of black cardboard to the side. Insert a stick into its center, and glue several short strips of orange corrugated paper to it.
mama-knowet.com
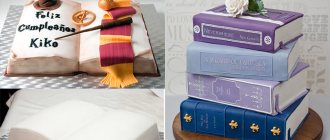
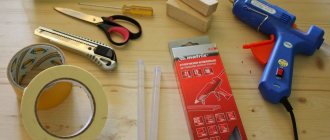
Traditionally, every year my children choose the theme for their birthday. This year we settled on unicorns. In addition to other decorations, we decided that we should have a piñata and we would make it with our own hands. In this review I will give a master class on making a piñata in the shape of a unicorn.
The idea of creating a piñata came to us during our summer vacation, when we were in America. These are photos of the piñatas we saw at Target and Walmart.
The cost of piñatas ranges from 12-20 dollars, depending on the complexity of the design.
They are made of cardboard and covered with thin multi-colored paper (white paper or thin corrugated paper). By the way, the pasting is not always done neatly.
The “fringe” on piñatas is created in two ways: with single-layer strips, on which noodles are cut from one edge, or with strips cut in the center, folded in half, then the fringe is obtained in the form of loops.
But our dream is unicorns. They were very beautiful, but we didn’t buy them. They are too bulky and it is not realistic to transport them without breaking them on a long flight with transfers. I thought that spending that kind of money on a piece of paper was expensive (it would be better to buy a Calvin Klein dress for that money on sale). In addition, our suitcases were filled to capacity with purchases and there was no room for a unicorn)
Having studied in detail the structure of the unicorn in the store, it was decided that we would make something similar at home ourselves. And now it’s time to get down to business - there are two days left until the birthday. Everything is as always and time is running out)
A large cardboard box from some furniture fittings was found for the unicorn. Cardboard is hard and dense.
First you need to draw the outline of the future unicorn, and then cut it out. You can enlarge my photo and remove the pattern from it (just cut a deeper corner under the throat instead of a rounded one; I trimmed it later in the process). My unicorn is about the same size as a cat)
If the width of the cardboard allows, then it is better to cut out the legs taking into account the folds on which the unicorn will stand. Then it will be easier to assemble the structure and glue it. We attach the finished half to the cardboard and cut out another one of the same kind, but without folds.
To connect the two halves, cut strips. Their height is equal to the width of the cardboard at the hem (which is on legs).
To make my work easier, I decided to glue the structure using paper masking tape. You can easily tear it with your hands and it holds as well as any adhesive tape. Fast, cheap and cheerful) We begin to connect the two halves from the legs.
And then we glue the strip on the back, bending it along the line of the unicorn’s body. I first glued several pieces of masking tape onto a strip of cardboard, and then gave the strip the desired shape and fixed it in stages, gluing the pieces one at a time.
Connecting the mane area. Please note that if your cardboard is corrugated, then you need the corrugation to lie across the strips, then they will bend well to the desired shape.
On the neck we literally bend the strip at a right angle.
There is space left on the stomach. If you break the piñata, then this place should be fixed more loosely, for example, take fewer strips or make them thinner and place them less often. Otherwise, the piñata will be difficult to break; the masking tape holds it tightly.
At this stage, you need to fill the inside of the piñata through the hole, and then seal it tightly. Traditionally, piñatas are filled with sweets (small chocolates, candies, lollipops, cookies, waffles, etc.) mixed with multi-colored streamers or confetti, cut paper and tinsel. You can also put small surprise gifts: firecrackers, small balloons, markers, souvenirs, small toys, notes of wishes.
The base of the unicorn is ready.
We sealed our piñata tightly because we didn’t intend to break it. The children did not like the idea of damaging the long-awaited beauty created for them. We decided to cut a neat hole-door in the side and use the piñata as a decorative container)
The next step is to cover the resulting shape with fringed paper. At first the idea was to make the piñata bright. I have a sufficient assortment of papers from regular crafts for children. But after family council, we settled on the version of a white unicorn with a delicate, dim mother-of-pearl mane. Just the day before, we bought two rolls of pearlescent paper to try—light pink and light green.
As an option, you can make a decoration for the mane - a couple of bright paper flowers to match the brighter shades.
The white paper I have is like this:
I'll show you how to quickly cut paper into strips. There is no need to unroll the roll, only partially unfold it.
We measure 5 cm and cut them off - these will be the strips. If you want wider or narrower stripes, then choose the width that is convenient for you.
Then, without unrolling the strips, cut the fringe.
The fringe is approximately half the width of the ribbon, the pitch is 0.5-0.8 cm (cut by eye).
The strip is ready, you can start gluing.
To prevent unpasted cardboard from peeking out from under the bottom layer of fringe, you just need to glue a strip of paper without fringe along the bottom (I have it about 2 cm).
We glue the strip in a circle. It is convenient to apply the glue with a flat, hard brush (I have bristles).
Next, glue the fringed strips, rising in each subsequent row by about 1-1.5 cm. Each row must be coated well with glue. Pasting is done in a circle, without tearing off the tape on each edge. Everything is done quite quickly.
To make the fringe more luxuriant, you can gather the ribbon a little.
You need to coat both the cardboard and part of the paper glued below with glue.
We reach the belly line and stop. Now you need to paste over the second pair of legs.
I’ll show you how to quickly assemble the paper: glue it on the sides, leaving a reserve of tape longer than the edge; then we distribute the tape evenly, pressing it against the surface coated with glue.
Both pairs of legs are covered, let's fill the remaining gap on the stomach.
Here I placed the fringe in opposite directions, with the connecting line in the center.
I cut regular white paper to size onto the soles and glued them on.
Now we continue pasting in a large circle around the body. The work is moving quite quickly.
We reach the neck and here we need to change the gluing method again.
We cover the gap in the back with pieces of paper, and then the back. The strips should be glued slightly overlapping and overlapping on the side so that there are no visible edges.
Then pull the strips on the side parallel.
The back is pasted over, now let's move on to the head.
We again glue a strip without fringe to the edge of the muzzle to cover the cardboard and then we sculpt the fringe on it. We leave a “beard”, which will then need to be trimmed along the contour.
Next we glue the neck from below.
Then the part of the head that is the “forehead” and “nose”. There is no need to gather the fringe here, since the surface should be as smooth as possible.
From the top of the head we go down to the nose, and then from the top of the head down the mane (also without frills). There will be ears at the junction.
We fill the remaining empty upper part of the head, pasting it with small strips.
We make the top strip narrower so that the fringe starts almost from the top of the head.
Carefully cut the strips along the contour of the head.
Now you need to trim your beard.
And also smooth the muzzle and the bottom of the neck so that the fringe does not stick out. I just covered it with glue and pressed it a little with my fingers.
That's how it happened.
We do a similar haircut along the lower abdomen - trim off the excess along the contour.
The unicorn body is ready. We will make his mane and tail using pearlescent paper.
On a piece of paper, cut “noodles” along the grain and then roll them into a tube.
Glue the edge and leave until completely dry.
I did the mane like this: I measured approximately how long the paper needed to be taken, simply placing it at the destination.
Then I cut this piece into pieces: two larger and two smaller.
I applied glue in the center and folded it in half.
Similarly, I glued the second piece to the first.
And so on... I applied a strip of glue in the center and folded the entire sandwich in half.
To make the gluing area stick more firmly, I pasted a strip of plain paper onto it. At the same time, I gathered up the corrugated paper a little.
On the first evening the work is completed. All parts were placed on the battery to dry. I also made a horn from ordinary paper: I twisted it into a “ball” with a sharp end and glued the bottom.
On the second day it took very little time to complete the work. On the mane we cut the white paper, making the strip thinner, cut the fringe on it and glue it in place with a glue gun.
Let's fluff it up. Be careful not to tear, the paper is soft.
In order to insert the tail, I made a hole in the right place. The tail can be fixed with the same hot glue.
The ears are paper folded several times into a triangle. I also glued it with hot glue.
The horn is painted with “golden” acrylic paint and glued with a heat gun just below the ears.
The final touch is the eyes. I cut them out of black cardboard and glued them onto PVA.
I can’t say that the work is very labor-intensive. It took three or four hours the first evening and another 10-15 minutes the second to glue the parts. Probably more time was spent on photographing and describing)
The result in the birthday girls' room.
If you are interested in paper pompoms, there is a master class at the link. These are our pompoms from last year, they were neatly folded and wrapped in plastic, and this year they were simply straightened out and reused. I will add cake and sweet recipes later.
I hope my master class will be useful to you. Thank you for your attention!
Where is the best place to hang a piñata?
This is another important issue that immediately appears on the agenda. After all, to place it you need a lot of space so that the child can “break” your efforts with the help of a bat and receive long-awaited surprises.
The optimal place to place it would be an open place on the street, in the courtyard of a private house and on a tree branch.
But, as you yourself understand, not everyone has such an opportunity, this is especially problematic for residents of city apartments. You can, of course, go outside and spend this part of the holiday there, but then you need to make sure that the gifts do not fall on the dirty ground, i.e. you will need to lay something under the tree.
In the case of country houses, it is possible to place a piñata inside the house; as a rule, such houses have high enough ceilings that allow you to easily hang such a holiday element and provide free space around it.
If you have a city apartment and you can’t go outside due to bad weather or other reasons, you can do it differently.
Take a chair, place it in the middle of the room, stand on it and hold the piñata at arm's length while the children try to break it. What is important is the gameplay itself, and not the place where it is located.
Pinata: original decoration and entertainment
Not a single Mexican holiday is complete without a piñata, and if the party is organized in a different style, guests will love this craft. It is believed that this entertainment owes its origin to Chinese lanterns; they were filled with gifts, but today this tradition has captured the whole world.
A large and bright toy is filled with tasty or pleasant gifts and hung from a tree branch or a special mount. The guests or the hero of the occasion are faced with a completely understandable and simple task: they need to hit the toy with a stick and get its contents.
What can you put in a piñata?
Depending on the theme, the piñata can be filled with the following elements:
- mini candies, lollipops;
- serpentine tape;
- confetti of any configuration;
- souvenir money;
- notes with wishes and predictions;
- small toys;
- bracelets, keychains, hairpins;
- rose petals.
It is not recommended to fill with heavy objects with sharp edges.
What's inside?
The piñata itself is a hollow toy. But inside it you can find all the most interesting things: candies and small sweets, lollipops and chewing marmalade, oranges and even toys. When the question arises of what to put in it, remember what is usually found in New Year's bags. Almost all of their ingredients will work great for this purpose. The only thing worth remembering when composing the filling is that sooner or later it will all fall out of the piñata, so you should not put anything that could break or injure guests.
Treasure chest
Among Us Cube
Cold heart
The next version of the piñata is also made very simply, almost using classical technology. For the master class you will need:
- balloon – 1 pc.;
- filling – candies, tinsel, small souvenirs;
- water – 1 tbsp. + 5 tbsp.;
- acrylic paints – white and blue;
- flour – 1/4 cup;
- satin ribbons – 10-12 pieces;
- newspaper - 7-8 sheets;
- decorations – images of characters from the cartoon “Frozen”.
Instead of newspapers, you can use paper that is sold with shoes. Instructions for making a piñata with your own hands include the following steps:
- Inflate the balloon and tie the end with a long thread.
- Cut the newspaper into strips approximately 3 cm wide.
- Place the ball on some kind of base - a saucepan or a jar.
- Place newspaper on it in a crisscross pattern, simply moistened with water. Leave to dry for 2-3 hours.
- Mix flour with a glass of water and boil the rest of the liquid. Then pour in the flour mixture, cook for 3 minutes over low heat, and cool.
- Cover the ball with a second layer of newspaper, dipping it into the paste. Leave the part with the tip open. Let dry and apply another 1-2 layers.
- After complete drying, cut off the tip of the ball and pull it out.
- Pierce the bottom of the piñata with an awl or cut through it with a stationery knife, and insert a ribbon there. Cover the hole with paper.
- Fold the filling inside, make several holes near the top hole, and insert the ribbon into them several times. Cover the hole with paper.
- Mix acrylic paints and paint the piñata blue.
- When dry, stick on top of the cartoon characters.
What to fill and how to arrange a surprise
The surprise is that not all people know what this box is and what the congratulations will look like. Let me remind you that the birthday boy alternately pulls the multi-colored ribbons at the bottom of the piñata. After what attempt the gifts, candies and confetti will start falling out is unknown. It turns out to be a small game, a gambling expectation of something pleasant.
We choose the filling for the piñata each time taking into account the age of the birthday person. Some people put one gift, others a couple of dozen light little things. To prevent the box from being empty, add streamers, large rectangular confetti, multi-colored pompoms with a diameter of 2-3 cm, artificial rose petals, candies, nuts or marshmallows in miniature packaging, etc.
All this tinsel will fill almost the entire space, but for congratulations you need to add small gifts for the birthday boy or even for all the guests (especially at a children's party).
For children aged 2 to 9 years, feel free to place small plastic, rubber and textile toys. For schoolchildren - unusual pens and erasers in the shape of animals, for adults - pleasant, unbreakable souvenirs.
Everyone enjoys finding cute gifts in the holiday tinsel. Everyone!
By the way, on the box itself, which is decorated with bright balloons or birthday greetings, you can paste funny photos of the birthday boy and your own text with good wishes.
Angry Birds
The ball makes a very original do-it-yourself piñata in the style of the birds from the game Angry Birds. For the master class you will need the following:
- balloon – 1 pc.;
- filling – candies, small souvenirs;
- water – 1 tbsp. + 5 tbsp.;
- acrylic paints – red, white, black, beige;
- flour – 1/4 cup;
- red satin ribbon - to attach the piñata 1 pc.;
- newspaper and paper - 7-8 sheets.
The easiest way to make a red bird from Angry Birds is to paint a balloon made using the papier-mâché technique. This is done like this:
- Inflate the balloon, tie it, stick strips of newspaper moistened with water over the entire surface, and let the layer dry.
- Mix flour with a glass of water. Bring the rest of the liquid to a boil and then add the flour mixture to it. Cook for 3 minutes, let cool.
- Next, glue several layers of strips, preferably 2-3, made of paper, using paste. Each one should take about 8 hours to dry. Leave a hole near the tip that is not sealed.
- After drying, burst the ball and take it out. Make 3-4 holes around the perimeter and insert the tape. Fill the toy with filling and seal the hole.
- Outline the bird's face - eyes, beak and eyebrows, as shown in the photo, color.
Hanging mount
Let's move on to the next stage of how to make a piñata with your own hands. When the mold is completely dry, you can remove the ball by untying it and releasing the air from it. Now you need to think about how the entire structure will be suspended. To do this, you should prepare a beautiful ribbon on which everything will hang, and tie a stick at the end. It needs to be inserted into this hole and placed across it. This is a fairly reliable fastening method. However, to be more sure that when struck, the piñata will not fall off prematurely, you need to cut a circle out of cardboard with a small hole into which to insert a ribbon and glue it to the body of the piñata. The additional seal will hold everything more securely.
The second option for hanging a piñata can be a wire hook. It is also inserted into the hole that remains from the ball, only the spacer is made of wire, and the ring comes out. And also everything needs to be carefully sealed so that the toy does not fall prematurely from impacts.
So, the piñata, the master class for creating which is described in detail here, is ready, now you need to fill it with sweet contents. To do this, we cut out a hole through which the candies and other holiday attributes will get inside. It’s better to do it at the bottom, so that when it hits, everything spills out at once and nothing gets stuck inside. In general, you can cut it from any side. You will need a sharp knife, with which cuts are made on the body, and then one or several parts are turned away, through which the sweets will get inside. After this, everything can be sealed with paper tape or strips of plain paper, spreading them with glue.
To make a piñata, the photo of which is presented here, you need to decorate it by covering it with colored paper. At the same time, you can add various elements, creating the image of your favorite cartoon character that your child likes. This will please the baby even more. An Angry Birds piñata could be an excellent option; it’s not at all difficult to make on the basis of a papier-mâché ball. All you have to do is cut out a beak with a tuft from cardboard - and the hero of the world famous cartoon is ready.