Often, when preparing for the birthday of a person close to you, you want to be original and show the recipient with your gift how much you love and appreciate him. It is quite difficult to achieve this simply with a store-bought item (even if the item costs a lot of money). You, most likely, are constantly gnawed by a strange feeling that this is all wrong and wrong; you are afraid that the gift simply will not “catch you.” So, sooner or later people begin to come to the conclusion that handmade gifts are not so bad.
The first thing that immediately comes to mind is a drawing, although most often we are immediately upset by the following thought: “I don’t know how to draw...”. At this stage, perhaps, it is worth pausing and looking at the process differently.
Everyone can draw!
There is still no person who is simply unable to create an original and understandable drawing to please a loved one. You just need to know the basics and a few fundamental rules of composition, as well as delve into fashion trends in the field of applied art.
Then you can give beautiful painted pictures as a gift.
Postcard for March 8
White thick paper is prepared, a pencil for sketching, colored pencils and felt-tip pens for complete design.
- On the postcard, the number 8 is a stylized ribbon. It has daffodils threaded through it. Festive inscription on the “tail” of the ribbon.
- The boundaries of the number 8 and its “tail” are marked.
- The outline of the number is drawn in thin, weak lines.
- Thicker lines inside the figure eight will make it look voluminous.
- If the child already knows how to write, then an inscription is written on the “tail” of the tape.
- Flowers are drawn step by step with a pencil. The entire postcard shows 4 daffodils. The four circles are the centers of the flowers.
Tip: For a small child, the daffodil can be a challenging flower. The simple technique of drawing it can be practiced on another piece of paper first. But you can replace it with something else.
- The center of each flower should be openwork, and its petals should be pointed.
- Flowers can be drawn in different sizes. In addition, turn them in different directions.
- The fifth flower peeks out from the top of the “tail” of the ribbon. Its peeking petals are completed.
- Short lines are drawn on the flower petals. They will give them a more natural look.
A master class for beginners on creating a holiday card ends with clear contours. You can start coloring.
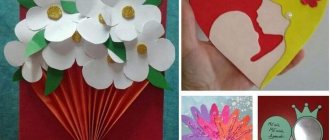
Women's Day is approaching
The easiest way to congratulate your mother or girlfriend is to depict the number eight, which is surrounded by daffodils or other flowers. The figure eight looks like a stylized ribbon, the tail of which contains the inscription "Martha". Step-by-step actions:
- We draw an outline using light lines, marking the center with a knot.
- To give the image a 3D look, we draw internal contours.
- We fix the flowers on the side above and below the end of the ribbon ending - 4 at the top and one at the bottom. First we draw their corollas with circles. Each center will be framed with pointed petals. You can practice separately. The buds are given different sizes and angles.
- For naturalness, we provide the petals with short strokes and complete the stems.
- We color the number in red, the flowers in a yellow tone, highlighting the core and stems with a green tint.
You can create one bouquet, for example, of daisies, which are not difficult for a child to capture because of their simple appearance, tied with a beautiful bow. Mothers and grandmothers will be delighted with this touching gift.
Birthday Card
Birthday is a special holiday. And I want to make the gift individual, unique. This is where a master class on how to draw a postcard with a pencil will help.
A postcard with a picture of a cake is suitable for a child.
- Work begins with preparing the base of the postcard - white paper or colored cardboard.
- In the middle of the sheet markings are made with auxiliary lines. This marks the middle of the cake.
- The lines are connected by an oval.
- The height of the cake is marked with vertical lines.
- The ends of the vertical lines are connected by an arc so that it is a projection of the semi-oval from above.
- Before you beautifully draw the top of the birthday cake, you need to erase the extra auxiliary lines with a grater. The cake becomes like itself.
- The cream appears as a wavy line along the edge. The inscription with congratulations can be made in English or Russian.
- The birthday cake is decorated with candles. The design of the picture is completed with the required number of candles.
Business dad
If dad is important and always wears a suit and tie, then the drawing will turn out very serious.
Tell your child how to do this step by step. Detailed master class:
- We start with the image of a small circle - the head. Below it we add an oval - the body. We draw arms downwards and legs connected together to the oval.
- We highlight the elements of the jacket on the resulting silhouette of a person - the collar and sides. We finish drawing between the halves of the collar of the shirt collar with a tie and a row of buttons on the right side of the jacket.
- Select the bottom line of the trousers and add boots, the toes of which point in different directions. Hands with painted fingers should be visible from the sleeves of the jacket.
- On the head we outline the bangs in two arcs. The hair should extend beyond the small ears. Two circles, painted in half with black - the eyes, above them the eyebrows-arches. The large semicircle is the mouth and the small one underneath is the chin. All that remains is to make the nose into a semi-triangle.
Did dad turn out beautifully? All that remains is to paint it and you can hang the drawing object on the wall.
Gift card drawn
An adult can help his child figure out how to draw a postcard step by step with additional elements.
This drawing will be more complex, but a child can handle it just as well.
- For the sketch you need a pencil, as a basis - white paper or colored cardboard, colored pencils.
- There is a round cat in the center of the postcard. A ball is drawn. Inside is his face: eyes, nose, mouth. You can add a mustache.
- The cat must have ears and a tail. For comedy, the tail is drawn thick and long.
- You can’t go to a birthday party without a festive hat.
- In the foreground, a cake with cream and candles is depicted in front of the cat. The bottom of the cat is not visible, so the line is wiped out.
- The cat will come to life if you add stripes to the body and tail.
- The cat guest brings the birthday boy, in addition to the cake, gifts in boxes. They can be drawn from behind the cat.
- Words of congratulations are written on the front side or inside the card. The work ends with coloring the drawing.
- The lesson on how to simply draw a Birthday card is over.
How to draw dad beautifully and easily
Dad is the strongest, caring and brave person. This is exactly what every child considers him to be. It's fun to play with him, jump through puddles and, of course, make various crafts. Therefore, we suggest you learn how to draw a dad beautifully and easily.
Every dad loves his child, but sometimes it happens that you have to be strict. Using the example of a strict dad, we will try to understand the basics of drawing. We take pencils, an eraser and try to draw dad in a beautiful and easy way for Father’s Day:
- Let's outline the face. It has an elongated shape, so let’s sharpen it at the bottom.
We draw out the eyes using small arcs, they will be closed. Apply eyebrows on top and nose below. All that remains is to draw the mouth, it should be wide open, probably dad is telling something. At the top we will make the hair using wavy strokes. The result was curly hair. - We go down and draw the body. Like the head, the sides will have smooth sides. Draw the outlines of the neck and neck of the sweater. We make the lower part of the clothing wavy.
- Let's draw the arms, for the right one we use triangular shapes, it will be bent at the elbow, and the hand will rest. Point the left hand upward. Draw the fingers, pointing the index finger up.
- All that remains is to draw the legs. Make them wide and apply regular, long lines. Add shoes below. If you drew with a pencil, use an eraser to erase all unnecessary strokes.
- Now you can color the picture. Use multi-colored pencils or felt-tip pens for this. You can use any colors, we painted the jacket with blue, the pants with light brown, and the shoes and hair with a dark brown felt-tip pen. You can make stubble on your chin, just put small dots.
That's all. We drew dad step by step. Happened? Then we move on to more complex examples.
In a separate article we drew mom step by step
Happy New Year
We are accustomed to the fact that New Year's cards depict a Christmas tree, Christmas tree decorations, and Santa Claus. But you can take a master class on how to draw a non-classic New Year’s card with a pencil.
And, for example, depict a small dog wearing a Santa Claus hat.
- The center of the picture is a dog. This is where the drawing begins. The shape of the head and the area of the muzzle emerge.
- Faint lines show the middle of the head and the location of the eyes. Later the lines are erased.
- Ears emerge. The contours of the cap are drawn. The distance from the dog's neck to its paws is drawn with a vertical line.
- The fur on the hat is visible.
- The design of the cap ends with a tip and a bubo.
- The dog's muzzle is completed with the shape of the eyes, nose, and mouth.
- Wool is imitated by curved broken lines of different lengths. It is drawn along the line of the muzzle. Short hairs are depicted near the nose and mouth. Longer fur around the eyes.
- The fur falls onto the eyes, and in this part the pupil is not painted over with a solid stroke. The hairs are applied intermittently to the ears and over the head.
- By gently pressing the pencil, the hairs are drawn all over the dog. You can use a hard pencil.
- The white part of the cap, the bubo, should be fluffy. Folds will make it voluminous and give it shape.
- Areas darken along the folds.
Tip: If you can't cope with the shadows near the folds, then skip this step.
- Snowflakes all over the front of the card will make it New Year's. There is no need to explain how beautifully to draw a Christmas tree branch to the right of the dog. A garland and New Year's toys are depicted in the upper part of the picture. The congratulatory inscription “Happy New Year!” is written below.
Tip: Instead of snowflakes, you can draw fireworks.
Having understood how to draw a postcard with a pencil, the child will easily create masterpieces with his own hands. Each card adds those details with which the holiday is associated for you.
This is how you can make the drawing individual.
Cheerful dad
On his birthday, dad will definitely be in a good mood, which means he will smile. Let's congratulate him with a drawing that depicts the hero of the occasion and his children - a daughter and a son at the moment of presenting the gift.
Step by step lesson:
- Let's start drawing with the hairstyle. Let's draw two arcs - a bang, zigzags on the right and left - flying whirlwinds, and on the right we will select a place for the ear. Let's add the top of the head.
- Under the bangs there will be an oval shaped face. The oval should be slightly inclined, because dad will hug his beloved children.
- In the oval we add two horizontal lines - eyes. The top ones should be thicker than the bottom ones. Above them are eyebrows like a house. The nose is in the form of an unfinished triangle and the arc is the mouth in a smile. We add a small inverted arc under the mouth to highlight the chin.
- Dad's portrait is ready. Now let's add the children's faces to it. Below dad's face on the left we draw a circle - the daughter's face. It should fit snugly against daddy’s cheek, because they are hugging. Select the nose. Draw a line of hair, leaving space for the ear. Add an elastic band and a ponytail outside the circle. And inside we draw the right eye, eyebrow and half of the mouth.
- We draw the shoulder and arm of the girl who hugs the birthday boy’s neck. Adding body contours. On the left back are the fingers of my father’s hand.
- On the right we add a boy. First, draw wavy hair just below dad’s face. Select the ear and nose. We finish drawing the left eye with an eyebrow and a smiling mouth.
- The boy's left hand hugs his dad. We finish drawing the body and divide it into stripes - lines on a T-shirt. On the back we add daddy's fingers.
- All that remains is to draw the outline of a chair behind dad’s back so that the family doesn’t hang in the air. It's easy to do.
The drawing can be painted and given to your beloved parent.
Photos of postcard drawings
0
Cute round cat
Beginning artists should start by drawing simple elements. You can choose a cheerful cat by simplifying the shape a little.
Step by step, use a pencil to do the following:
- A large circle is drawn;
- On its upper half, the eyes, a triangular nose and a mouth extending in arcs to the sides are marked with dots;
- A cone-shaped cap is drawn on the right side of the head;
- The ears are located on top;
- The tail is completed at the bottom side;
- You need to draw a cake in front of the cat, a lit candle in the center, cream hanging on the sides;
- Excess lines are erased with an eraser;
- At regular intervals, shading is done on the cat’s body;
- The word “Congratulations” should be written above the picture.
A simple pencil is outlined with colored lines along the contour. The shade can be chosen as desired.
Cake with candles
You can make a beautiful card for dad with your own hands in the form of a three-tier cake with many candles. Draw rectangles on thick cardboard folded in half. Draw the top layer of the cake as the smallest one, place the middle-sized layer in the center, and draw the largest one at the bottom. Then use scissors to cut the paper along the lines from the central fold of the future card to the corners of the rectangle. Using hand pressure, push the resulting parts forward and smooth out all the folds in the opposite direction. Now each layer of the cake needs to be sealed with strips of the same size, only cut separately from paper with a bright printed print.
The design with multi-colored dots and dashes looks beautiful, because a real cake is often decorated with sweet curly sprinkles. Candles are cut out to the same size from thick red cardboard. The candle flame has a pointed upward shape and is glued from the inside of the candle itself. When all the small parts have been collected, they are placed on each layer, distributed at an equal distance from each other.
After all the work is completed, the card is closed and presented as a gift in a closed form. Dad will be very surprised when he sees such a beautiful cake inside. Such a card (dad will be very happy to receive it from his daughter) can be placed vertically on a shelf or in the center of a holiday table.
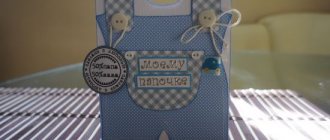
Master class on creating a postcard-shirt
Take a not too thick sheet of cardboard of any color you like. Bend it in half crosswise. Step back 3-5 cm from the fold line (depending on the “size” of the shirt), draw a connecting line and cut both sides of the workpiece by ¼ of the width. Bend the resulting wings so that a collar is formed. Take small buttons or cut them out of different colored paper and glue them to the corners of the collar.
Postcard-tie pattern
You can complement the composition with a tie. Sign the gift and give it to the recipient.
Postcard for a tinkerer
If dad likes to work with his hands and makes a lot of crafts for the home with tools, then he will definitely like the next version of the card. The sample shows that the work used denim, hemp rope and unpainted thick cardboard. A work apron can be cut from old jeans or a skirt.
First draw the tools on paper and then cut out along the contours with scissors. Punch holes along the edges of the apron and insert natural twine into them, tying knots at the ends. You can choose any background for the postcard. A contrasting pattern with a print looks good.