Surely you love giving gifts as much as receiving them. It’s so nice to see genuine joy on the face of a loved one! And it’s especially nice to give original gifts, especially to loved ones, for example, to your younger brother.
Surely you love giving gifts as much as receiving them. It’s so nice to see genuine joy on the face of a loved one! And it’s especially nice to give original gifts to loved ones, for example, your younger brother. Therefore, we suggest you make a birthday gift for your brother with your own hands.
An original gift is not just a souvenir, but also a toy. After all, a child of any age will be pleased to have a toy made especially for him. We will tell you how to make a real airplane that any boy will like. And of course, the birthday boy will remember not only the gift, but also the postcard on which you will write warm words. You can also assemble it yourself. And rest assured, even after many years, having become an adult, your brother will be happy to re-read your wishes and remember you.
What to give mom and grandma for their birthday?
Birthday gifts for beloved mothers and grandmothers can be made by the whole family, and if it turns out to be not only beautiful, but also useful, loved ones will certainly appreciate it.
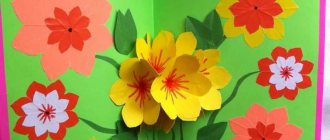
Bouquet of sweets or fruits
Instead of a regular bouquet, it is better to please your mother and grandmother with an original and delicious bouquet of fruits or sweets, which can be decorated with real or paper flowers.
To create a bouquet of fruits you will need:
- Fruits (pineapple, kiwi, watermelon, melon, orange) and berries (strawberries, blueberries, grapes, blackberries). You can take other fruits, the main thing is that they are not overripe and dense, and do not change color after cutting, like an apple.
- Skewers of different lengths on which the fruit will be placed.
- Molds for cutting shapes from fruits. Cookie cutters work great.
- Container for a bouquet (vase or glass), polystyrene foam, ribbons.
The fruits are peeled, cut into slices and cut out into shapes of flowers, butterflies, and hearts. If there are no molds, it will be enough to evenly cut the fruit into half rings or triangles. It is better to use the berries whole. They are strung on skewers in several pieces like beads, except for strawberries. The finished bouquet details are placed on skewers.
If desired, some fruits can be dipped in melted chocolate and allowed to set.
The next stage is to form the bouquet. To do this, you can use a low, wide vase, a decorative basket or an opaque glass. It is advisable to place polystyrene foam inside and stick skewers into it, beautifully arranging the fruit shapes. Between fruits and berries you can place fresh flowers, stems and leaves of plants or dried flowers, and decorate the container with ribbon.
To create a bouquet of their sweets you will need:
- round candies;
- corrugated paper of different colors;
- wide and thin decorative ribbons;
- wire or skewers;
- scissors, wire cutters, tape, foam;
- floral mesh, transparent wrapping paper, organza or flower pot.
The following steps will allow you to assemble an original sweet bouquet for your mother or grandmother in a short time:
- Cut transparent wrapping paper into squares of appropriate size, wrap each candy in a square and secure it on a skewer or wire with tape.
- Another option for decorating flowers is to cut out petals from corrugated paper, place them in the center of the formed candy and strengthen the flower on a skewer.
- Wrap the wire or skewer in corrugated paper or green ribbon.
- You can collect the bouquet in a pot or in wrapping paper. Place polystyrene foam in the pot and secure the bouquet parts in it. Another option: tie the “stems” of candy flowers together and wrap them in organza or wrapping paper. Complete the decoration of the pot or bouquet using ribbons and floral mesh.
Tea house
How to make a birthday gift with your own hands to surprise your grandmother? Build a cute tea house for her from decorative cardboard.
First you need to prepare the details of the house:
- 4 walls measuring 20 x 9 cm;
- 2 roof parts measuring 10 x 10 cm and 1 part - 10 x 13 cm;
- stand measuring 10 x 13 cm;
- 2 triangles with a height of 9 cm and a base of 6 cm;
- parts for fastening 4 pcs. size 20 x 3cm, 4 pcs. -10 x 3 cm, 1 pc. – 6 x 10 cm.
In one wall of the house, at the same distance from the side edges, a semicircular hole is cut from the bottom, about 5 cm high and 6 cm long. It is convenient to remove tea bags from here.
When all the blanks are made, it's time to assemble them using glue:
- All parts for fastening are folded in half lengthwise, except for a rectangle measuring 6*10 cm. Its short side is divided into 3 equal parts and a pyramid is folded, the joints of which are glued using a 10 x 3 cm piece folded in half. The remaining parts should form a right angle to fasten the parts of the house.
- The walls of the craft are assembled by gluing them together using parts bent at an angle of 90° for fastening. In the same way, the house is glued to the base, excluding the wall with the hole.
- 2 parts of the roof 10 x 10 cm are fastened together using a finished pyramid part. On the long side of the roof base (10 x 13 cm), measure 2 cm from the edges and bend them down. The base is glued to the sides of the roof with the bent parts down. The finished roof is placed on the house without gluing it, from here the house will be filled with tea bags.
- You can decorate the walls and roof before gluing begins or after finishing the work. Any interesting ideas will do, from children's drawings or paper flowers to newspaper clippings or quilling decorations.
Jewelry storage box
A box for earrings, rings and brooches is a very useful thing, which can also become a real decoration for your dressing table. The easiest way to make such a gift is from a cardboard spool of wide tape after using it. The lid and bottom are made from cardboard blanks. To do this, you need to attach the coil to the cardboard and trace it around the outer circumference with a pencil.
Cut out 2 circles with a margin so that the bottom can be glued to the reel, and the lid can easily cover the future box. In order for the bottom to stick well, you need to follow the pencil markings with a hard thin object (ruler or tweezers), then it will be easier to bend the cardboard. To make the bottom strong, several layers of cardboard of a suitable diameter should be glued inside the box.
To make the outer part of the gift even, you need to cover the reel with cardboard over the entire surface.
Before making the lid, you need to cut a strip of cardboard half the height of the coil, wrap this strip around the top of the future box and glue the edges. When the rim is dry, glue the prepared circle of the lid to it in the same way as the bottom was glued.
You can decorate the finished gift in any suitable way:
- wrapping paper,
- ribbons and beads,
- flowers in kanzashi style
- decorate the box using decoupage.
Topiary of flowers
If your mother or grandmother loves artificial flowers, giving them a delicate topiary will be a great idea that is easy to implement. For the craft you will need artificial flowers and greenery, a pot, plaster, a base ball, which can be made from crumpled newspaper wrapped in green knitting thread, a branch with a diameter of at least 1 cm, a glue gun and decorations for the pot, soil and flowers.
Sequence of actions for creating topiary:
- place the prepared ball on the branch;
- glue flowers onto the ball;
- secure the branch with plaster into the pot;
- after the gypsum has hardened, decorate the “soil” with pebbles or artificial greenery, gluing them with PVA glue;
- decorate the pot by wrapping it in coarse textiles, twine or ribbons;
- You can plant ladybugs or butterflies on flowers, a tree trunk or under it.
DIY apron
Making a kitchen apron is not difficult if you have a sewing machine in the house. All you need is fabric, thread, scissors, chalk, a pattern and a sewing machine. The easiest way to find the desired pattern is on the Internet, but you need to adjust the width of the pattern to the half-waist circumference of the woman for whom the gift is intended. The best models are an apron and an apron with a bib.
Before starting work, the fabric (Teflon, denim, cotton or linen) is washed, dried and ironed so that it shrinks. Then the fabric is folded in half lengthwise and the pattern is transferred to the wrong side using chalk. You need to cut out the parts with allowances and folds of 1.5-2 cm. The edges of large parts that will not be joined are folded and stitched.
Neck and belt ties are made from strips of fabric of suitable length and width. To do this, fold the parts in half, sew 2 halves from the wrong side along the long and one short edge, turn them inside out and iron them. Neck ties are sewn to the bib, the bib and apron are connected, sewing ties for the belt at their junction from the inside. The finished product is smoothed.
How to congratulate your grandmother
A box for small items is perfect. Prepare a thick base, toothpicks, glue gun, yarn, decorations. Cut the bottom into a heart shape from the base, insert toothpicks around it, and wrap the yarn around them in a wave-like manner to the top. Place an accessory on each point and additionally decorate the entire box with beads.
Grandma will be pleased with a glasses case made from old fabric, decorated with buttons.
What to give to dad and grandfather?
You need to think in advance about what to give and how to make a birthday gift with your own hands for your dad or grandfather.
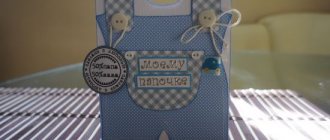
Card-shirt
To make a postcard you will need thick cardboard as the base of the postcard, colored paper and scissors.
A sheet of cardboard is folded in half widthwise. The back side from above is cut off by 3 cm. On the front side, at the same distance, cuts are made on the right and left, leaving a solid section of 5 cm in the middle. Fold the ends of the cardboard towards the middle so that a shirt collar is formed, cut off the excess tails of the cardboard.
Make a tie out of paper:
- Fold a square sheet of paper in half diagonally, unfold it again and turn it so that the fold line becomes the length of the future tie.
- Fold the 2 side parts equally towards the middle (towards the fold line).
- Fold the 2 side pieces to the middle again and glue them. Fold the top acute corner twice, making a tie knot.
Glue the finished tie to the collar and then glue the corners of the collar to the shirt. You can add sleeves to the sides, or you can glue a folded sleeve with a cuff to the bottom of the card, imitating a shirt packed in a box. You can decorate the gift with a pocket or buttons on the edges of the collar. Make a congratulatory inscription on the inside.
Knitted socks (step by step instructions on how to knit)
Having mastered the knitting technique, you can create interesting sneaker-shaped socks that will appeal to any man. For sizes 43-45 you will need yarn with a wool content of 50%, 100 g each. 2 different colors, and hook No. 3, laces about 1 m. Socks are knitted with thread in 2 folds.
Knitting the sole and nose:
- 1st row: in the center of the ring, 7 stitches are knitted without overlap (st. b/n);
- 2-4 row: knit st. b/n evenly add 7 loops (p.);
- Rows 5-8: add 4 stitches evenly;
- 9-17 row: even knitting without additions;
- on the 18th row, unroll the work and knit 30 sts. b/n;
- repeat row 18 22 times;
- next 8 rows: knit st. b/n, decreasing 2 stitches in the middle of each row;
- They finish the part and sew the heel.
Tongue: in the AC direction knit 16 tbsp. b/n (about 30 cm). The upper part is performed along the ABC line. Knit 11 rows st. b/n and continue knitting st. b/n, but do not knit 3 stitches at the end of each row. 4 rows are performed in this way, and the next 4 rows are not knitted 1 stitch at the end of each row. Next, knit straight st. b/n about 17 cm. I finish the work with a “crawfish step”.
You can decorate the socks by tying the edges in 4 rows. b/n, sew the parts, thread the laces. You can knit a circle of a suitable color on the side.
Case for glasses
A useful gift is a case for glasses, which can be made of felt, leatherette or leather, cotton or jeans in the form of a handbag with a lock, a bag with a magnet or a bag with a string.
To do this, parts of a suitable shape are cut out of the base material, the same parts are prepared from flannel and padding polyester (for thin fabrics), and slightly smaller parts are cut out of whatman paper or cardboard in order to insert them for compaction between the outer and inner layers.
If a zipper is provided, it is sewn in at the beginning of the work, a magnetic button is sewn between the layers, and a place is left for the rope in the upper part of the case. When everything is ready, sew 2 layers with cardboard inside from the inside out, turn the product over and smooth it out.
Personalized cake with wishes
A cake with wishes is a fun surprise made of cardboard that gives you a great mood and 0 calories. Such a gift is assembled from cardboard “pieces”, inside of which you can place small surprises and wishes. Templates for making pieces can be easily found on the Internet, printed on suitable paper, cut and glued.
You can decorate the top of the cake with flowers made of corrugated paper, coffee beans, and you need to connect the pieces by tying them with a beautiful satin ribbon.
Ideas for surprises and wishes:
- cheerfulness - coffee bags;
- health - blisters with vitamins or hematogen;
- good luck - lottery tickets;
- wealth - a banknote;
- freshness - a pack of Tick-Tocks;
- energy – AA battery;
- love - cookies in the shape of a heart.
Everyone can come up with similar options themselves, taking into account the characteristics of the birthday person.
Volumetric postcards using scrapbooking technique
Scrapbooking is the art of decorating photo albums, but its techniques are also very popular when creating cards.
Using Kirigami elements, using the Scrapbooking technique, you can also make a three-dimensional postcard with your own hands. We cut out and fold “steps” from scrap paper for the “pop-up” candles on the second half of the card. Glue the candles and glue the resulting blank onto the base of the card.
You can make a simple but original greeting card from scrap or colored paper. We cut out the candle flame and decorate it with sparkles, then glue it to 2-sided tape. We glue the second part of the candle with glue. The congratulation itself can be tied or glued to an elegant satin ribbon. Simple and original!
A postcard made from paper of a different texture will look completely different)
By placing each element of the card on top of each other, again using double-sided tape, you can create such a voluminous, bright cake!
Let's take a look at Tatyana Sadomskaya's master class on how to easily make a voluminous, delicate postcard using the Scrapbooking technique using ready-made pictures.
To create such a postcard, Tatyana used:
- scrap set ScrapBerry's “Favorite Pet”
- scissors
- thick cardboard
- glue
It is better to use scrap paper with a large number of miniatures that can be cut from a single sheet, as well as colored stamp prints and chipboards.
Before creating a postcard, you need to decide on its plot in order to choose the color of the base of the postcard and its “characters”. In this case, the basis is paper with a calm beige print, and the components of the plot are cut out of it: kittens, a puppy, flowers, a crown on a pillow.
Next we work with the base. It is necessary to make markings for cuts on the front side.
Don’t forget to decide before starting this work what will be in the foreground and what will be behind it!
In our case, we put the larger kitten in the foreground, this will enhance the feeling that it is closer than kittens with a dog.
We make the necessary cuts. The result is a design with “steps”. We glue leaves of arbitrary size onto the resulting “steps”. These leaves imitate a wooden fence.
Next, we gradually glue our elements, starting from near to far. We start from the foreground and glue the kitten. We glue it onto beer cardboard, because it gives additional volume and casts a shadow. Using the same principle, you can glue several other elements, for example, balls and flowers. When the inside is ready, glue it to the base of the card.
We also decorate the outside of the card with an elegant floral print.
For greater elegance, decorate the elements of the card with sparkles (use glitter).
Original master class.
For inspiration, check out this masterpiece 3D cake card:
What to give to your friend or sister?
How to please your friend and sister and make a unique birthday gift with your own hands?
It’s not difficult at all, the main thing is patience and a positive attitude!
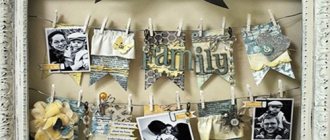
Instagram style memorial album
A fashionable gift that modern girls will love is easy to make by decorating a photo album or photo book in Instagram style.
You can depict an icon of a famous social network on the title page using scissors and a cut out thematic picture. Or you can fill such an album with your most memorable photos, placing famous Instagram elements and icons next to them.
Chocolate bottle with surprise
To make a delicious gift for chocolate lovers, you will need the following ingredients:
- 150-200 gr. chocolate;
- small plastic bottle;
- funnel;
- small candies such as sea pebbles or nuts.
Sequencing:
- open a clean bottle and remove the label;
- melt chocolate;
- pour it into the bottle using a funnel.
While the chocolate is hot, you need to distribute it evenly throughout the bottle, slowly rotating it in a horizontal position for a while. To completely harden, place the bottle in the refrigerator. Then pour candy or nuts inside. Carefully make a cut in the plastic and remove the mold without damaging the chocolate. The bottle can be closed with a plastic cap and a label attached.
A vase for flowers
How to turn an ordinary jar into a gift with your own hands and make your friend’s or sister’s birthday unforgettable? Make a bright flower vase for her!
There are many ways to give new life to a glass or plastic container:
- stick pieces of bright napkins or corrugated paper onto the jar (decoupage technique);
- evenly wrap the container with thick woolen threads, satin ribbons or twine;
- Paint with acrylic paints, applying them with a sponge, and stick beads and flowers onto the bottle using a glue gun.
Bracelet made of beads and threads
There is nothing easier than buying beautiful beads and floss at a craft store and putting them together into an elegant bracelet. The basis for the decoration can be an inexpensive ready-made bracelet or a circle cut from a plastic bottle. If you purchased individual beads, you first need to assemble them onto a fishing line; if you have ready-made beads sold by the meter, you can immediately begin making the product.
Instructions:
- Glue the beads using a glue gun to the base in 1 or 2 rows;
- wind the beads in the spaces between the beads with brightly colored floss threads;
- make several of these bracelets, matching threads by color.
Such products look beautiful on the hand if you combine several narrow bracelets.
Candle in a shell
To make a romantic gift in the form of a candle in a shell, you will need candle stubs, a wick from cinders or a string for the wick, 2 toothpicks and 2 rubber bands from money, large durable shells and tweezers.
Manufacturing instructions:
- secure the shells on a plate or board, gluing them onto the melted stearin candle;
- melt the cinders in a water bath;
- pull out the wick with tweezers or make a new one;
- hold the wick between two toothpicks secured at the edges with rubber bands;
- place toothpicks on the shell so that the wick is located approximately in the middle of the future candle;
- pour melted stearin into the shell, holding the hot container with cinders with tweezers;
- Allow the candle to set and then remove the toothpicks from the wick.
Accordion postcard (diagrams and templates)
Another type of voluminous postcard is the accordion postcard.
To create such a postcard you will need: thick scrap paper for the base frame, a die-cut scrap knife or stationery knife, transparent plastic for the internal parts, stamens, semi-pearls and other materials for decoration.
We take the template and make blanks for the postcard. We cut out 8 blanks for the base frame from thick scrap paper and 4 from transparent plastic.
Thick paper blank...
...and transparent plastic
We glue the plastic blanks to a paper base. To make the card fold, we make a double crease of about 2 mm on the outer folds. We connect the resulting 4 parts - glue them with glue or use 2-sided tape. Glue the remaining 4 frames on the opposite side.
Next, we connect the internal plastic parts. The easiest way to do this is to use transparent tape. We get this basis for an accordion postcard.
We connect the parts with tape
Basis for an accordion card
Now you can begin the most creative part of creating a card - decorating it! Glue fluttering butterflies and twisted greenery to the plastic. The postcard is ready!
Let's start decorating
Ready!
Original master class
See below for various templates for making the bases of such postcards:
Using your imagination, you can create all sorts of variants of such folding postcards. For example, with a predominance of children's themes. The number of components may vary.
Clock for the night owl
Asterisks for the astrologer
Birds, flowers, butterflies always look very light and airy on postcards!
Ah, France, Provence!
The Bird of Happiness
For the most beloved!
How do you like this original clock mechanism?!
What to give to a friend or brother?
A few creative ideas will help you make gifts for friends and brothers that will remain in their memories for years to come.
Scops owl pillow
A product like this funny pillow would be a great handmade birthday gift for sleep lovers. An interesting idea is to make a pillow in the shape of an owl. Print the pattern from the Internet and prepare fabric (preferably cotton), padding polyester, thread and scissors. If you don’t have a sewing machine, you can sew a small item by hand.
To make a scops owl pillow, you need to cut out the main parts from the fabric according to the pattern with allowance for allowances. First, decorate the front side by sewing on the eyes, wings and beak. Sew the 2 halves of the body from the wrong side, leaving open space for stuffing the pillow with padding polyester. Turn the product inside out and distribute the padding polyester evenly inside the owlet, sew up the hole by hand.
Candy motorcycle
Some guys have no less a sweet tooth than girls, and a candy motorcycle will be a pleasant gift for them. The frame of the motorcycle is made from cardboard, wrapped in gold foil or corrugated black paper, and attached to wire guides to create the desired shape.
The wheels can be made from several layers of 4.5cm corrugated cardboard, glued together and wrapped in gold or black paper. The handles, exhaust pipe and wheel holders are made from wrapped wire.
Now it will be easy to assemble the motorcycle:
- Glue square-shaped candies in 2 rows around the circumference of the wheels with double-sided tape. Secure the wheels with gold tape. Make a hole in the middle of the wheels and thread the prepared wire through them.
- Fill the base of the motorcycle with candies inside, forming a line for the gas tank and seat. Fasten the wheels and base using wire.
- Glue a row of candies onto the front panel, attach it to the handles, which are hooked to the product with a wire.
- Glue a headlight candy in front, and rest the motorcycle on support legs made of wire.
Treats
For the sweet table
buy candies with bright wrappers (preferably all the colors of the rainbow), but the most important treat will, of course, be the cake! It can be made in the form of a palette.
Photo: unschoolgirls.blogspot.com
Photo: www.theweddingcake.net
Photo: thesweetescapeinfo.blogspot.com
Photo: natalieintven.files.wordpress.com
What to give to your loved one?
Poster with sweets
The easiest way to please your loved one is to give him a poster with heartfelt or cheerful wishes, decorated with sweets “with meaning.” The inscriptions can be made by hand or made from cut out printed words.
One design option could be like this:
- I wish you endless (Inspiration chocolate) and prosperity (candies in the form of gold coins);
- let (curd cheese “Miracle”) accompany your every day;
- be as vigorous and strong as (a bag of coffee);
- you and I are inseparable, like (Twix chocolate bar);
- you are my most (small pack of “Favorite” juice) person on earth;
- Now we know exactly what (chewing gum “Love is”) is our present and future.
Rubik's Cube from joint photos
So that your loved one always remembers the happy days spent together, you can make a Rubik's cube for him from photographs. To do this, you will need a Rubik's cube with colored stickers that can be removed from each piece, glue, colorless varnish, scissors, favorite photographs and a lot of patience.
Performance:
- The edges of the Rubik's cube are freed from colored stickers;
- prepare photographs that are suitable in size;
- on the reverse side, draw each photo into 9 identical squares, corresponding in size to the squares of a Rubik’s cube;
- cut all photographs without mixing them;
- carefully glue each part of the photo onto the corresponding square of the cube and let it dry;
- after drying, disassemble the cube into parts;
- cover each photo with colorless varnish and allow to dry;
- collect parts.
Coffee heart
A coffee heart is a fragrant gift that expresses the love of the giver. It is performed in the same way as creating a topiary, using a heart-shaped base instead of a ball, pasting it with coffee beans. Another option for a coffee heart is a car pendant.
The basis for such a heart is made from corrugated cardboard covered with brown velvet or foil, or from a floral sponge cut in the shape of a heart and pasted over with sand as a background. A hook with an eye or a wire must be inserted into the recess of the heart to form a pendant.
Roasted coffee beans are attached tightly to each other onto the finished base using a glue gun, so that there are no empty areas left. Decorate the heart with a gold ribbon, star anise or cinnamon stick.
Balloons with wishes
An original birthday surprise will be a bouquet of balloons with wishes. Pleasant compliments and parting words are written on small pieces of paper and rolled up. Each one is placed in a balloon, which is inflated with helium. Tie each ball tightly with thread, tie ribbons and collect the bouquet.
You can attach a card with a gift certificate or a cheerful wish to the ribbons.
How will we draw the gift?
Do you think that pencils, paints, felt-tip pens – everything has been familiar for a long time, nothing will surprise anyone? Do you know how to draw a gift using flagella from multi-colored napkins, an iron and wax pencils, strong coffee and a toothbrush? Believe me, it doesn't look as ridiculous as it sounds.
Contemporary fine art offers hundreds of original ways and materials to convey your feelings, emotions, and beliefs through drawing.
Master class on making flowers from balloons
An unusual bouquet for the holiday can be made from balloons. With some skill, you can get a wide variety of types of flowers, but first, it’s better to make a chamomile, for which you will need to inflate sausage balls, leaving 3-5 cm at the end free of air.
Instructions:
- The beginning and end of a ball of white or another color are tied, folded in half and twisted twice on the fold.
- The resulting 2 parts are twisted in two places so that 6 identical parts are formed (three on each half of the ball).
- Place the parts on top of each other in pairs and intercept them at the place where the petals twist.
- With the other hand, twist the petals in the middle so that you get a flower with a hole in the middle.
- A stem with a flower center is made from a green ball. Near the knot, roll a sausage of about 10 cm, bend it and twist the same segment together with the first.
- Thread the resulting core into the hole of the flower.
- Make several flowers and collect them in a bouquet, tying them with a beautiful ribbon.
Cut and tailoring
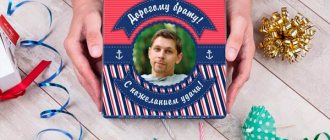
We always start by measuring and cutting out two rectangles of fabric, between which we need to lay fleece and secure with pins. Then you should stitch around the perimeter or carefully and slowly stitch by hand (if you don’t have a machine). We wrap the resulting blank around the cup and select the best place for sewing Velcro (marking it with a pin).
Separately, you need to prepare a photo frame by cutting out a square from the same fabric (not forgetting also about fleece), approximately 8x8 in size. We place the fabric squares on top of each other, and after measuring 1.5 cm on all sides, we draw a smaller square: 5x5 centimeters, and carefully cut it out, thus obtaining a frame. The perimeter of the square must be stitched to connect the fleece to the corduroy. The next step is to sew the frame to the sleeve blank, attaching it to the middle, then insert a photo (or a specific thematic picture) into it. It turned out to be a sincere gift for my brother on his birthday. Whether he turns 27, 30, 35 or 50 doesn’t matter; he’ll like this surprise anyway.
3D images on postcards
If you attach a handmade 3D card to your birthday souvenir, this set will look like the most original gift.
DIY birthday gifts are quick and easy to make if you follow the step-by-step instructions.
Instructions:
- Fold double-sided colored cardboard in half, make markings with a pencil on the fold line, from the top edge 4 cm, 1 cm, 5 cm, 1 cm, 5 cm, 1 cm. From the points limiting the 1 cm segments, set aside lines 2 long perpendicular to the fold, 5 cm, 2 cm and 1 cm.
- Make cuts according to the drawing, you will get 3 bases for 3D format of different lengths. They need to be folded in half in half inside the postcard.
- Glue the finished base onto a second sheet of thick paper, folded in half.
- From thick colored paper, cut out decorations in the form of boxes with gifts, the inscription “Happy Birthday!”, balloons or butterflies. Glue the selected parts onto 3 bases inside the card. Make sure that when folding the postcard, the parts do not get wrinkled.
- Sign the card, decorate the outside of the card with details similar to those inside, ribbons, beads or rhinestones.
Everyone can draw!
There is no person who is unable to create an original and meaningful drawing to please someone you truly care about. You need to know a few basic rules of composition and delve into the latest trends in the world of applied arts.
Rules for placing a picture on a sheet
No matter what you paint with or what material you choose for the base, adhere to the laws of composition:
- Expand the sheet in proportion to the depicted object;
- Determine the center of the picture, the margins;
- The top margin should be slightly larger than the bottom so as not to put pressure on the image;
- Make a small sketch of your future work on a small piece of paper so that when transferring it to the final copy, you can take into account any mistakes made.
- Place important and meaningful objects in the center, and secondary ones nearby.
How to make a gift box?
You can do your own gift wrapping. A gift box is made from colored thick paper in the shape of a pyramid, a house, a flower bud, a round or square box. You can find a lot of templates on the Internet, by cutting them out you can make neat packaging without much expense.
It’s very easy to build a cone box yourself:
- draw a circle on paper (the larger it is, the higher the box);
- divide the circle in half and form a cone from half, connecting 2 corners together;
- place a gift inside the box, cover the cone with foil or paper, gluing it to the base;
- decorate the box with ice cream appliqué, ribbons or beads.
Everyone loves receiving special birthday gifts. Everyone can surprise their family and friends by making a unique surprise with their own hands.
After reading this article to the end, it becomes obvious that making a gift with your own hands and presenting it on your birthday is almost as easy as buying it. But in such a product there is sure to remain a piece of true love and best wishes for the birthday person.
Tags
A gift for a brother for a brother for an original brother happensBirthday orBirthday or the birth of a childBirthday Birthday Birthday Birthday Birth of a childbirthday your ownbirthday presentbirthday Birthday Birthday Birthday Birthday Birthday BirthdayBirthdayBirthdayBirthdayBirthdayBirthdayBirthdayBirthdayBirthdayBirthdayBirthdayBirthdayBirthdayBirthdayBirthdayBirthdayBirthdayBirthdayBirthdayBirthdayBirthdayBirthdayBirthdayBirthdayBirthdayBirthdayBirthdayBirthdayBirthdayBirthdayBirthdayBirthdayBirthdayBirthdayBirthdayBirthdayBirthdayBirthdayBirthdayBirthday make a gift
craftsmomfebruarynewhelpercommentsandglueholidaymasterweddingmarchanniversarycraftsonlyclassnews
Design of photo frames
Using quilling you can decorate any object, including a photo frame. It is important to choose the right colors, otherwise the gift will look too pretentious.
You can purchase ready-made sets or select paper ribbons yourself.
Idea! If you have a lot of old buttons, you can cover the photo frame with them. It will turn out very original.
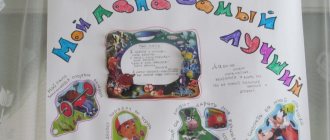
Children love to make crafts with their own hands. Give me an idea to make a photo frame out of cardboard. For decoration, you can use colored paper or gift wrapping paper. To make the legs, use the same cardboard; if you decide that the frame will hang on the wall, then glue the string.
Children love to make crafts with their own hands. Submit an idea to make a photo frame out of cardboard
How to draw a mother beautifully and easily - a basic lesson for children - years old
A beautiful mother’s portrait is usually difficult to draw even for schoolchildren. But if you choose simple lessons for children that show in detail all the stages of its creation, then there will be no problems in the work. For example, the following master classes will help you learn how 8-9 year old children can draw their mother beautifully and easily with a pencil or paints.
Step-by-step master classes on creating a beautiful mother's portrait easily and simply for children
Using the proposed videos, you can easily draw your mother’s porter with paints or pencils. Such master classes are suitable for children 8-9 years old and older children.
Fun T-shirt for brother
If the brother is not a bore and is distinguished by originality, then the gift for him can be creative.
For example, a fun T-shirt or a T-shirt decorated with your own hands.
To work you need to prepare:
- A white or other plain T-shirt or tank top.
- Markers and fabric paint;
First, you should draw a template on paper. After this, it is placed under the T-shirt, and an image is drawn on top of the fabric using markers or paints.
If the brother is not a bore and is distinguished by originality, then the gift for him can be creative
Defender of the Fatherland Day
On February 23, it is appropriate to depict military equipment, a light model - a tank. The lower elongated oval is the tracks, into which characteristic circles are inserted, the smaller middle oval is the armor itself, and the final small element is the turret with a muzzle.
A good variation of the star and the St. George ribbon is a symbol of the heroism of soldiers. Step-by-step instruction:
- Use a protractor to draw a circle. Dividing it crosswise, we add four more lines passing through the fundamental angles. We use dots to denote the image of an asterisk and combine them. We do not erase the internal strokes - they will help achieve convexity;
- draw a secondary contour, retreating a small distance from the edge;
- a sign of soldier’s valor is placed around it, on which vertical familiar stripes are applied;
- Color the drawing using pencils or paints. The outer star edging is gold, as are the stripes on the ribbon, alternating with black neighbors. The star itself is red and embossed due to the play of shades.
We sign our postcard, wishing dad or another user health and goodness.