After reading our article, you will know how to tie balloons correctly so that they do not deflate, and what device is available for tying balloons.
Balloons are always associated with lightness, fun, and a good holiday mood. They immerse you in a carefree childhood, allow you to forget about problems and just enjoy the moment. And today, many companies can offer helium balloons with delivery.
It’s hard to imagine a children’s party or any other celebration without balloons. Wedding, birthday, banquet, corporate event - all these events are never complete without original design. This is due to a number of reasons:
- Balloons are the most colorful and festive type of decoration. Even very simple compositions bring a smile to your face and give you a lot of positive emotions.
- Balloon decorations are very easy and convenient to install, especially if you know how to tie balloons. If fabrics, fresh flowers, paper compositions require certain dexterity and skills from the installer, then anyone can decorate a room with the help of balloons.
- These items are quite economical compared to the same bouquets.
- Balloons carry a huge meaning. A certain combination of colors or a figure constructed from them (a heart, an infinity sign) serves as an excellent means of expression.
- Decorative elements are actively used in various shows. For example, everyone is familiar with the tradition of releasing balloons into the sky when people make wishes.
Features of foil balls and working with them
Foil and latex are two completely different materials; therefore, they will differ from each other in appearance, design and features of interaction with them:
- There are no pores in the foil structure, so the balloons will not deflate. At the same time, they do not need to be treated with high float.
- The balloons have a valve that firmly fixes the air from the inside.
- Products made from foil will not stretch. If a change in temperature is envisaged, it is recommended to not inflate them completely, leaving a small space for the air to expand.
It is much easier to deflate a foil balloon with your own hands than latex products. The main task of the aerodesigner is to carefully tie the fragile foil structure without deformation. If you are fully aware and strictly follow the instructions, foil products will last more than 7 days. Sometimes the storage period can reach 30 days.
How to properly inflate a foil balloon
When inflating foil balloons yourself, it is not recommended to use alkali, vinegar or other chemicals to produce gas. Under their influence, the seam of the product can separate, and the material is deformed, dissolved, and loses its brightness along with its shape. In this regard, it is recommended to inflate the structure with helium or air.
Step-by-step instructions for inflating a foil balloon.
However, helium inflation is an expensive option, but the most effective because the gas is lighter than air and allows foil structures to fly. It is advisable to entrust this process to more experienced aero designers, but it can be carried out independently by using an adapter with a helium cylinder.
Step-by-step instructions for inflating:
- Fix the adapter on the cylinder, insert the other end into the ball.
- Straighten the figure so that the helium penetrates evenly and unhindered into the structure.
- Initially, it is recommended to inflate the product with air using a tube so that the valve can open smoothly. Otherwise, it may become deformed due to the sudden flow of gas.
- Inflate the structure until it takes the appropriate shape.
- Close the flap and tie the ponytail.
Despite the fact that foil products are very strong, they can be blown out. As a result, the material will tear or the seam will come apart.
If the holiday will take place outdoors during a hot period of time, it is advisable not to inflate the products too much. Under the influence of heat, the gas will begin to expand, and the structure will take the required shape.
Inflating balloons with helium is not entirely suitable for a small celebration, since the balloon is quite expensive and it is not worth purchasing it for several products. However, it can be rented from a company that provides such services.
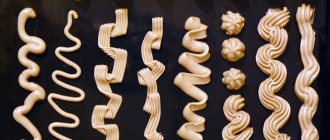
A flower made from a sausage ball is a more complicated option.
Step-by-step instruction:
- The balloon is not fully inflated with the pump, leaving 8-10 cm free.
- The inflated ball is twisted to form a circle and tied with the free ends.
- At equal intervals, the circle is twisted three times, making six nice “sausages”.
- The “sausages” are folded to get 2 halves of a flower, 3 petals in each.
- The two halves are twisted together.
The composition element is ready. You can make many of these flowers in different shades and sizes for a luxurious bouquet.
Check Valve for Foil Balloons
You can deflate a foil balloon with your own hands using a check valve consisting of 2 transparent polyethylene strips that are soldered to each other along the entire length of the edges. On one of the strips, part of the length is more durable thanks to a sealed piece of polyethylene with a bluish tint.
The beginning of the valve, shown as a yellowish line, should be sealed into the neck of the structure. The welded line of polyethylene strips is shown as a grayish dotted line.
The valve is a tube, which is more rigid inside the neck, and softer inside the cylinder of the product. The rigid part is reinforced with a bluish stripe and is intended for contact with the noses of gearboxes or adapters. The softer part of the valve tube, presented in the form of petals, is required to close the gas inside the product.
When helium is injected into the product, the tube begins to open, allowing the gas to freely penetrate the structure. When the jewelry is inflated, under the pressure of the gas hidden inside the product, the soft part of the valve tube will begin to compress. As a result, the closed petals will not allow gas to escape from the product.
In order for the gas to be securely locked inside the foil product, the petals must be very long. For example, if, as the temperature decreases, the gas pressure inside the structure begins to fall, the force compressing the valve petals will begin to increase with possible gas leakage from the product.
When helium leaves the structure, it begins to reduce the pressure inside the product, and as a result, the check valve begins to open more. To quickly leave the ball, a lot of gas must come out.
Simple tying of an inflated foil balloon
The check valve, fixed in the neck of the structure, holds the gas very reliably. In this regard, the tape is fixed to the inflated products so that it does not fly away. However, if the tape is tied slightly above the inlet, the strength of the check valve will be compromised and the product will begin to deflate within a short period of time. The braid must be fixed below the inlet hole.
If the air temperature begins to decrease, the pressure from inside the foil structure can drop significantly. As a result, the check valve will begin to let gas through. At the same time, the protruding neck of the ball does not look very impressive. To securely close the structure and hide the neck of the product, it is recommended to use a professional tying method.
Professional balloon tying
It will be quite difficult to deflate a foil balloon with your own hands if you tie it using a professional method, which involves double fixing the ends of the braid.
Instructions for tying foil decorations:
- Fold one edge of the ribbon into a loop.
- Roll the neck of the product into a strong roll around the loop.
- Fold the roller into a V shape, securing it with one hand.
- With your other free hand, pass the free edge into the loop and pull up to form the first knot.
- Using both hands, tie the edges of the braid together to create a second knot that will prevent the first one from coming undone.
How do professionals do this?
Aerodesign specialists use a different tying method. It is much more reliable and holds air and helium inside better, and it simply makes the neck of the balloon neat, without protruding ends.
- First, the ribbon or braid is folded in half so that a loop is formed at one end, and the tape is placed on the outlet hole of the ball below the check valve.
- After this, the resulting “tail” is twisted around the ribbon in the form of a roller to the base of the sphere. The roller bends, forming the letter V, and holds it with your fingers.
- With your free hand, take one end of the braid and make it into a loop and tighten it. After this, a second knot is tied on top of the first.
- The first knot will hold the ball on the ribbon, and the second one will simply prevent it from coming undone.
Sealing inflated foil balloons
The foil balloon must be sealed so that it does not deflate after inflating. To do this, you can use a special sealer. However, in its absence, it is permissible to solder the structure with your own hands using a regular iron, which must be heated to a high temperature.
You cannot solder the structure directly, as the material may melt, tear, or create unsightly folds. It is recommended to make a spacer between the hot metal and the foil, which can be served as a thin napkin. The product should be sealed in several places, leaving a small distance between them.
When sealing an inflated foil balloon, there are several points to consider:
- Before sealing, you should check that there are no folds or air in the neck;
- the product must be soldered 2 times, maintaining a distance between solders of 1 cm;
- it is necessary to attach a protruding part of the structure to the sealer, through which inflation occurs;
- it is necessary to test what temperature to set and how long to keep the hot tool for different products (the time will vary depending on the material).
Decor
In itself, this is a rather labor-intensive method. As a rule, the construction of the process of wrapping a gift in a ball depends directly on its size. In general, the entire registration process is divided into three parts:
Read also: How to maintain a conversation with a girl on VK
- We place the gift itself in the ball.
This point is the most important and most difficult, but at this stage the most questions arise, the answers to which you will find out below. - Fill the balloon with air.
As is correct, difficulties arise at this stage only with large gifts. In any case, at this stage you definitely need a pump (for large balls); for small ones, the strength of your lungs is enough. Then, the secondary design of the internal space of the ball. - Now you need to decorate the outside of your gift in a ball.
You can use anything as decoration: ribbons, beads, beads, stickers, flowers, etc.
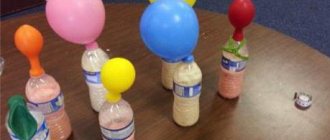
To make a gift in a small-sized balloon, such as, for example, jewelry, packaging of candy, a watch, and so on, you will need: directly, the large-sized balloon itself, the chosen color, the neck of a regular plastic bottle, scissors, a ready-made gift, pump, and decorative elements.
Toy in a ball
How to attach a ball to a stick
A thin plastic stick acts as a handle for the foil product. It can also be used instead of a cocktail straw to inflate the structure.
Correct attachment of the ball to the stick:
- Inflate the structure in any way.
- Insert the stick into the product.
- Tie the tail tightly at the highest point, near the base of the ball, using braid.
If the structure is not sealed, it will not deflate for several weeks. The balloon can then be inflated again.
To tie it, it is advisable to use a thick ribbon, the width of which will be within 1.5 cm. The tail should be wrapped with braid in several layers to make the winding dense and strong. As a result, gas will not escape from the structure.
Balls for a surprise ball
For the craft, you need to buy one large ball, as well as several dozen mini-balls. They are sold in packs of ten or one hundred. These are small products up to 5 cm in diameter (inflated). For one surprise, craftsmen use about 200 mini-balls, but their number may be smaller. The shape of the internal elements can be arbitrary. The easiest way is to put in regular oval balls, but if you want to play around and make the surprise even more amazing, you can change them to hearts.
How to deflate a foil balloon
Air is often used to fill small structures. Larger items use helium and also have an internal valve so they can be reused. However, for these purposes it is necessary to deflate them correctly.
You can deflate a foil balloon with your own hands using a cocktail tube, following these steps:
- Carefully insert the tube into the valve of the structure.
- Slowly push the tool deep into the product. The valve with walls must not be deformed, otherwise the product cannot be reused.
- Release the gas from the ball by lightly pressing on the structure.
- If the helium does not descend, it is permissible to use a vacuum cleaner to remove the remaining gas.
After deflation, the product should be flat, resembling a sheet of paper.
Product advantages
Foil balloons can fly for a long time: from 3-5 days to several weeks. Because of this excellent property, the products are used for interior decoration. Moreover, they are often combined with latex balloons. Foil products make wonderful greeting bouquets.
Bright foil balloons come in different designs, shapes, and sizes. They are very easy to print compared to latex ones. Stores sell different shapes of balls: circles, stars, hearts, objects, animals, equipment. Some have congratulatory inscriptions and thematic drawings. Those who want to beautifully decorate a room need to know how to inflate a foil New Year's ball or product at home for any other holiday.
Storing foil balloons
After deflation, the foil balloon must be stored correctly. To do this, it must not be folded, otherwise tears or cracks will appear on the folds. Products should be separated from each other using soft paper sheets, since when the temperature increases, they can stick to each other. As a result, deformation will occur.
It is recommended to store foil structures horizontally and unfolded. In this case, the air temperature should not be very high.
Air
Foil figures with air do not fly, but this option is almost free. In this case, 2 methods are used:
- Mouth inflation.
- By pump.
Which method to choose depends on the size of the ball. Small figures can be inflated on their own, but for larger ones a pump is suitable. How to inflate foil balloons at home in two ways is described below.
Re-inflating foil balloons
Foil balloons can be re-inflated using air and a cocktail straw. However, such a design will not float under the ceiling.
There are 2 ways to inflate foil products:
| Option | Peculiarities |
| Using a ballpoint pen or cocktail straw | It is necessary to remove the rod from the handle, since only the main part is needed. The tool should be inserted into the valve and slowly inflate the product. If you blow very intensely, the valve will become deformed. If air does not penetrate well, it is permissible to move the handle a little further into the structure. |
| Pump | The product cannot be blown all the way, so there should be folds on the sides. After inflation, press the valve and close it. If desired, helium can be used instead of air. |
If you inflate a foil balloon correctly, it will retain its shape for several weeks. When all the air has deflated, the product need not be thrown away, since it can be re-inflated, giving the balloon a second life so that it can decorate a festive celebration. However, to do this, you should deflate it correctly with your own hands and store it without losing its properties.
How to tie a balloon?
The answer to this question is very relevant in the 21st century, because they do not always resort to the help of specialists to decorate the interior. Often you have to do this yourself at home. Therefore, it is very important to learn how to tie balls with or without thread. This procedure seems quite complicated, but in fact, it is no more difficult than lacing. So, how to tie balloons?
First, you need to get acquainted with the structure of a balloon. It consists of three parts:
- the body is the main detail. It is this that is filled with air and has the shape of a sphere;
- sponges are a ring through which the balloon is inflated;
- neck - an elongated connecting part between the body and the sponges.
The simplest answer to the question “how to tie a ball” is with a thread. To do this, cut a thick, durable thread measuring 15-20 cm (if you plan to hang decorations, for example, from the ceiling, the length should be longer). Inflate the balloon so that it has a long tail, and pinch it at the base with two fingers of your right hand. With your left hand, grab the top of the ball and rotate it around its axis several times, then wind the thread at the base. To prevent the balls from deflating, make at least 4-5 skeins. At the final stage, release the ponytail and tie the thread with both hands.