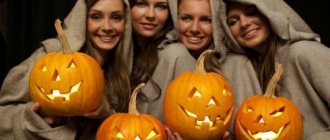
Halloween is a holiday that takes place on the night of the end of one autumn month and the beginning of the second (October-November). It is widely celebrated in several countries around the world (USA, Scotland, England and Ireland), but is gradually gaining popularity in all corners of the globe.
Halloween is a symbolic holiday, so you can’t do without certain paraphernalia when celebrating it:
- Pumpkin lanterns.
- Matching suit.
- Bright makeup.
All this is an integral part of the night of "Horror". What do you need to create a men's themed Halloween look?
Easy Halloween makeup at home for girls “Scarecrow” - step-by-step master class with photos
Let's start with a very light make-up of a popular fairy-tale character for Halloween for girls - the scarecrow. In order to embody the image of the famous Scarecrow from “The Wizard of Oz” at home, you will need a completely standard set of cosmetics. And to complete the image of this character at home, in addition to light Halloween makeup for the “Scarecrow” girls from the master class below, you will need a straw hat.
Necessary materials for easy Halloween makeup for girls “Scarecrow” at home
- black eyeliner
- liquid lipstick or coral gloss
- false eyelashes
- white eyeliner
- light eye shadow
- liquid eyeliner
- Foundation
Step-by-step instructions for Halloween makeup for girls “Scarecrow” at home
- First of all, apply your usual foundation or powder to even out your skin tone. In addition, this technique prolongs the durability of all subsequent makeup. Using liquid lipstick, draw small circles on the cheeks. We also highlight the tip of the nose and paint over the lips.
- Use light shades to highlight the upper eyelids. Then use a black liquid eyeliner to line the upper and lower eyelids with a thin line. Moreover, on the upper eyelid we draw a classic arrow, and on the lower eyelid (in the outer corner of the eye) we draw an imitation of eyelashes.
- Glue on false eyelashes. Then use a black eyeliner to outline the spot on the nose. Draw small lines similar to the threads of a fabric patch.
- Using the same pencil, draw short straight lines at the corners of the mouth. We also make parallel thread strokes. Using a white pencil, draw highlights on the cheeks and nose.
- To complete the look, we braid two braids or ponytails and put on a straw hat.
Halloween makeup for girls
A lot of time is spent on makeup for Halloween masquerade by girls. Everyone wants to create a unique image from their favorite horror movie or children's horror story. There are a lot of master classes that explain in detail step-by-step techniques for performing almost professional makeup. It is important to work out the details of the future makeup. This creates a complete picture, allowing you to achieve the desired result at the holiday, turning into a mythical creature or the heroine of a book or film.
Witch
Witch makeup is deservedly considered one of the most popular. Sexuality and challenge can harmoniously combine here. For your future look, stock up on a black pencil, eyeliner, red lipstick, add a palette of dark shadows and you can get to work.
Prepare your face - apply foundation to cleansed skin, then light foundation. Using a black pencil, draw the eyelash line well and blend everything out. Repeat the same manipulations below. Apply dark gray shadows to the moving eyelid and brush again. To make your look more expressive, coat your eyelashes well with mascara. Many people use false eyelashes for the evening.
Apply red, blue or purple lipstick to your lips and fill in the corners with black eyeliner. Blend gently to create a smooth transition. Rich, bright makeup is ready. All that remains is to complete everything with a suitable suit and hairstyle.
Mummy
A simple and common Halloween makeup involves transforming into an ancient mummy with elements of sexuality. Stock up on liquid latex; you can replace it with PVA glue, bandages, napkins and bright cosmetics. Bandage half your face, applying makeup on top. Brightly paint one eye, choose bright lipstick for your lips. This type of costume is the easiest to implement; you can open as much as you want. There are no restrictions with paints, type of makeup - all you have to do is experiment.
Sugar Skull
Scary skeleton makeup for Halloween has spread around the world from Mexico and has its origins in the Day of the Dead holiday. To create a sugar skull, scary and at the same time glamorous makeup is used. To bring the image to life, you will need not only cosmetic products on hand, but also special masks sold in office supply stores. You can completely copy the desired image from them. Often professional makeup or paints are used to achieve the desired result.
Zombie
An amazing option is Halloween zombie. On the eve of the holiday, zombies become one of the most frequently encountered characters. The idea of zombie makeup is based on numerous films and comics about the future apocalypse. For maximum realism, many use fake blood. She looks appropriate in the image of a half-decomposed corpse.
To create terrible scars and wounds you will need PVA glue and paper. First you need to apply glue, then use paper to create a semblance of scars, and paint over everything with cosmetics on top. Don't forget to create the effect of sore eyes using a red pencil. A palette of gray shadows and a light tone for the face wouldn’t hurt either. Show some imagination by drawing a animated corpse for the holiday.
broken doll
On Halloween, makeup can resemble a broken porcelain doll thrown in a corner that makes your blood run cold when you look at it. The main feature of the makeup is realistic cracks on the face. Try to give them maximum attention. Halloween dolls become the embodiment of children's horror stories. They come to take revenge on those who abandoned them. False eyelashes remain an invariable attribute in makeup; you need to pay attention to the eyes, making them wide open.
It is not worth appearing in such an image in front of children. A child's look with elements of horror stories is suitable for Halloween; the makeup looks realistic and can scare the child. For adults this is an acceptable image.
Pay attention to drawing the lips, creating the bow shape inherent to the doll.
Bride of Frankenstein
Makeup that resembles the corpse of a famous doctor's bride is popular at the holiday. The image was taken from the film of the same name; it has long become a classic. Makeup for Halloween, where a dead bride appears in a wedding dress, should be done carefully. The main thing is to create the illusion that a single whole consists of fragments of dead bodies collected by the doctor. Inflamed seams on the face, pale skin and bright eyes, lips together create an impressive, terrible picture - just what you need for the holiday.
Vampiress
Vampire makeup is worn by many people year after year. A distinctive feature of ladies who love to walk at night and give destructive kisses is pale skin, red lips and black eyes. Use well-known cosmetics and create a smoky eye makeup. Add unnatural pallor to your face and don’t forget about the trickle of blood flowing from the corner of your lips. For realism, you can stock up on fake fangs.
Remember, vampire makeup is horror and sexuality, masterfully combined in one bottle. Carefully consider the details of the image.
Harley Quinn
If you haven't decided yet how to wear makeup for Halloween, choose the look of Harley Quinn, making her crazy eyes the main focus. There is no need to talk about the popularity of this character again. Many have already transformed into this pretty but merciless girl.
Use foundation to lighten your skin; many people prefer to replace it with professional makeup - this will create a greater resemblance to a tough beauty. Use a red pencil to draw well one eye, and for the second use a blue pencil. The same can be done with gouache.
Girl without an eye
The scary makeup that is chosen for Halloween often creates the illusion that the girl simply does not have an eye. It can be difficult to do this kind of makeup yourself. You need to practice, choose an eye patch, disguise it well with cosmetics and rhinestones. Many people prefer to create the effect of a wound using the same glue, napkins and paints, applying everything on top of the bandage.
Scary makeup for Halloween looks scary, but to congratulate your friends on this holiday in an original way, you can choose it. The main thing is not to overdo it with realism.
Web - queen of spiders
Halloween makeup for girls, which is an intricate web, is presented in numerous photos. This will help you accurately recreate the desired image. First, apply foundation, foundation, mascara to your face, then use a pencil to mark the points where the web will pass and carefully connect everything together.
The result is a very beautiful makeup. There is more sexuality in him than fear and aggression. The created look will be completed with a transparent gloss applied to the lips.
Make-up “Cat” at home for Halloween for children and adults - lesson with pictures, step by step
The following “Cat” makeup at home for Halloween with pictures is suitable for both adults and children. To create it you will need a minimum of cosmetics and a hoop with cat ears. You will find all the details of creating Halloween cat makeup for children and adults at home in the lesson with pictures below.
Necessary materials for making a cat on Halloween at home for children and adults
- Foundation
- bronzer or dark color corrector
- black eyeliner
- black liquid eyeliner
- mascara
- light beige and dark shades
Step-by-step instructions for making “Cat” makeup at home on Halloween for children and adults
- Apply your usual foundation all over your face. We use bronzer or a dark shade corrector to contour, as in the photo below. Blend well with a brush or sponge.
- Use light shadows to highlight the back of the nose and eyelids.
- Using black liquid eyeliner, first draw a classic wing on the upper eyelid. Then, with its help, we draw the lower eyelid, drawing the inner corner of the eye, thereby achieving a cat-like look.
- Use a black pencil to highlight the tip of the nose, as in the photo below. We also draw black dots in the area of the nasolabial folds.
- To complete the image, we draw whiskers and small spots/stripes, characteristic of the coloring of representatives of the cat family.
Doing your hair
Equally important is choosing a Halloween hairstyle that will complement your chosen look. If you don’t want to devote time to this issue, then you should use a headdress that matches the costume, or a wig. If you decide to do your hair yourself, then use these tips.
- For scary images, use a comb to comb your hair, tousle it, and fix it with hairspray.
- Using colored mascara and tint foam you can color your locks.
- The extravagance of the image is emphasized by sparkles in the hair.
- Hairpins with skulls, spiders, and pumpkins will complement your Halloween look.
- A headband with horns and ears is perfect to complete the costume.
Quick and easy makeup for girls “Elsa” for Halloween - master class at home
Not every little girl wants to be a witch or a zombie on Halloween. A quick and easy “Elsa” Halloween makeup for girls from the at-home master class below is suitable for those little ones who prefer princess looks. To create this quick and very easy to do fairytale princess Elsa makeup at home, you will definitely need face painting and a special stencil.
Necessary materials for quick Elsa makeup for girls for Halloween at home
- face painting in white, blue and light blue
- brush and sponge
- stencil with snowflakes
- glitter, rhinestones and glue
Instructions for creating easy makeup for girls for Halloween “Elsa” at home
- In order to create the image of Elsa, you first need to make a small sketch of the mask on the face. It is important to mark the upper points on the forehead and above the eyebrows, and then proceed to applying makeup with a sponge. First, a blue base is made, on top of which the mask will be drawn.
- Then, using a homemade stencil made of paper or thin plastic, you need to draw snowflakes on top of the base and beyond.
- Then you should move on to attaching the application of stones, rhinestones and sequins in the form of a frosty pattern on the forehead. Special glue for rhinestones should be used for this purpose.
- All that remains is to draw the contours of the crown mask with a thin brush and white paint - Elsa’s image is complete!
Types of makeup
First of all, it is important to determine for yourself what material you will use. There are several types of paint for creating Halloween makeup:
- Face painting.
- Theater makeup.
- Face chalks.
The good thing about face painting is that it is easy to apply. Like watercolor paints, it is diluted with water, does not crumble over time, does not flow, and does not stain clothes. The main advantages of this makeup are its environmental friendliness and hypoallergenicity, which is important when doing makeup for children . It's not cheap, but one package is enough to celebrate Halloween several times.
Theater makeup is much heavier than the previous type of paint, and over time it can crack and stain the child’s clothes. In the light it shimmers with a greasy sheen.
One of the budget options for children's makeup is face crayons. These are non-toxic paints that are easy to apply with your fingers or a regular sponge. Disadvantage: They wear out quickly.
Materials
You will need pencils and eye shadow, eyeliner, mascara, concealer, blush, and powder. Depending on the paint base used to apply makeup, you will need makeup removers.
Tools
Brushes of various thicknesses and textures, cotton sponges, napkins and discs.
Blending Basics
The first step is to check the skin's reaction to the paint. To do this, a small layer of paint is applied to the child's wrist. If within an hour there are no allergic reactions in the form of a rash, dryness or irritation, then you can safely get to work. Before directly applying makeup, it is recommended to lubricate the child’s skin with baby cream.
Easy Halloween makeup for children “Witch” - master class with pictures, step by step
Halloween witch makeup for children from the master class with pictures below can also be called quite easy to perform. To perform it you will need children's face painting and a little artistic talent. All the details of creating light Halloween “Witch” makeup for children in the next master class with pictures.
Necessary materials for easy “Witch” makeup for children for Halloween
- green, purple, black makeup
- thin brush
- pointed hat
Step-by-step instructions for a master class on light Halloween makeup for children “Witch”
- Apply a thin layer of green makeup to the entire face. Lightly highlight the eye area with purple makeup.
- Then we draw the eyelids, eyebrows, nose and nasolabial folds with a more saturated purple color. We also draw wrinkles with this shade.
- We emphasize the lower eyelid with black paint. From the resulting arrow we draw cobwebs. Draw warts on the chin. You can also add a couple of spiders hanging from the web in the outer corner of the eye.
- Paint your lips purple. You can use the same face painting, or you can take bright purple lipstick. Additionally, draw wrinkles and bags under the eyes with thin black lines.
- We complete the look with loose hair and a pointed hat.
How to do witch makeup?
The witch is one of the most popular images for women. It is believed that the witch has great power and the ability to lure any man. Girls often wear robes and make -up for Halloween.
Witch makeup application:
- First of all, you need to make your face as light as possible , since the witch is a mystical creature (she does not have a “healthy blush”). Use white powder for these purposes, apply it with a puff and rub thoroughly, and also so as not to leave unpleasant lumps and not create a “mask effect”.
- Use a dark brown powder to add texture to your face. Blush will make you look flushed, and you don't want that. Dark brown powder will highlight your cheekbones and chin. Apply the same dark powder to the wings of the nose to visually make it more elongated.
- Line your eyes with a black eyeliner to add definition. You can also use black or purple shadows. If possible, stick on eyelashes. This will simultaneously brighten your eyes and give them a feminine look.
- It is best to paint your lips with light lipstick . To do this, you need to choose white, purple, lilac shades of lipstick without pearl. This lipstick will make your lips look lifeless.
- Using a black contour pencil, draw a spider or spider net on the cheek if desired. This will add style and originality to your look. You can even draw a mole on the noma - this is also a symbol of a witch.
Witch makeup options for Halloween:
Witch makeup option for Halloween
Halloween "witch" makeup for girls
Witch look and makeup for Halloween
Do-it-yourself scary “Skeleton” makeup for Halloween for a boy - step-by-step master class
As a rule, boys prefer to make their own scary makeup on Halloween, for example, creating the image of a skeleton. By the way, applying this makeup at home is as easy as shelling pears. At the same time, a DIY image with a scary skeleton makeup for a boy for Halloween is always relevant and in demand.
Necessary materials for scary make-up “Skeleton” for Halloween for a boy with his own hands
- white and black makeup
- thin brush
- flat foundation brush
Step-by-step instructions for making a scary skeleton makeup for Halloween for a boy with your own hands
- First of all, using a foundation brush, apply a thin layer of white makeup to the entire face, including the lips. Blend well to get the effect of very pale skin. You can also add a little gray makeup to the white paint and mix well. In this case, the shade will be off-white and ideal for this look.
- Using a thin brush with black makeup, draw circles around the eyes, including the eyebrows. We close our eyes one by one and fill each circle with black. On the back of the nose, draw two lines in black, similar to holes in the skull.
- Now we draw a thin line under the lower lip, bringing its ends to the cheeks and emphasizing the cheekbones. We make a thicker line on the cheekbones to emphasize the relief of the makeup. Then we move on to drawing the jaw. To do this, on the upper and lower lips we draw rows of small squares imitating teeth.
- We complement the image with light touches, for example, cracks. To do this, use a thin brush with black paint to draw uneven lines on the forehead and cheeks. You can also make the makeup more voluminous and “live” by slightly darkening the jaw, the convex part of the forehead and the contours of the cheeks with a sponge with gray paint.
Outfits for boys: interesting ideas
Boys are crazy about images of skulls and zombies - that's a fact. Therefore, knowing how to do two versions of the most popular makeups, you will definitely be able to surprise and delight the guys.
I'll start with the skull. For makeup you will need paints, black and white. The easiest way to apply paint is with a sponge. Start with a base of white paint. Leave the eye area untouched. Fill in the gaps with black paint. Divide the line of the mouth with a black stripe and draw the teeth. Smudge the contours of your lips to make it look more realistic. Highlight your cheekbones with black paint and blend.
Well, where would we be without bloody zombies? This image captivates boys aged 8 years and older.
To make a little zombie look realistic, you will need to make an effort. In addition to colored face painting, you will need liquid latex and sharp scissors. Blood is also best made from paint and corn syrup. This will make it thicker and more natural. Start applying makeup according to the instructions:
- Saturate the sponge with liquid latex.
- Apply the mixture to the part of your face where the wound will be.
- Place a thin cloth in the latex area, add a little more mixture and let the layers dry. Repeat the procedure 4-5 more times. Speed up drying with a hairdryer.
- On the dried composition, make a cut with jagged edges. Use scissors or a utility knife.
- Apply basic makeup over the wound.
- Add blood from corn syrup to the inside of the “wound”.
- Paint your face a pale gray or blue.
- Draw bruises under the eyes.
Streams of blood under the nose, on the temples, neck and clothes will help enhance the effect.
Spider-Man look: bright makeup for little ones
Preschool children will be happy to dress up as Spider-Man. The makeup for this look will require only three primary colors: red, black and white. Apply the red base to the skin except for the areas around the eyes and with a thin brush draw a symmetrical web on both sides. Paint the clean areas around the eyes with white paint. You can draw a small spider on your forehead. The image is ready!
Do you like baby makeup ideas? Share with your friends on social networks!
Sincerely, Anastasia Skoracheva
Simple Halloween makeup for boys and men “Vampire” - master class at home, photo
The following version of a simple vampire makeup for Halloween at home is suitable for both boys and men. To create it you will need makeup and a little time. Learn more about how to make a simple vampire makeup for Halloween at home for a boy or a man in the next master class with photos.
Necessary materials for simple Halloween makeup for boys, men “Vampire”
- white and black makeup
- Red lipstick
- black eyeliner
Instructions at home for creating a simple vampire makeup for men and boys for Halloween
- We start by applying white makeup to the entire face. Moreover, it is advisable to add a little black color to it and mix well to achieve a dirtier shade, similar to unnatural pallor.
- Use a regular black eyeliner to line the upper and lower eyelids. In this case, we connect the lines into one in the outer corner of the eye.
- We also fill in the eyebrows with a black pencil. Then we move on to the most difficult part - we frame the forehead and temples with black makeup. You need to achieve a visually heart-shaped face, which cartoon bloodsuckers usually have.
- Fill the entire forehead and the sides of the cheeks near the ears with black paint, creating a narrower face. We paint our lips with red lipstick. Using white makeup we draw fangs on the lower lip. You can also use lipstick to finish off small streaks of blood. Ready!
Coming up with a costume
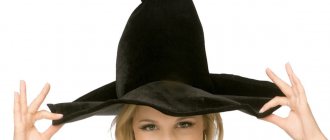
“Recognition” at the holiday depends on how detailed the Halloween outfit is thought out. Parents and children should show all their imagination and skill in making a costume. Using your creative abilities, you can make your own original, unique costume.
What can be useful for creating a costume?
- any old clothes that you don’t mind cutting or tearing
- pieces of fabric, ribbons, scarves
- socks, gloves
- hat, scarf, cap
- cloak, robe
- boots
- feathers
- pieces of leather, fur
- bandage, rope
- cardboard
- wire
- fake nails
- glitter accessories
- chains
- wings
- toy spiders, snakes, weapons
How to apply “Zombie” makeup for Halloween for guys - step-by-step master class with photos
To create a truly scary Halloween look, all you need to do is apply zombie makeup that is perfect for a guy. The Halloween makeup option from the next master class is easy to repeat at home, even without special equipment and materials. Read more about how to do zombie Halloween makeup for guys below.
Necessary materials to apply zombie makeup to a guy for Halloween
- long-lasting makeup base
- Foundation
- black pencil
- thin paper
- PVA glue or medical glue
- theatrical makeup
- sculpture makeup
Step-by-step instructions on how to apply zombie makeup for Halloween for guys
- First of all, we prepare the face. Since the image involves a lot of heavy makeup, we apply a long-lasting makeup base. We distribute foundation on top of it, which will help the makeup settle more evenly on the face.
- We cut out a circle from thin paper, the diameter of which coincides with the circumference of the eye socket. You can also take a paper wrapper from Raffaello candy. Glue the paper so that it completely covers one eye. Using sculptural makeup we create deep wounds and scars on the cheeks. Apply a thick layer of PVA glue to the nose and wait for it to dry completely.
- We paint the eye socket covered with paper black. We apply a thin layer of sculptural makeup around it, imitating a depression. We paint the wounds on the cheeks with red makeup. Apply black color to the temples and sides of the face.
- We also fill the nose area, upper lip and part of the chin with black. Using theatrical makeup, we paint the bloody wounds on the face in more detail. On the upper lip we draw the appearance of teeth in white. To make the wounds textured, fill the grooves with a black pencil. Ready!
Hand makeup for Halloween at home for children and adults - step-by-step master class with pictures
Original and scary Halloween makeup at home for children and adults can be done not only on the face, but also on the hands. Particularly popular are various types of scars, lacerations and punctures. In the next master class, we invite you to master Halloween hand makeup at home for children and adults, which in itself can be a complete look for the holiday.
Necessary materials for hand makeup for Halloween at home for children and adults
- sculpture makeup
- silicone gel
- cotton swabs for ears
- tassel
- baby powder
- scalpel
- theatrical makeup
- pen
- fake blood
Step-by-step instructions for hand makeup for Halloween at home for children and adults
- This makeup quite realistically imitates a lacerated wound with visible bones on the arm, or more precisely, on its cyst. To create this terrible makeup, the first thing you need to do is make a sketch on the surface of the brush with a regular ballpoint pen. Then you need to roll several thin sausages from theatrical makeup and secure them along the contour of the workpiece. Apply silicone gel in the middle of the wound, and then powder. Let it dry.
- When the gel dries, together with the powder it forms a rather dense layer, very similar to skin. It must be carefully pryed with a scalpel and removed halfway.
- We again apply silicone gel to the skin and use it to secure the cotton swabs. We place them in such a way that they are a continuation of the bones of the fingers, thereby imitating their bare edges.
- Now lightly cover the stick with the torn edge of the “skin” and proceed to decorating the wound. Using flesh-colored makeup, we form a smooth transition from the edges of the wound to real skin. Then we use red makeup to paint the area of the torn skin and dried blood.
- We add a tint to the flayed skin using fake blood. We also use it to make the wound look more realistic, as shown in the photo below.
Mummy
An interesting option for children for Halloween is mummy makeup. The main thing here is to properly create the look of wrinkled skin . To do this, prepare the preparation in the evening - dip a paper towel in the coffee and leave it to dry without squeezing. Using a wooden spatula, a mixture of corn starch and flour is applied to a small area of skin, and a piece of a previously prepared towel, slightly wrinkled by hand, is placed on top. The same principle applies to all remaining uncovered areas of the face. Next, the entire face and neck are wrapped in gauze, covering it with colorless powder on top.
Quick last-minute Halloween makeup - step-by-step master class with video
When there is little time left before the start of the Halloween party, a quick last-minute makeup option will come to the rescue. In the video below you will find some original and simple ideas for creating scary images in 5 minutes. This quick, last-minute Halloween makeup look is perfect for kids and adults alike.
Scary Halloween makeup for adults and children on the face, hand or other part of the body can be quick and easy to do. To do this, just use one of our master classes with pictures and videos on creating frightening images: skeleton, zombie, werewolf, witch, vampire, Jason. And for those who prefer to transform into good children's heroes on Halloween, lessons on Elsa or cat makeup are suitable. We are sure that not only boys and girls, but also adults (girls, boys and even men with beards) will be able to find a suitable makeup option for themselves, which they can easily implement at home.
When is Halloween celebrated, what date?
Halloween is an ancient holiday that is usually celebrated on the last day of October. People celebrate the completion of the harvest. It is on the 31st that festivities are held on this occasion. Since ancient times, the soil was considered a deity because it fed people. This is why people felt it was important to “pay homage” to the land and bless it for the next harvest season.
But, besides thanking the soil, people believed that it was on this day that it had power, and therefore they were afraid of it. It’s not for nothing that Halloween is called the holiday of “all the dead.” It was believed that the earth was endowed with the power to resurrect the dead and buried ancestors in it.
To prevent the resurrected dead from bringing devastation and chaos into the world of the living, it was decided to use all possible means to scare them away. For this, people dressed up in scary costumes and masks , similar to the images of ghosts and evil spirits. The resurrected did not recognize people and considered them similar to themselves, and therefore went away into the ground the next morning.
The traditions of celebrating Halloween have been preserved in our modern world. Not every country and family celebrates this holiday. But, nevertheless, everyone knows about it and everyone is interested in it. Halloween parties are organized by many public organizations, student companies, groups and even schoolchildren. This holiday has deep religious roots and therefore has the right to exist.
It is customary to celebrate Halloween in a pompous and fun way . Every family should decorate their home according to the theme of the holiday. In addition, unexpected guests can come to every house. They should definitely be accepted by treating them to something tasty. That is why it is customary to arrange special “food zones” (“Food zones”, from the word “food” - “food”). These areas may contain sweets, snacks and drinks.
Food zone decoration for Halloween
Halloween Yard Decoration
Home Decoration for Halloween