Useful tips
If you are going to celebrate a holiday in an unusual way, be it New Year, a party or a birthday, then you can prepare a mask for yourself and maybe for the other participants for this occasion.
Making a mask is not difficult, you just need to know a few simple rules and have the necessary materials with you.
You can find several not-so-complicated master classes on making masks here, including New Year's and carnival masks, as well as masks for children and adults.
How to make a cat mask
You will need:
- scissors
- lace trim
- glue
- satin ribbon
- small decorative feathers, if desired
1. Cut the lace trim so that you get two equal parts.
2. Connect the binding halves as shown in the image. This should be the main part of the mask. Secure in the middle with glue.
3. Cut off unnecessary parts to obtain the desired shape.
4. Glue the feathers so that they resemble cat ears.
5. Prepare a satin ribbon, cut it into two equal halves and glue each part to the left and right ends of the mask.
Useful tips
Masks are an invariable element of any fun celebration. Undoubtedly, their appearance depends on the special occasion. Christmas ones can depict characters from the Bible or winter images. For Halloween, it is worth focusing on accessories that reflect the spirit of All Hallows' Day, or embody its symbolism.
Before you make a carnival mask, you need to decide on your image in general and your outfit in particular. This is the only way to ensure that this item looks natural.
If you are going to ditch the suit and use just this one accessory, you will need to make a significant effort, since in this situation it will be the one that defines your look.As for the material for production, as you can see in the photo of carnival masks made by yourself, it can be:
- paper;
- cardboard;
- textile;
- gypsum;
- polymer clay.
Rhinestones, sequins, sequins, beads, beads, tinsel, braid, and lace can be used as decoration.
DIY New Year's masks
You will need:
- felt
- artificial flowers
- ribbon
- glue
- sequins.
1. Cut out a mask from felt, after drawing it with a simple pencil. To make it easier to figure out where to cut the holes for the eyes, place the mask on your face and trace the approximate location with a pencil.
2. Separate the petals from the artificial flowers and glue them to the mask the way you like.
3. Next, glue the sequins to the mask around the eye holes.
4. Glue or sew the tape to the back of the mask so it can be worn.
Making lace products
This mask can turn an ordinary dress into a carnival outfit. The most attractive product will be made from black lace. It will give the girl mystery and a touch of mysticism. In your work, you can use material of any color, the main thing is that it matches the shade of the festive dress.
To create a craft we need:
- tulle;
- velvet ribbon;
- scissors;
- black paint;
- thick paper or cardboard;
- cling film;
- glue;
- scotch.
The method of making a lace mask with your own hands is quite simple and includes the following steps:
We print out the version of the lace product you like on a sheet of paper. If you have artistic talent, you can draw the mask template yourself.- Place the paper on a table or other hard surface. Cover with cling film and carefully smooth out any unevenness. We use tape to secure the film.
- Take the tulle and cut a piece that will completely cover the finished template.
- We outline the pattern with black paint. Make sure that all small parts are well painted, as the appearance of the future product depends on this.
- Let the workpiece dry and remove the tulle.
- Using sharp scissors, cut the piece along the contour and make holes for the eyes.
- We measure the circumference of the head and cut off two pieces of velvet ribbon with a margin of ten centimeters.
- Glue the tapes to the edges of the workpiece and let the product dry.
How to make a carnival mask
You will need:
- a sample mask (can be found in specialized stores) or cut a mask out of cardboard.
- colorful feathers
- rhinestones
- sparkles
- Super glue
- toothpick
1. Prepare a sample mask and think about how you want to decorate it.
2. To carefully glue the rhinestones, use glue and a toothpick - dip it in the glue and apply it to the mask. Glue rhinestones around the eye holes.
3. You can glue rhinestones on the top side of the eye hole and apply glitter on the bottom. To do this, apply glue to the bottom and carefully sprinkle glitter on it.
4. Also use glue to add colorful feathers. You choose how many feathers and where they will be placed yourself.
5. All that remains is to add an elastic band or tape to put the mask on and leave the glue to dry.
Papier-mâché accessory
All masks you buy have a standard shape and size. The same cannot be said about the shape of the face; it is individual for each person. Therefore, the purchased product may be inconvenient. To avoid such problems, we suggest you master making papier-mâché masks . This process is simple and even a child can handle it. List of necessary tools and materials:
- newspaper sheets;
- toilet paper;
- petrolatum;
- scissors;
- water;
- flour;
- dye;
- tassels;
- PVA glue.
Making a craft from papier-mâché:
- Preparing the paste. To do this, pour a glass of water into the pan and bring to a boil. Mix a glass of flour with a few tablespoons of cold water. After thoroughly mixing the mixture, add it to boiling water.
- After the mixture has cooled, add four tablespoons of PVA glue to it.
- Cut toilet paper and newspapers into pieces.
- Choose the person you will make the mask for and apply Vaseline to their face.
- Fill the bowl with water and start working. We wet pieces of newspaper and attach them to the nose, cheeks, chin, and forehead. We do this until the entire face is covered with newspapers. Make sure there are no gaps between the sheets.
- Dip a piece of newspaper into the prepared mixture and glue it onto the first layer. We continue working until the end of the layer.
- Similarly, we make another five or seven layers. The last one should consist of shredded toilet paper.
- Dry the mask with a hairdryer and carefully remove from the face. Leave it in a warm place until completely dry and hardened.
- We trim the edges of the product and make slots for fastening.
- We paint the finished product and design it to your liking.
How to make a mask out of paper. Decorate with paper roses.
You will need:
- a simple papier-mâché or plastic mask (without drawings or patterns), purchased in a store or you can cut it out of cardboard yourself
- corrugated paper
- glue
- scissors
- feathers, optional
1. You will need to cut approximately 25 strips of crepe paper. Their length can vary from 25 to 40 cm. Fold each strip in half.
2. To make a rose out of a paper strip, start rolling it as shown in the picture. As you curl the paper, turn the strip 180 degrees. To keep the flower in place, you can secure some places with glue.
If you want to know what other flowers can be made from paper, check out our articles:
How to make corrugated flowers
Paper flowers using quilling technique
Paper flowers
How to make origami flowers from paper
Flowers from plastic bottles
3. Start gluing the roses to the mask. Add glue to the bottom of each flower.
4. If desired, you can add decorative feathers.
You can try using different colors and types of paper.
Masquerade option
This is a classic version of the mask, suitable for those people who do not like to work on it for a long time. You can involve not only adults, but also your children in creating this craft. This will diversify their leisure time and help develop their creative abilities.
New Year's carnival masks are made from the following materials:
- colored double-sided cardboard;
- paper;
- pencil;
- scissors;
- wooden stick;
- dye;
- satin or velvet ribbon;
- glue;
- colored feathers.
Manufacturing instructions:
- Print out the template of the workpiece you like. Cut it out and attach it to a sheet of cardboard. We trace the outline with a pencil and cut out the blank.
- On a paper base we create a pattern of decorative elements.
- Glue all the parts to the base.
- Take a wooden stick and paint it to match the color of the cardboard. We wrap a velvet or satin ribbon around it and glue it.
- Take cardboard and cut several identical rectangles. We apply a wooden stick to the inside of the workpiece and secure it by gluing it with pieces of cardboard.
- Leave the product until completely dry.
Father Frost's Workshop"
The author of the master class and photographs is Yulia Anatolyevna Bogomolova, teacher at State Budgetary Educational Institution Lyceum 1564, educational institution “Raduga” (Moscow).
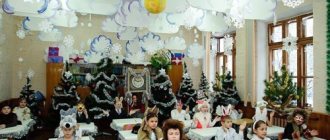
Progress of a master class for children on making carnival masks from paper “Snowman”
Children join the group to the accompaniment of music (the song “New Year’s Toys”).
Educator : Hello, guys! New Year is approaching! This is a magical holiday that both children and adults look forward to equally. To make the New Year's holiday fun and memorable, we must prepare well for it. Today we invited you to our creative workshop and offer you to make a New Year's craft - a mask. Look what I found near our kindergarten - what a big bag! And there was a letter attached to it. Let me open it and read what is written there (reads):
“Hello, dear children and kindergarten teachers! It’s snowing outside the window, which means New Year is coming! I’m going to visit you for a holiday, I’ll be walking to you for a long time, Through snow-covered fields, through snowdrifts, through forests... I’ll bring you a Christmas tree covered in snow-covered needles. I will congratulate you on the New Year and leave you gifts. You don’t sit idle, decorate the group with snowflakes, firecrackers, garlands, toys with frosty patterns, silver rain, multi-colored flags, noticeable drawings...
Therefore, throughout the Russian country I am issuing a Decree: to open all children’s institutions without delay, without any doubt, “Father Frost’s Workshops.” Let everyone come to glue, and sculpt, and cut out... Invite everyone to the workshops! See you soon, friends!”
Educator:
This is the necessary decree that Grandfather Frost issued! What's in the bag? Let's open! (Children and teacher open the bag). Look how much Santa Claus gave us - scissors and colored paper, cotton wool, plasticine, glue and a template. Let's try to guess: who does this template look like? (children answer). Of course, for the snowman.
Now the girls will tell us poems about a snowman:
Three balls, a bucket, a carrot and two coals for the eyes; Let's deftly insert the hand sticks: We glue the snowman.
The yard is full of snow. I made a snowman. Arms, legs, head, carrot nose, two eyes. I'll paint the mouth. Let the people rejoice!
Educator:
Well done girls!
Now we'll play a little. Physical school:
We are making a snowman - (Children show everything they talk about) Hat, nose, eyes, sides. He is neither small nor big (squat, stand up) A nice snowman came out! (Hands placed on the belt, body turns Left - Right)
Let's make a New Year's craft together - a snowman mask. Let's make a New Year's craft together - a snowman mask. Next, the teacher shows the children the stages of making a mask - a “Snowman” headband. Children perform a mask. How to make a snowman mask with preschool children is presented in the step-by-step photos below.
Step 1. Trace the snowman template.
Step 2. Sculpt a snowman's nose from plasticine, make eyes and buttons. Using the method of spreading plasticine along the contour of the part, make a bucket.
Step 3. Apply glue to the snowman using a pencil. Glue fluffy cotton wool.
Step 4. Decorate the snowman with snowflakes.
Educator: What great fellows! What beautiful snowmen we made. Let's take a photo together in our carnival masks and send a photo to Grandfather Frost. He will be very pleased that you made such beautiful crafts and that we are all looking forward to the New Year. The master class “Father Frost’s Workshop” is ending. Snowman mask" tea party.